Several days ago, we covered where to download a Windows 10, 8.1, or 7 ISO image file, but a common question is what do you do once the image is downloaded? The answer is make a bootable USB drive out of it!
Creating a Windows installation bootable USB drive is incredibly easy thanks to an application called Rufus. Assuming you have your Windows ISO (or Linux/other bootable ISO) ready, the whole process should take no more than 5 minutes.
Here’s how it’s done.
Rufus
1. Download Rufus.
2. Plug in a USB drive that’s at least larger than the Windows ISO (or other ISO) file you’re trying make bootable. Keep in mind the contents of the drive will be lost, so make sure nothing important is on there.
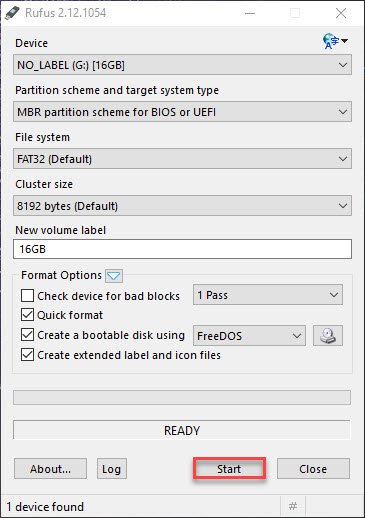
3. Once Rufus is launched, you’ll be greeted with this intuitive interface. You can change which drive you want to use under the “Device” drop-down menu.
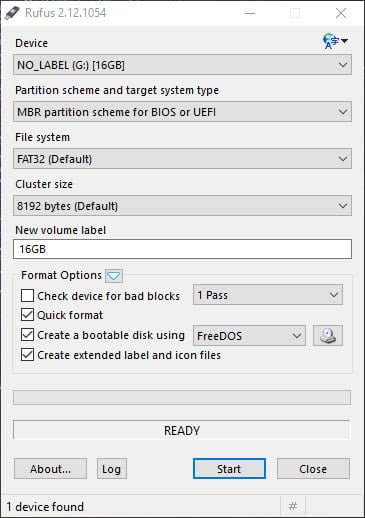
4. Make sure you have the proper drive selected. Choose “MBR partition scheme for BIOS or UEFI” if it’s not already selected under the “Partition scheme and target system type” drop-down menu.
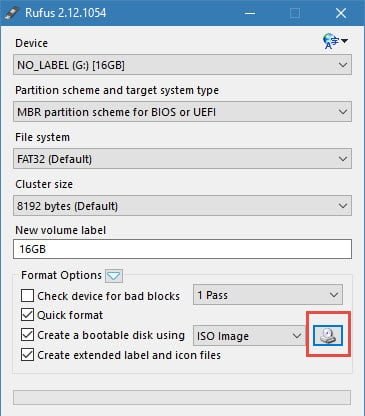
5. Next to the “Create a bootable disk using” drop-down menu, select “ISO image”.
6. Hit the next to the little disk icon.
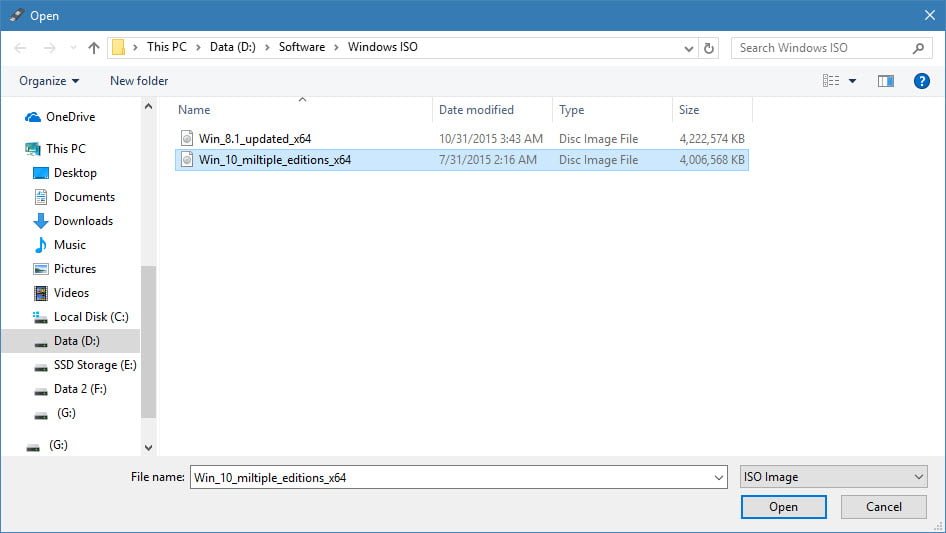
7. Navigate to your Windows ISO, hit “Open”
8. After File Explorer disappears, hit “Start” in Rufus to start creating the drive. Once the operation is completed, the USB drive will contain the installation for Windows. You can now boot off the drive you’ve just created to install Windows or Linux or whatever else you want. We recommend taping a label on it to make it easily identifiable. Enjoy!

