As PC enthusiasts, we spend quite a lot of time tinkering with our CPUs and GPU overclocks to squeeze every last bit of performance out of them, but it’s not common knowledge that monitors can also be overclocked as well.
Why Overclock a Monitor?
Generally speaking, unless you own a 100Hz or 144Hz monitor, your monitor is running at 60Hz, or 60 Frames Per Second (FPS). Overclocking a monitor essentially refers to going beyond the 60Hz specification set by the monitor manufacturer in order to push more FPS than the manufacturer’s specification. Depending on the panel you own and a bit of luck, overclocking the monitor could potentially provide a very noticeable improvement in visual responsiveness, especially in applications such as gaming.
As with all overclocking guides, overclock at your own risk. While monitor overclocking is quite safe (substantially safer than CPU or GPU overclocking), there’s always some risk when going beyond manufacturer specifications and your monitor warranty will likely be void if any issues arise.
Monitor Overclocking Tutorial (Nvidia Graphics Cards)
Step 1
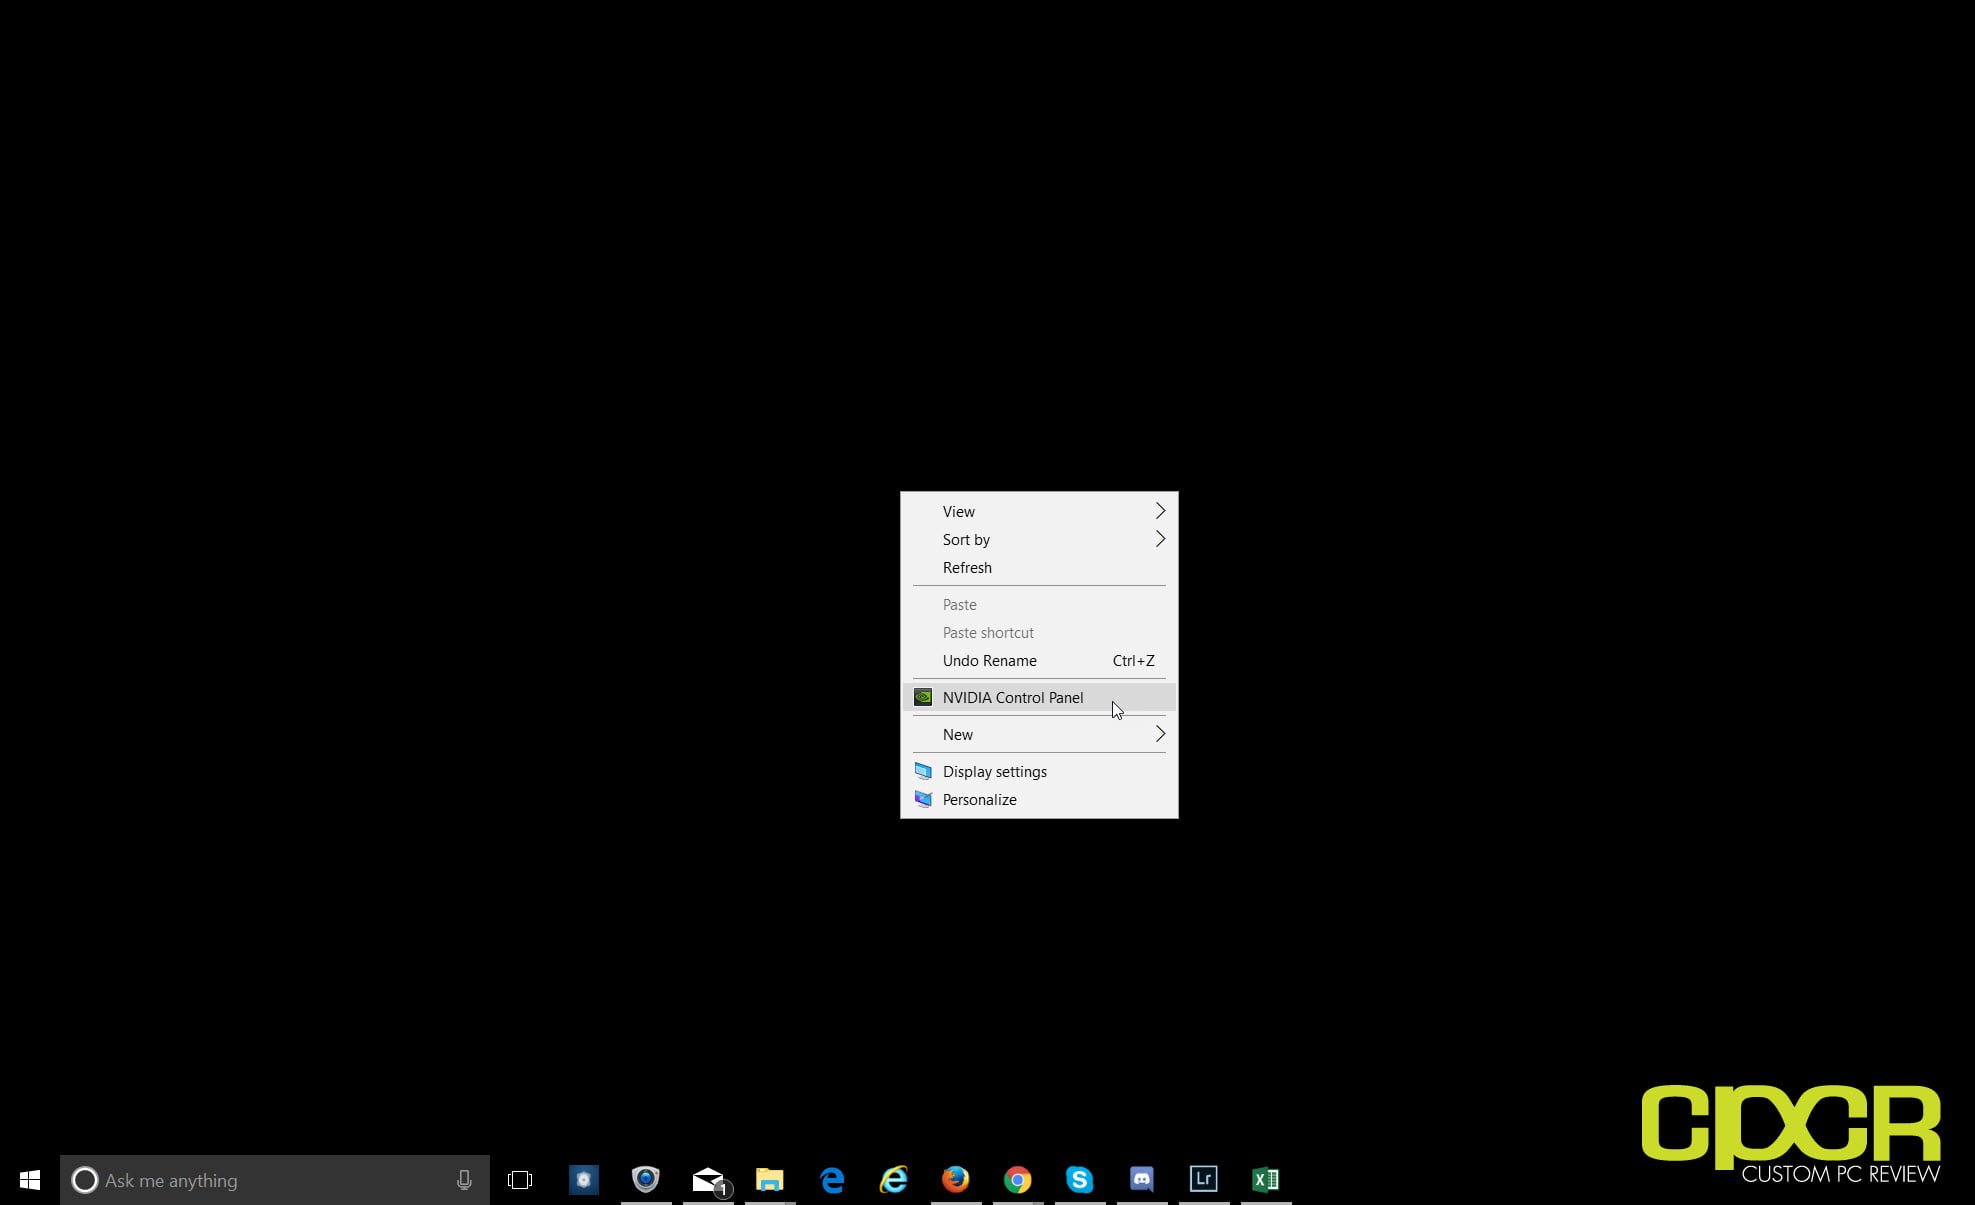
Right click on the desktop and click on “Nvidia Control Panel” from the menu.
Step 2
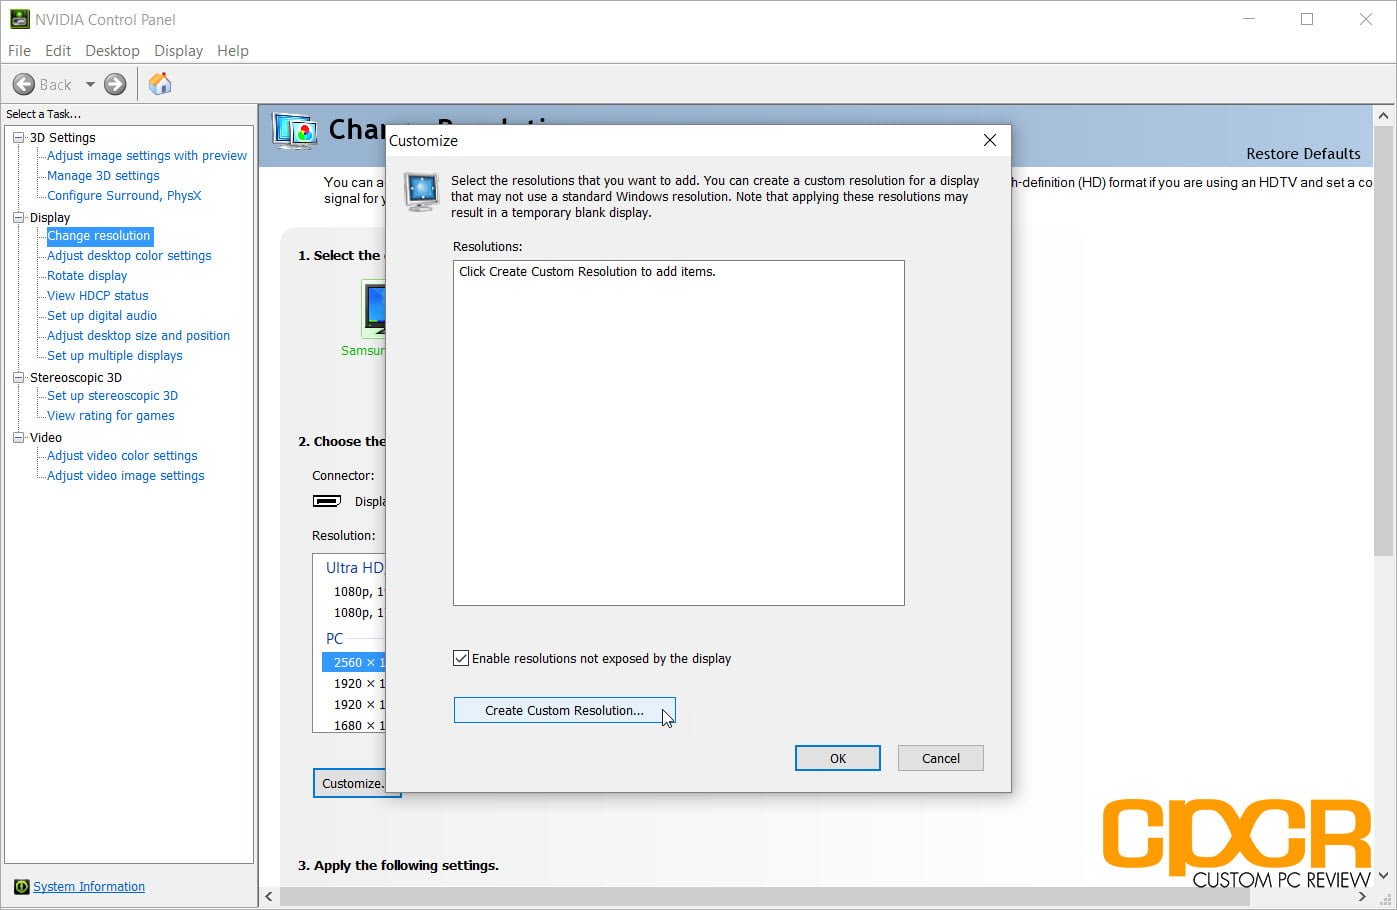
Click on “Change resolution” from the menu on the left and click on “Customize…” under the resolution bar.

Step 3
Click on “Create Custom Resolution…”
Step 4
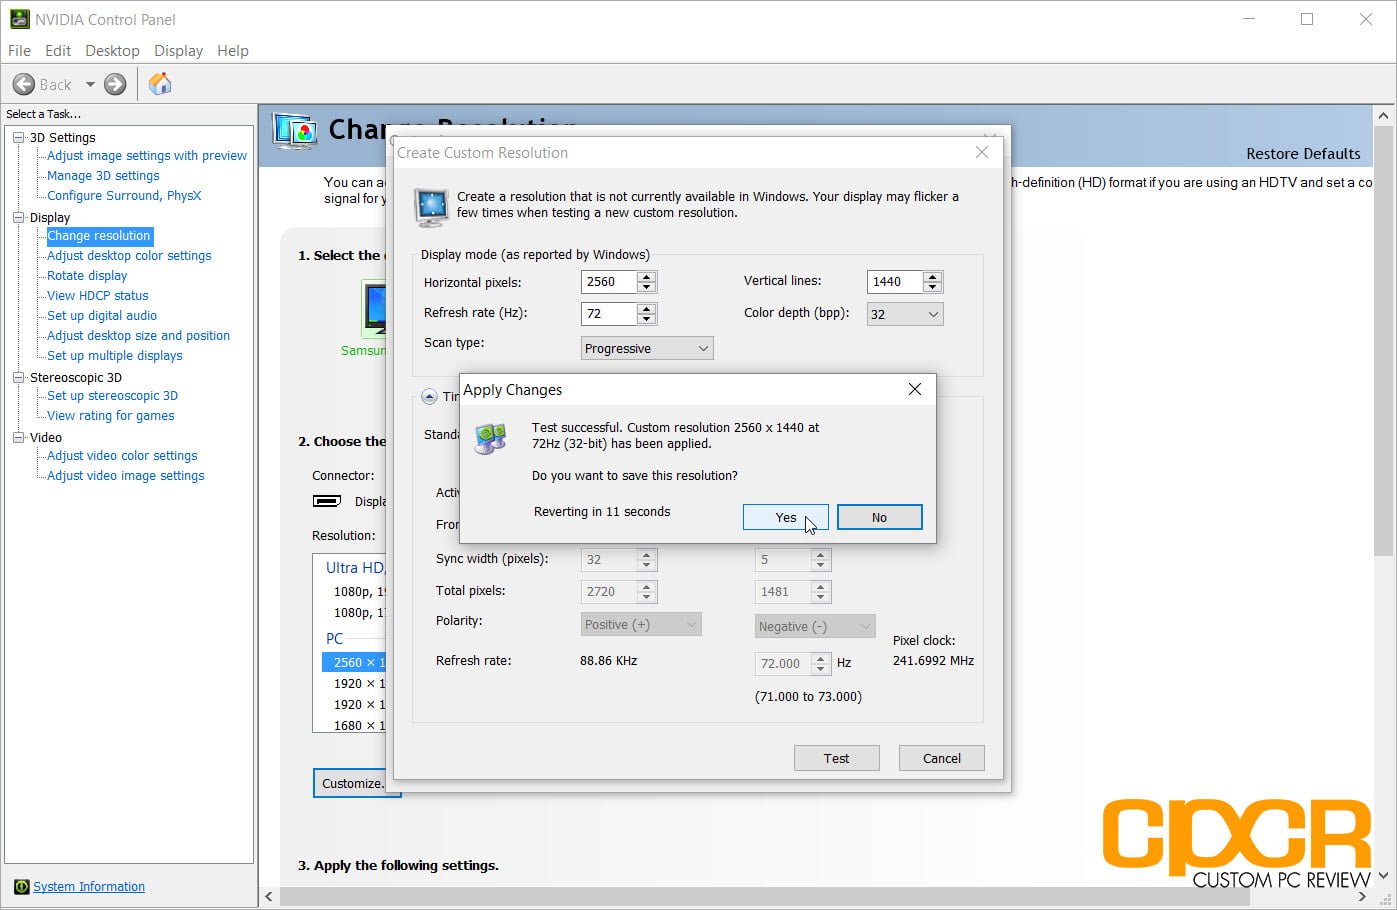
In the “Refresh rate (Hz):” field, enter your desired refresh rate you’d like to overclock to. Most monitors are set to 60Hz from the factory, so enter a number higher than that. Personally, I recommend adding 5 Hz to the refresh rate then clicking on the test button below. Most monitors are able to overclock to somewhere between 65Hz to 80Hz with some monitors capable of achieving nearly 100Hz with a simple overclock.
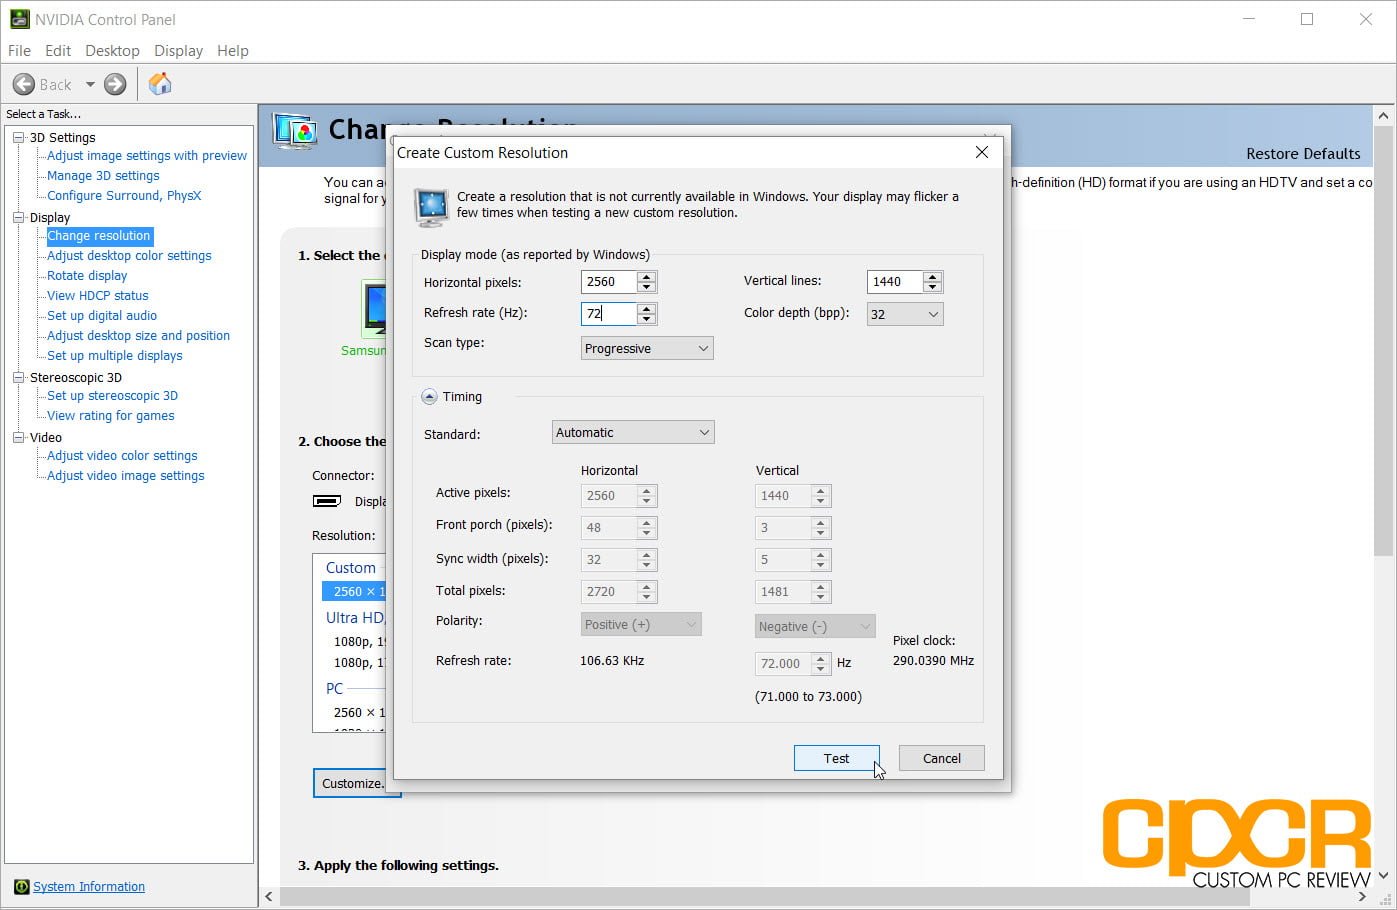
If artifacting (shown below) or if the monitor goes black happens, you’ve gone too far. Fortunately, the settings will revert after a certain time. Once the display settings reverts itself, back off the overclock a bit and continue testing until the monitor is stable.

Step 5
Once the display is stable, go ahead and click Yes under apply changes.
Step 6
Once you create the custom resolution profile, it will show in the custom profiles menu. From here, click OK.

Step 7
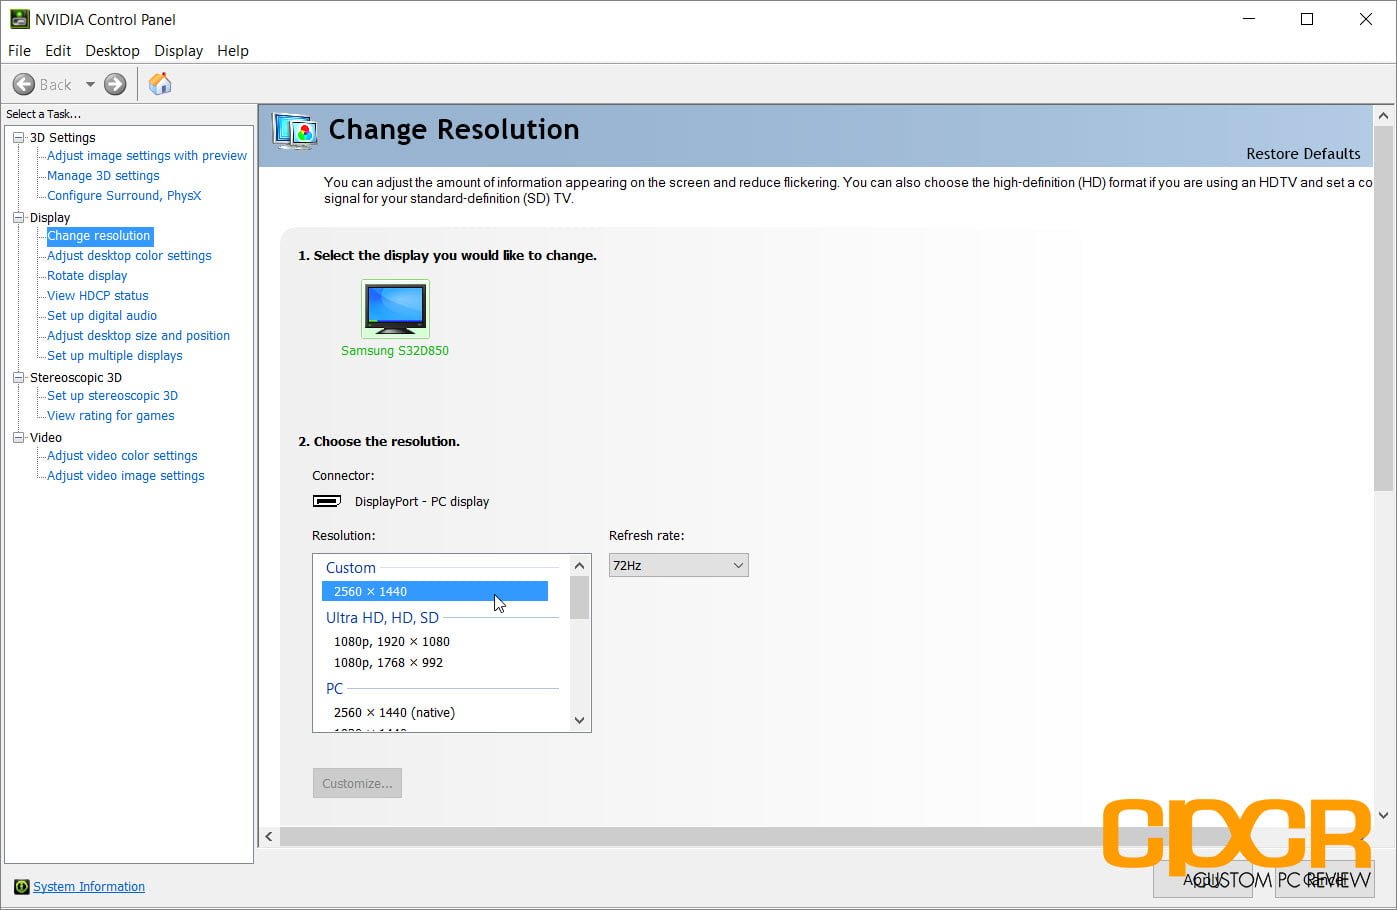
After this, your new Custom profile will show under the Custom section in the resolution selection menu. Click on the new custom resolution with the increased refresh rate. Ensure the increased refresh rate is the Refresh rate box.
Step 8
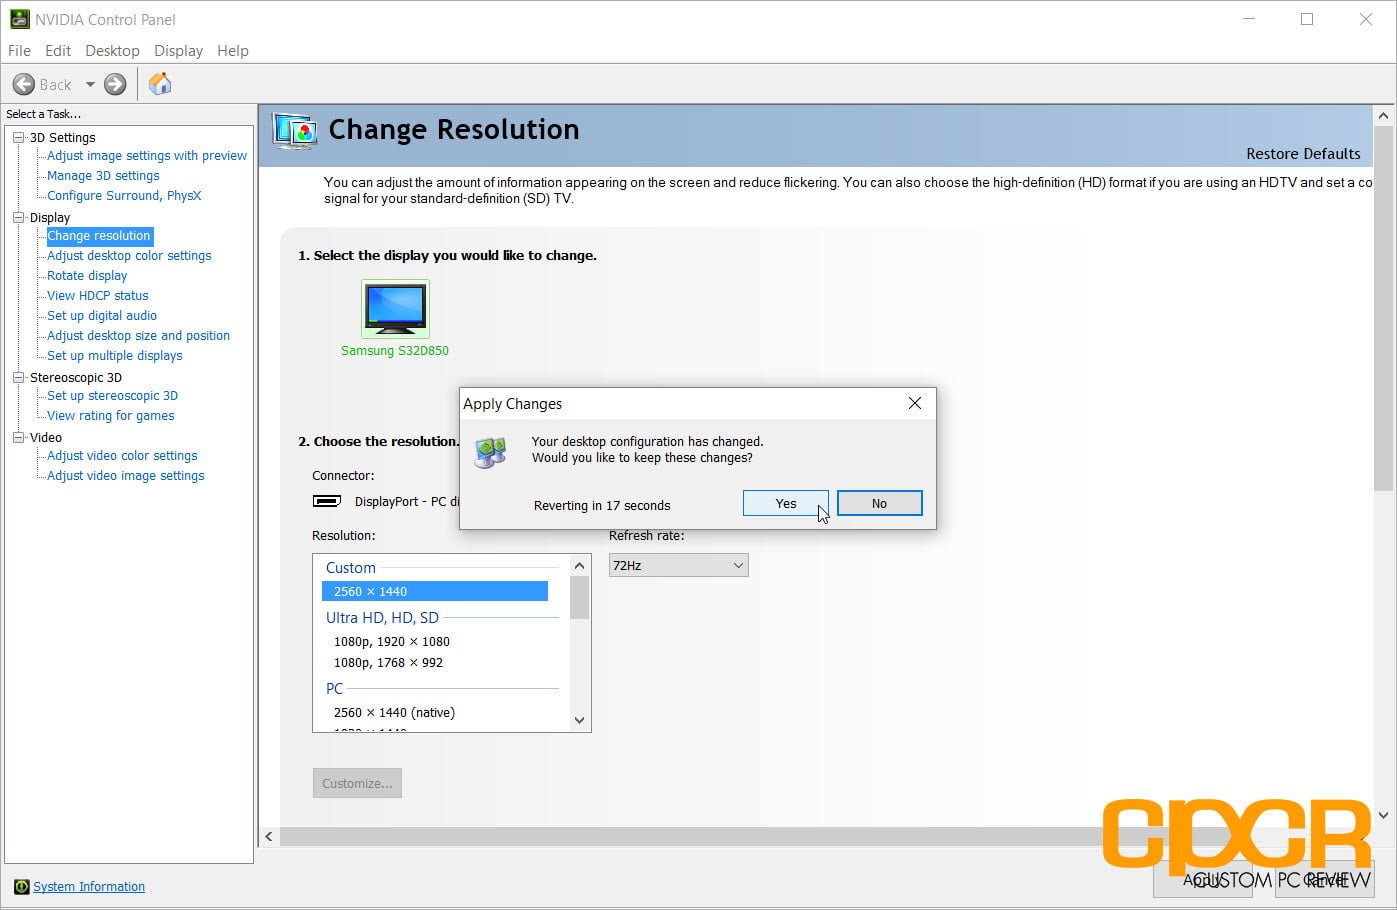
Click on the Apply button at the bottom right corner and click on Yes under apply changes.
Step 9
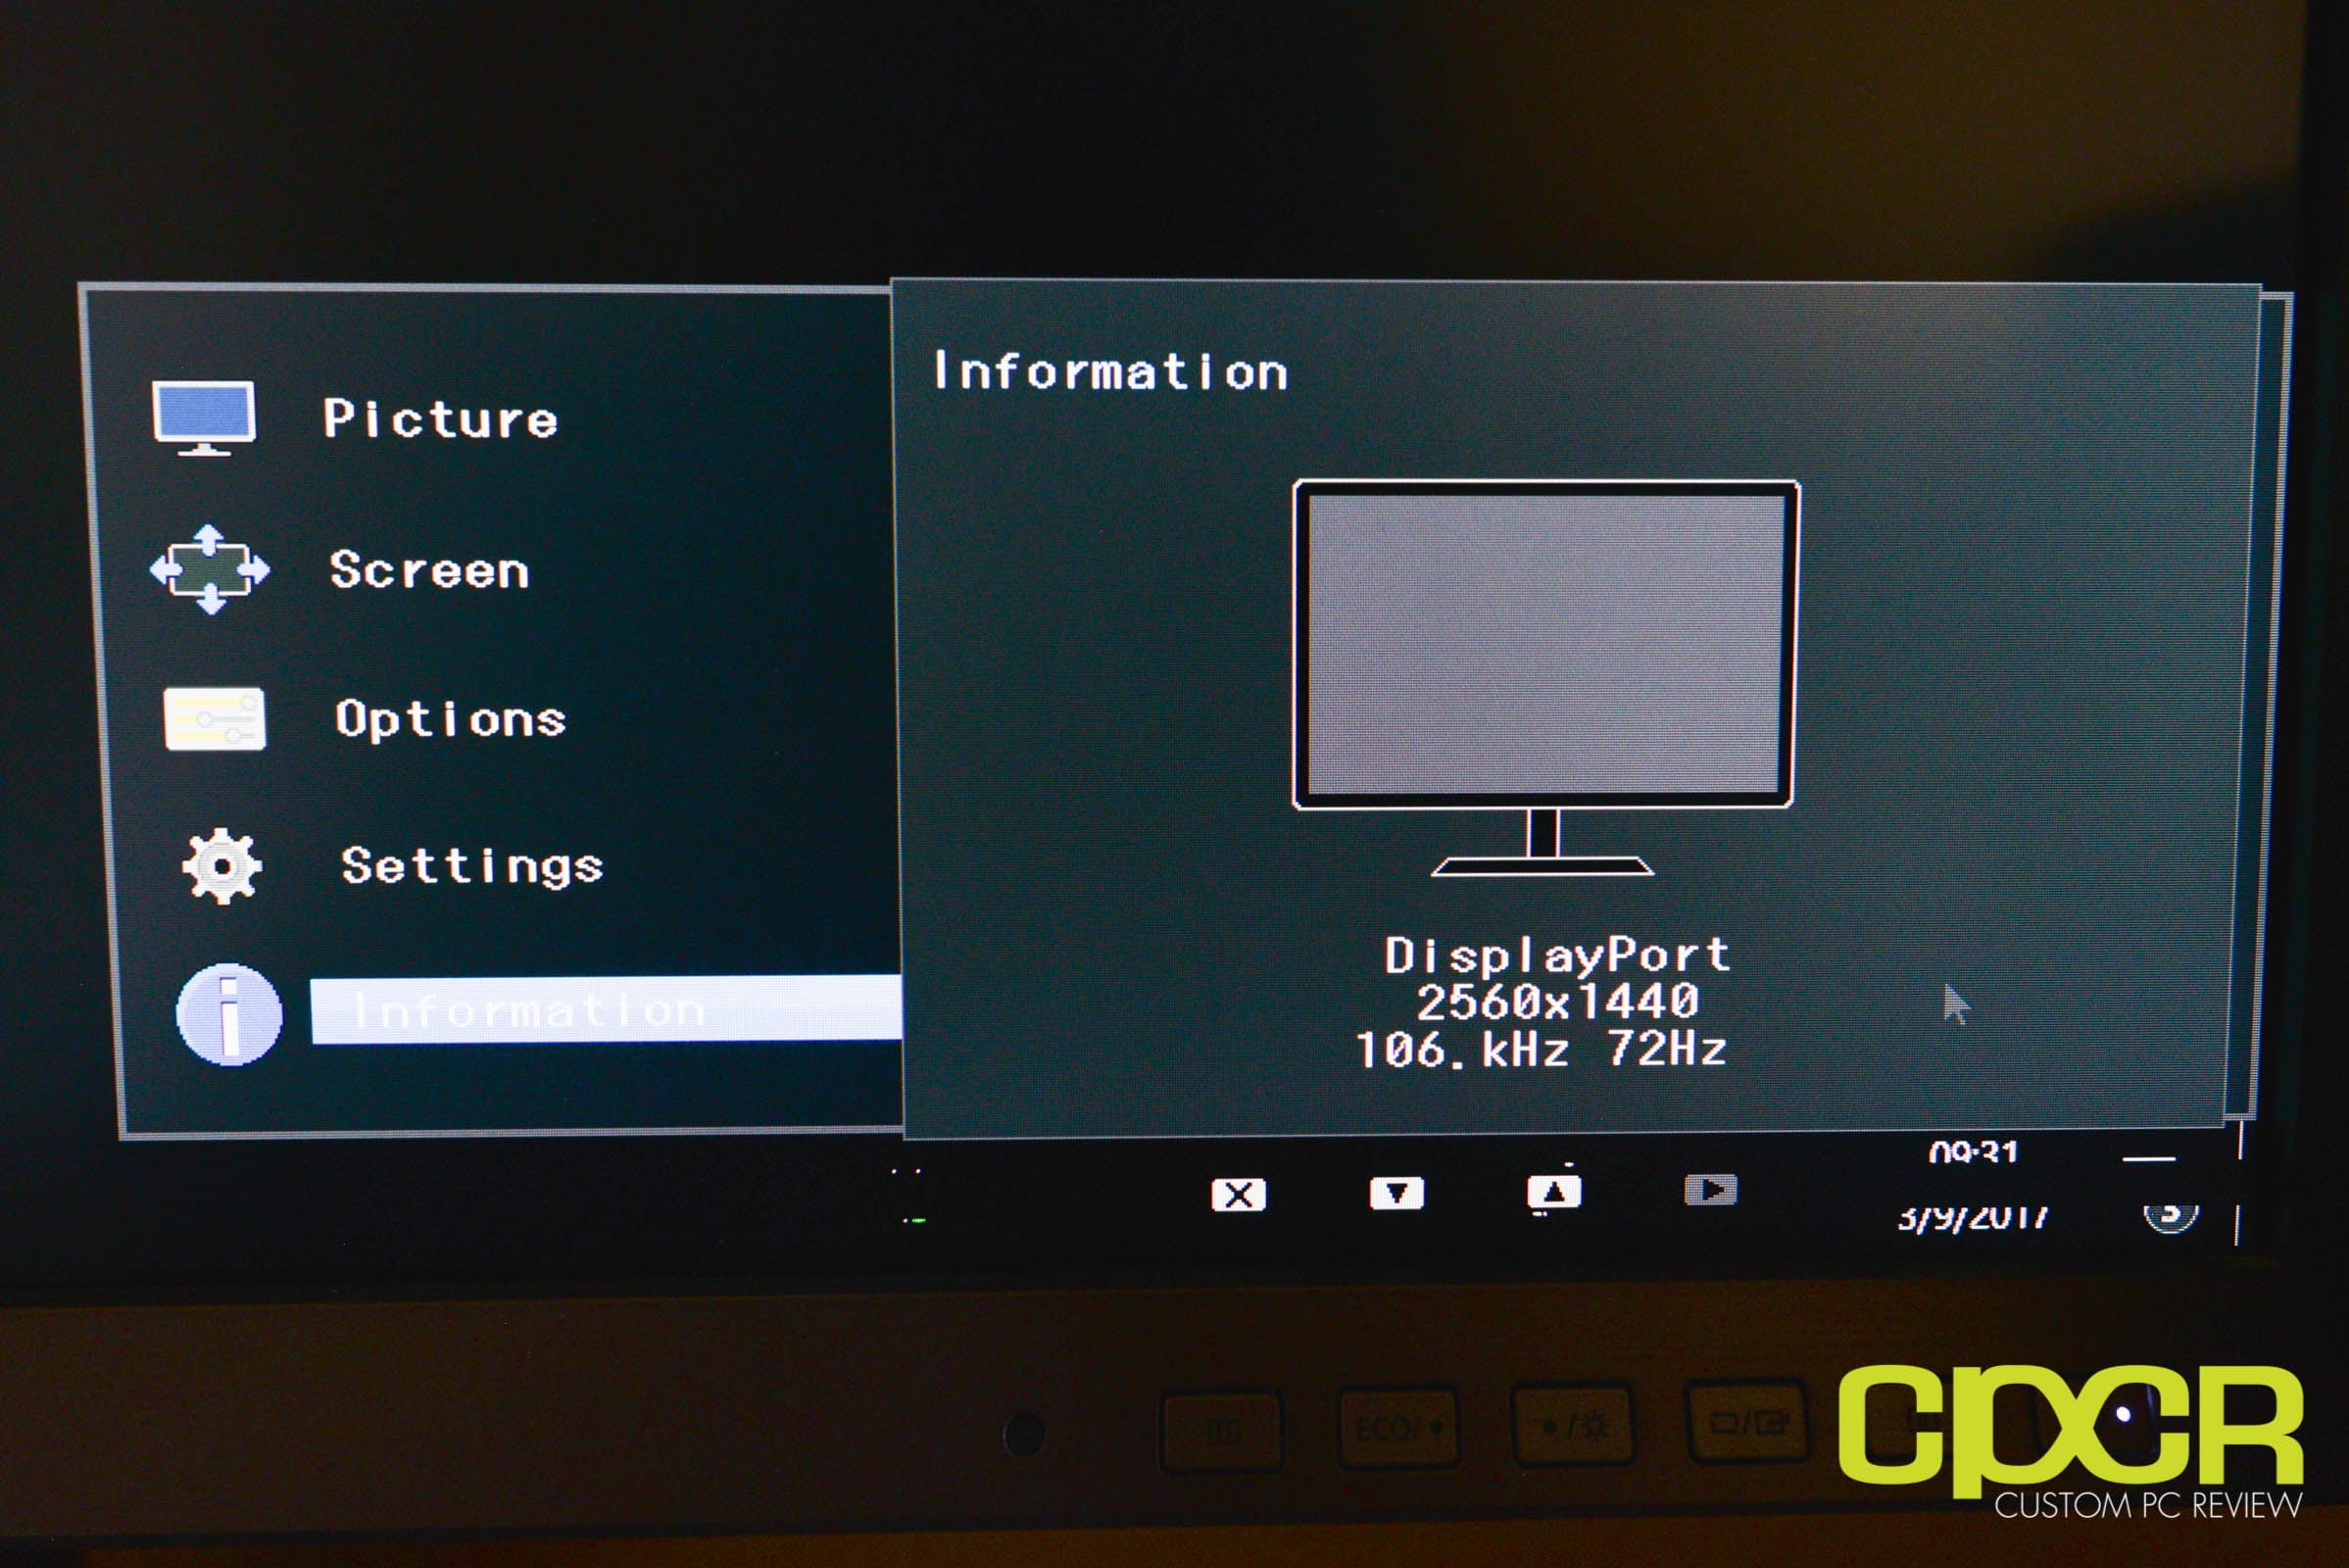
And that’s it. You’re done! Go ahead and verify your new overclocked monitor refresh rate from your monitor’s settings menu and go play some games!
thanks!
What do I do if the customise button is greyed out?
Turn off DSR Factor under Manage 3D Settings (simple restore all settings to default will do)