[section label=”Introduction”]
Battle of the Titans
 Up until the release of Sandy Bridge processors back in early 2011, overclocking was something generally reserved for only the most hardcore gamers and enthusiasts who wanted to push their systems to the limits. Overclocking required countless hours of tinkering and testing, which was generally a bit too complicated for mainstream users.
With the release of Sandy Bridge however, the landscape of overclocking has really changed dramatically. Significant overclocks may now be had with simple motherboard overclocking buttons or 5 minute adjustments in the BIOS, which greatly simplified the once complicated and confusing task.
With overclocking however, there is one inescapable problem – heat. Unfortunately as voltages on processors are bumped up above original specifications, these powerful processors begin to get hot which tends to create instability issues or may damage the processors in the long term. To solve this issue, aftermarket CPU cooling solutions must be used which is why today we’ll be reviewing five of the top CPU coolers on the market.
The five CPU coolers reviewed today include the Corsair H100i, the Cooler Master Seidon 240M, the Phanteks PH-TC14PE, the Noctua NH-D14 SE2011, and the Zalman CNPS 12X. Each of these coolers are considered flagship coolers for each respective company, so let’s see how they stack up against each other.
Specifications
| Type | Fans | Price | Purchase Link | |
|---|---|---|---|---|
| Intel BXRTS2011AC (Reference Only) | Air | 1x100mm (3,000 RPM) | $21.80 | Click Here |
| Corsair H100i | Water (240mm Radiator) | 2x120mm (2,700 RPM) | $109.99 | Click Here |
| Cooler Master Seidon 240M | Water (240mm Radiator) | 2x120mm (2,400 RPM) | $97.50 | Click Here |
| Phanteks PH-TC14PE (Black) | Air (5x8mm Heatpipes) | 2x140mm (1,300 RPM) | $89.99 | Click Here |
| Noctua NH-D14 | Air (6x6mm Heatpipes) | 1x120mm (1,200 RPM)1x 140mm (1,300 RPM) | $79.95 | Click Here |
| Zalman CNPS 12X | Air (6x6mm Heatpipes) | 3x120mm (1,200 RPM) | $79.54 | Click Here |
[section label=”Corsair H100i”]
A Closer Look
Corsair H100i
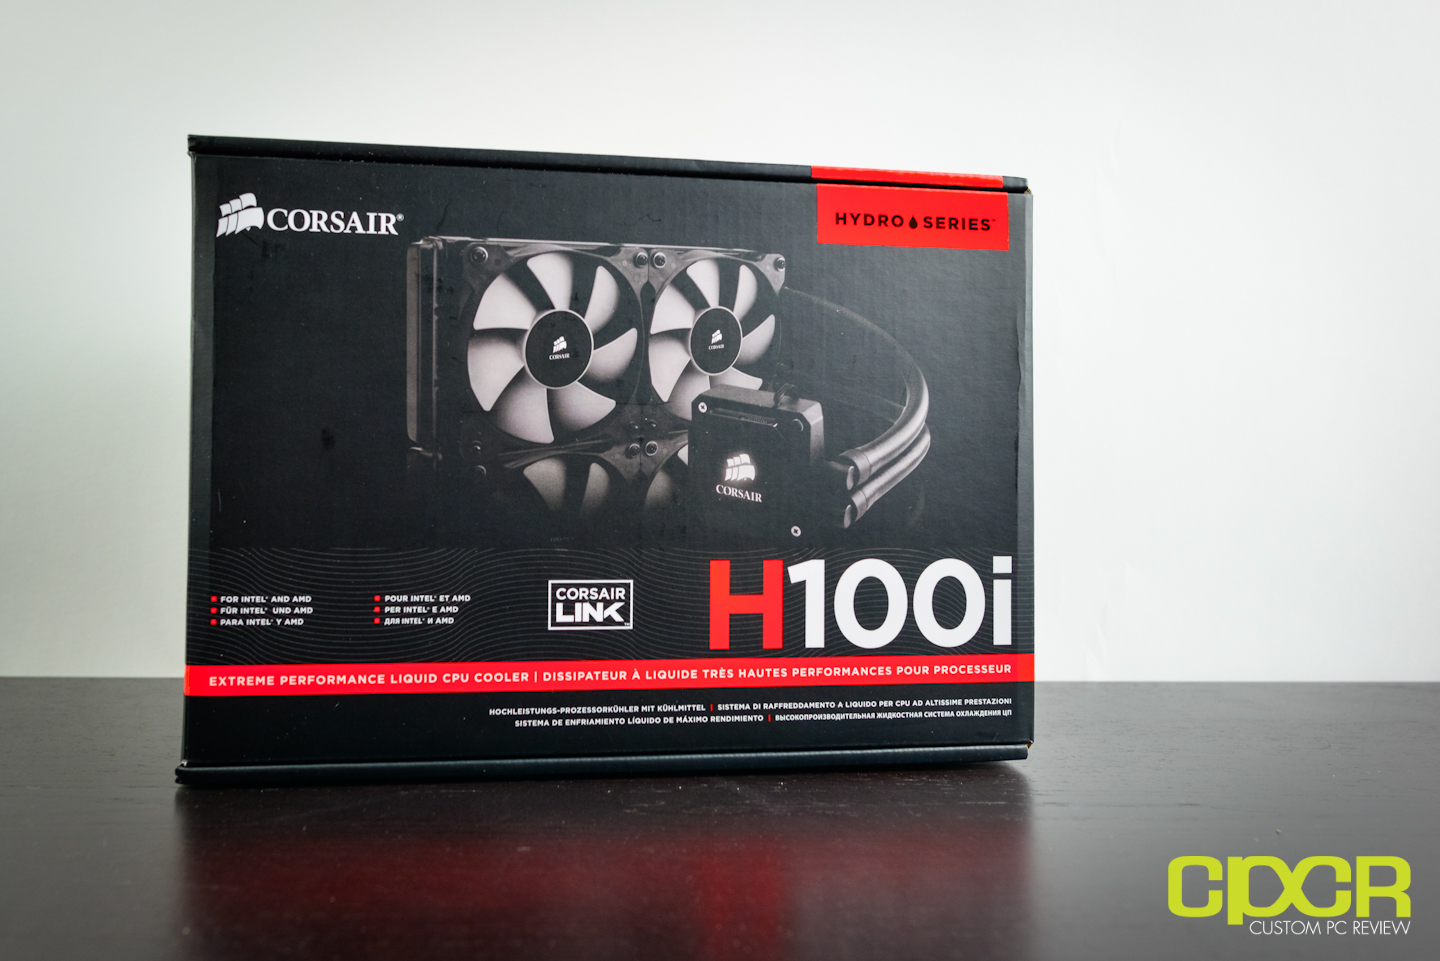
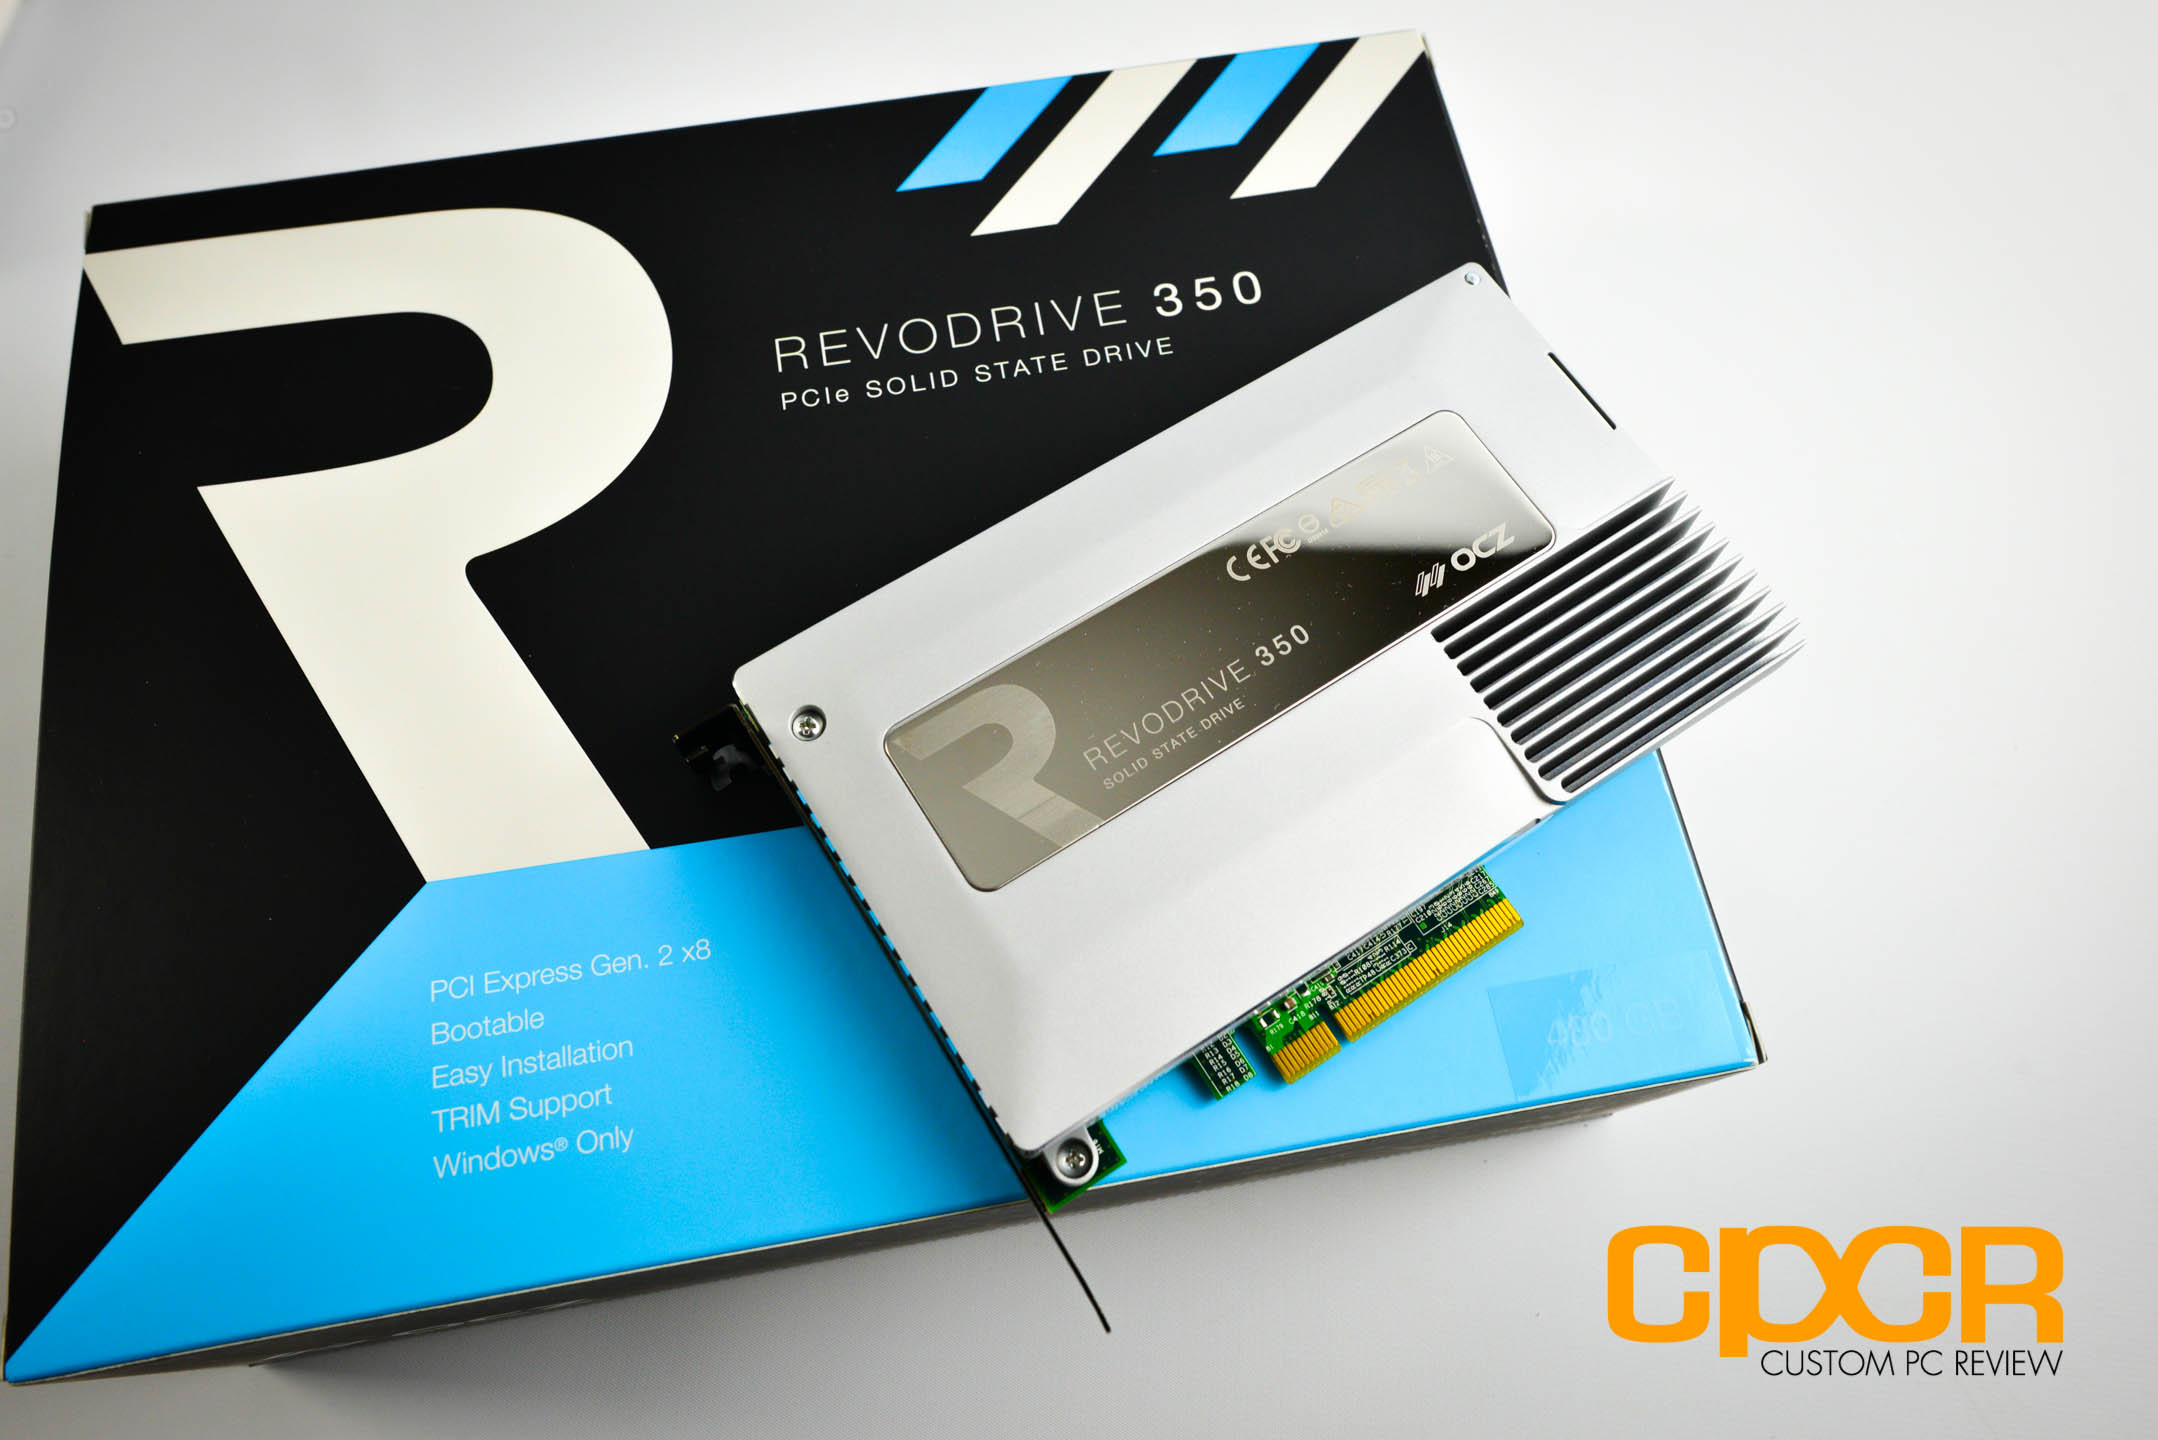
Here’s a look at the Corsair H00i. As you can see from the box, it’s a high end AIO water cooler sporting a 240mm radiator.
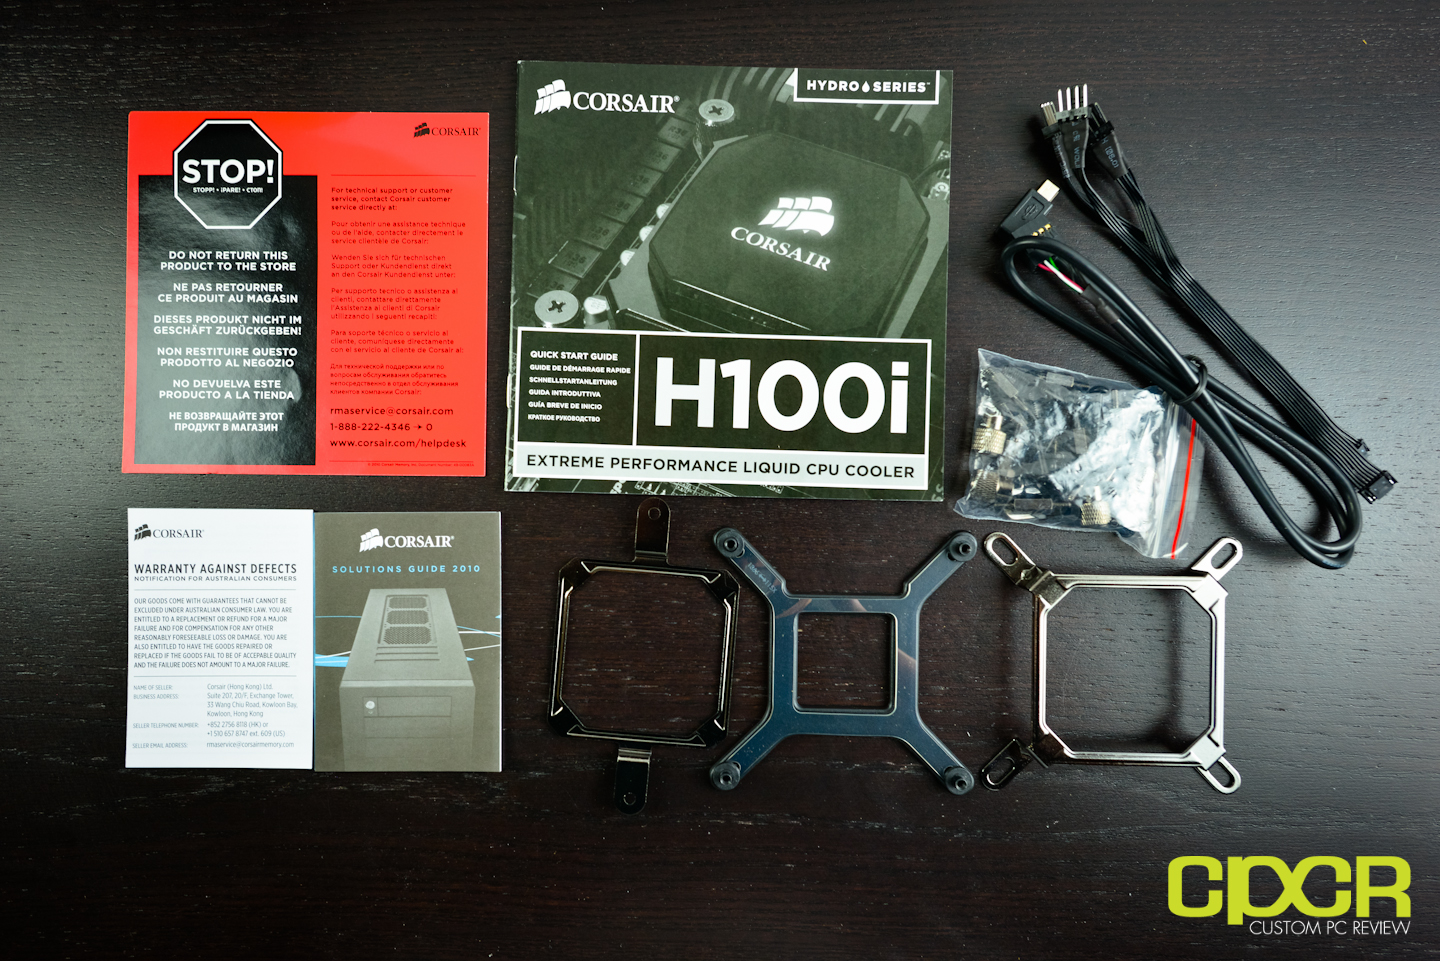
Cracking open the packaging, we get some documentation along with all the mounting hardware necessary to install the cooler.
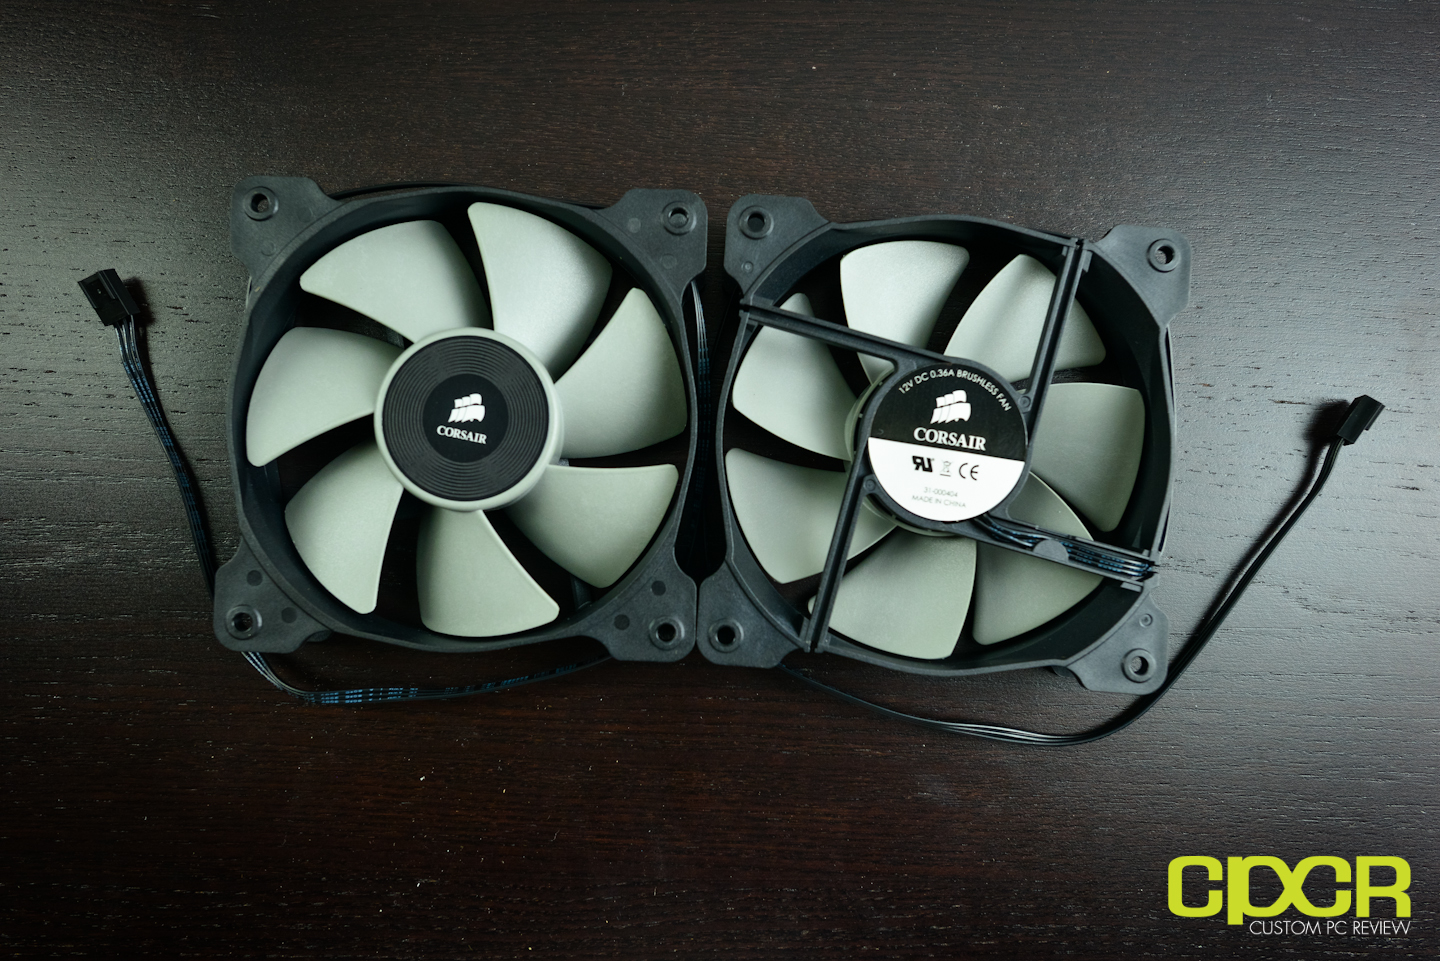
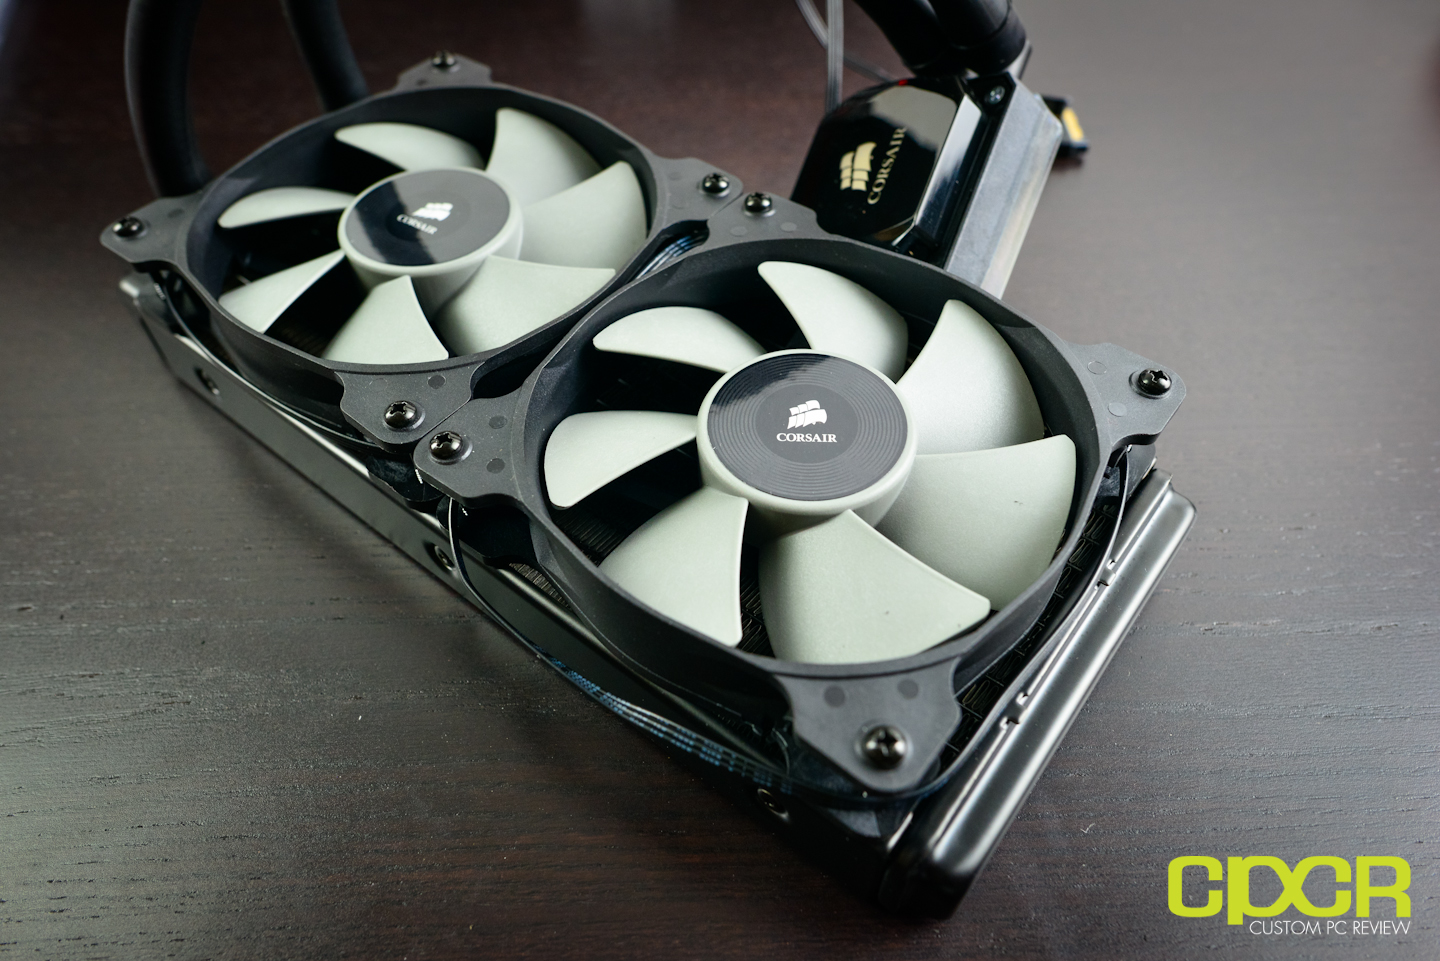
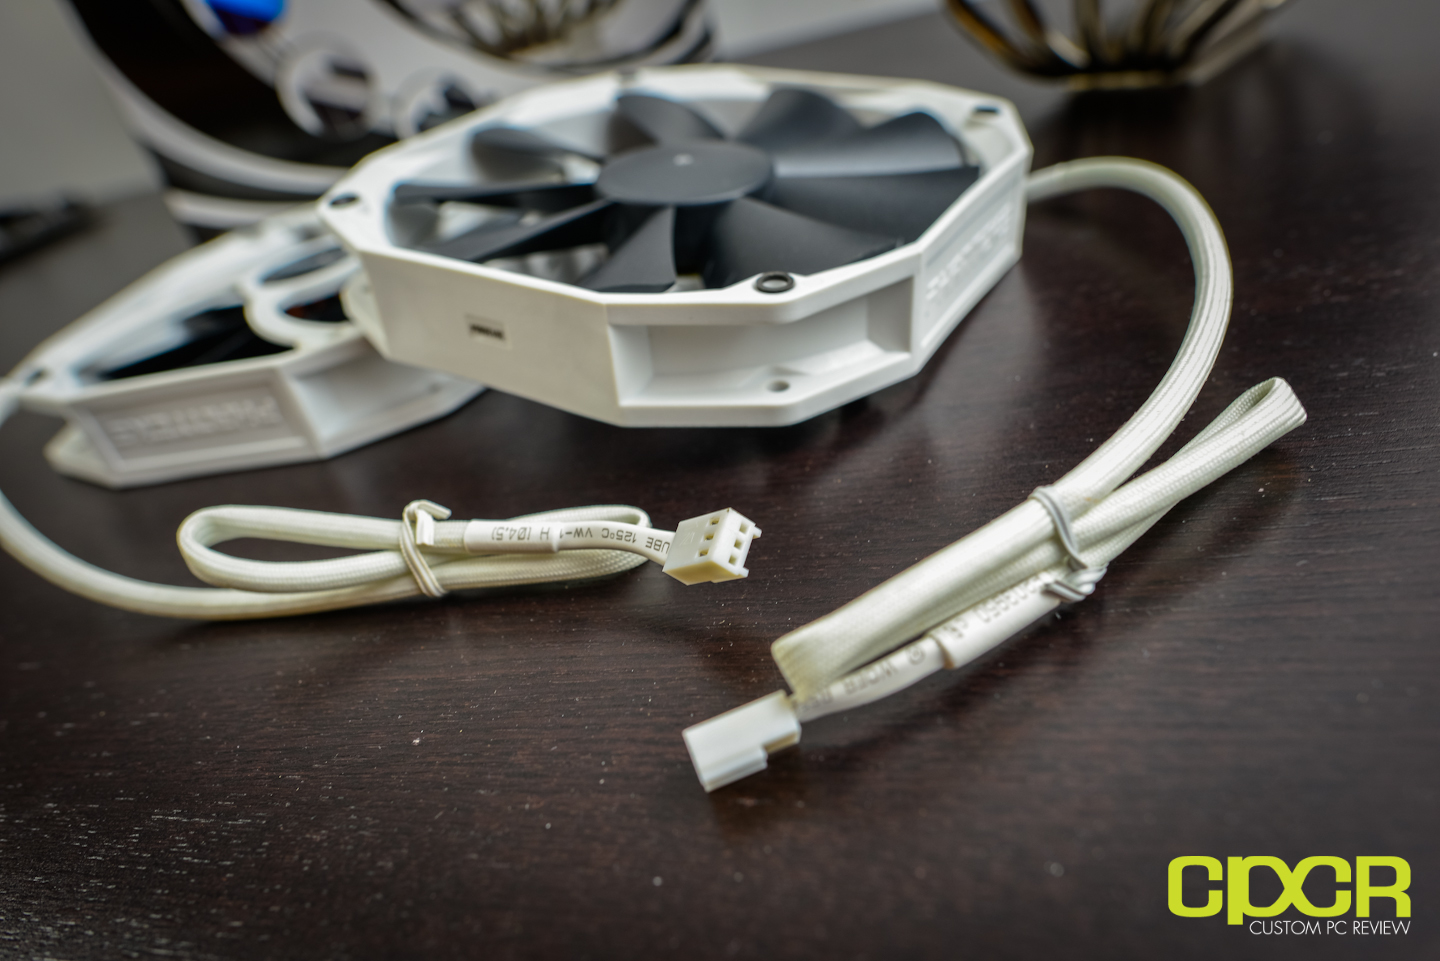
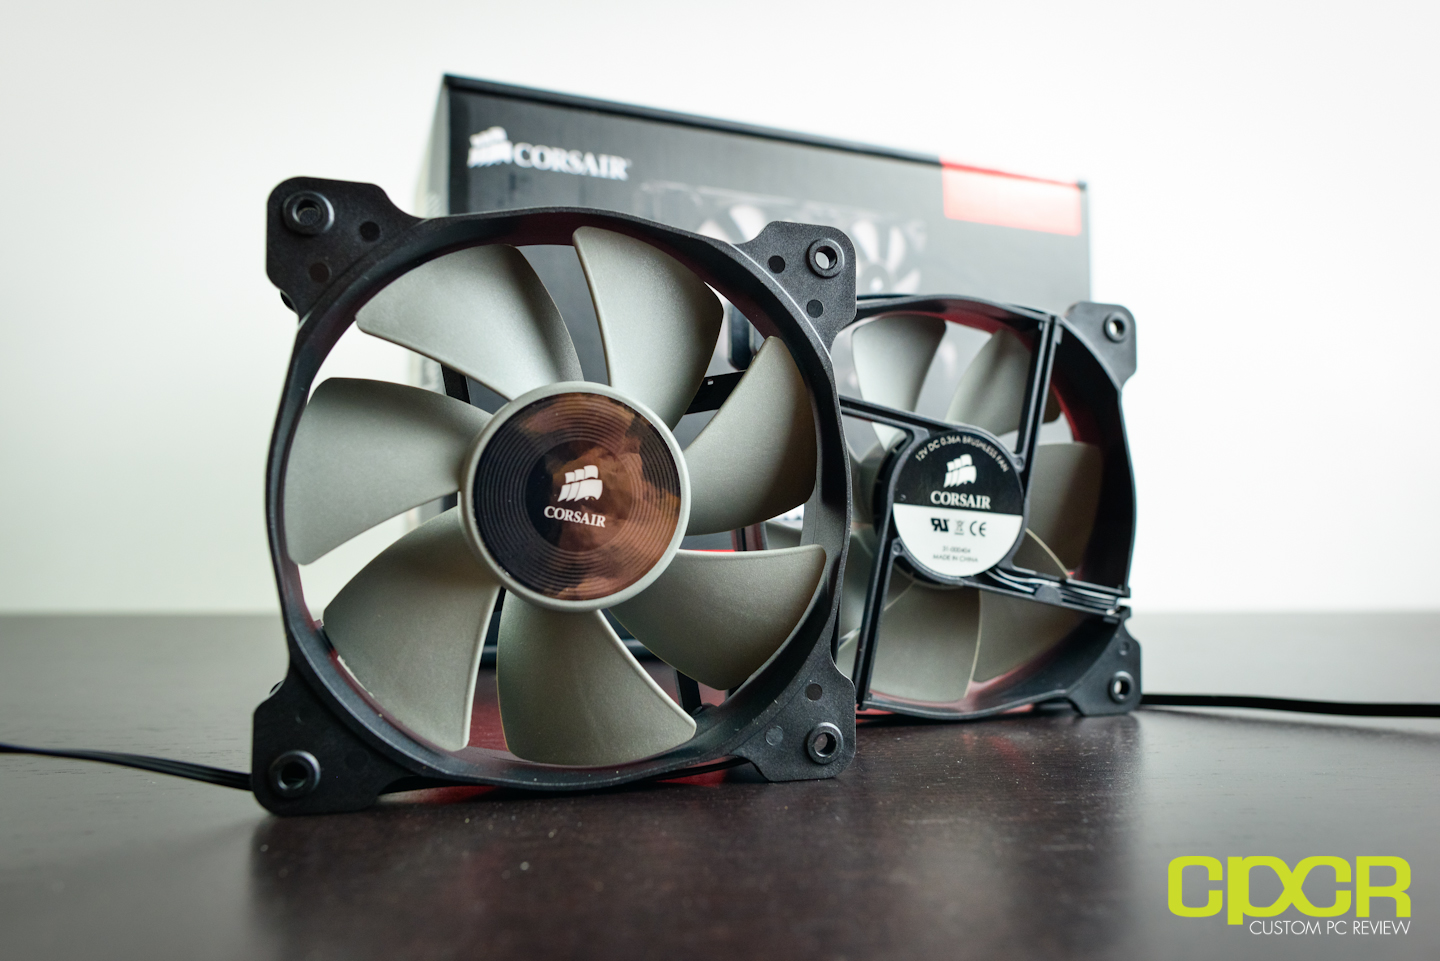
Here’s a look at the fans included with the H100i. These fans are optimized for high static pressure and are capable of spinning at up to 2,700 RPM.
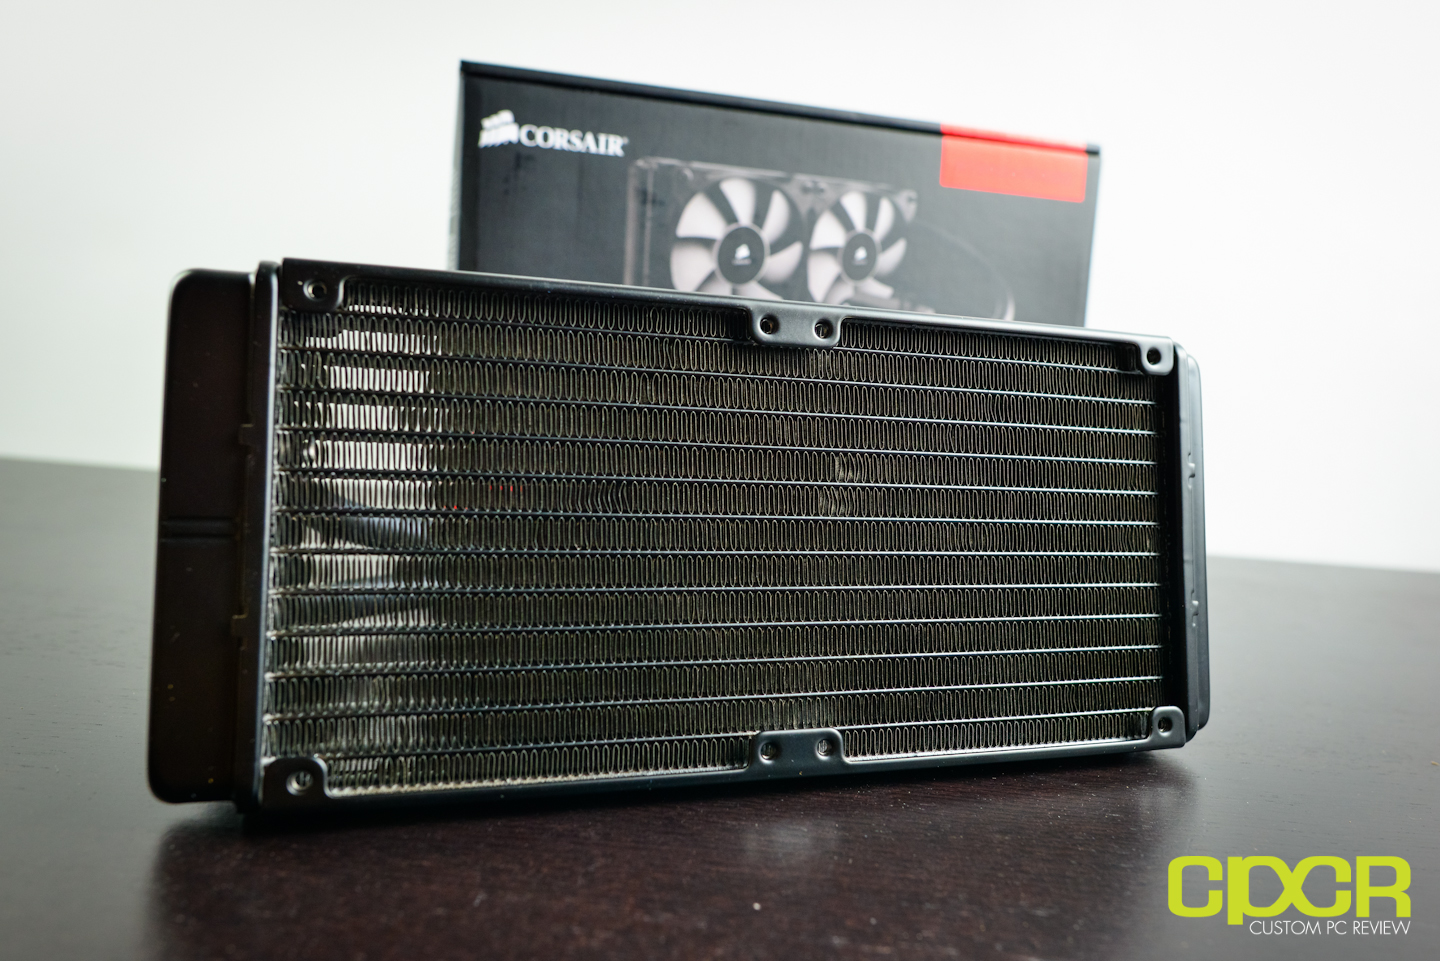
Diving further into the box, we also get the radiator/CPU block assembly. With the Corsair H100i, Corsair has gone with a 240mm radiator, which provides more surface area than a 120mm radiator, which allows for additional heat dissipation.
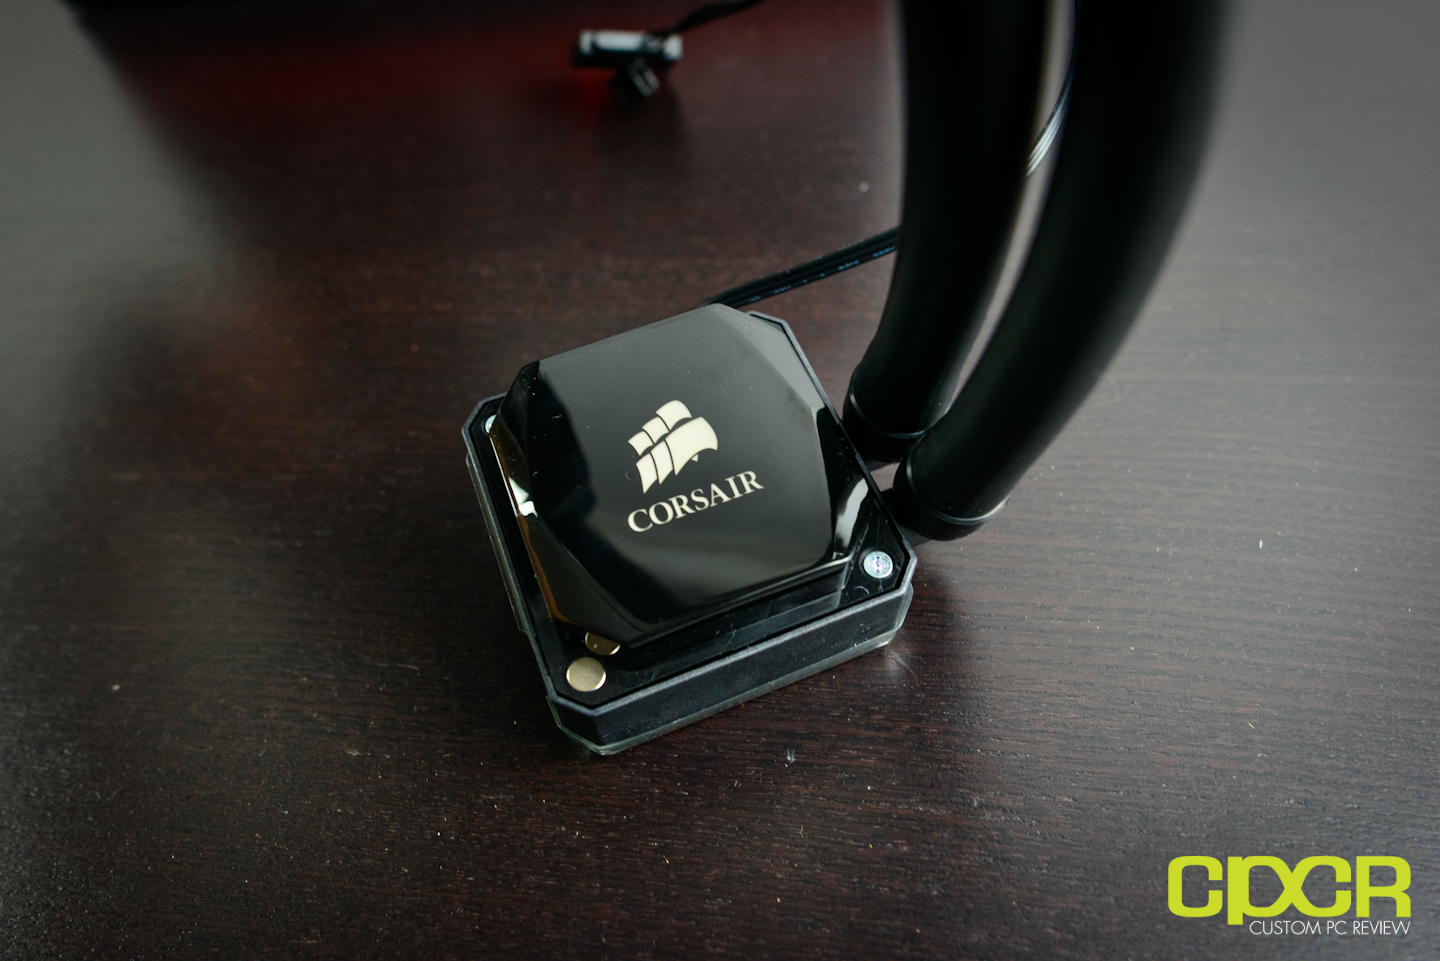
Let’s also take a look at the CPU block as well. The top of the CPU block includes a Corsair logo along with a high gloss finish. The logo is RGB backlit and lighting can be adjusted via the Corsair Link software. One thing worth mentioning about the H100i is that Corsair is using very high quality, very thick rubber tubing which not only looks fantastic, but also feels much more durable than the tubing found on the older Corsair all in one water coolers such as the H70.
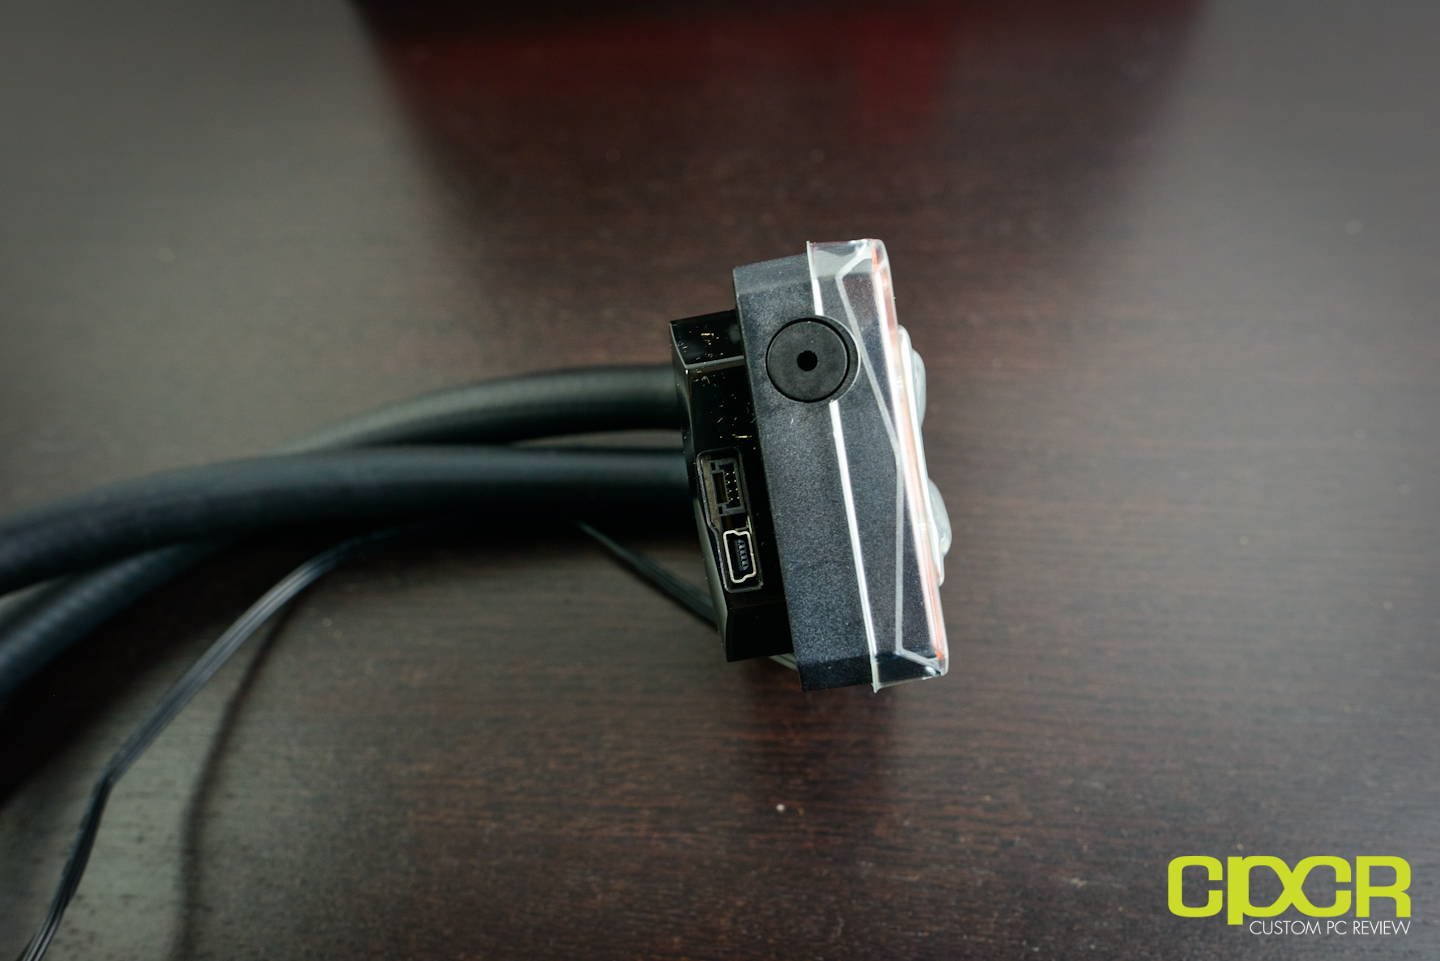
Unlike any cooler I’ve seen previously, the H100i includes a mini-USB port as well as a Corsair Link port for interfacing with other Corsair devices. The mini-USB port allows the H100i to connect to the Corsair Link software, which will allow the user a ton of functionality such as adjusting fan speed, adjusting LED backlighting, or monitoring temperatures.
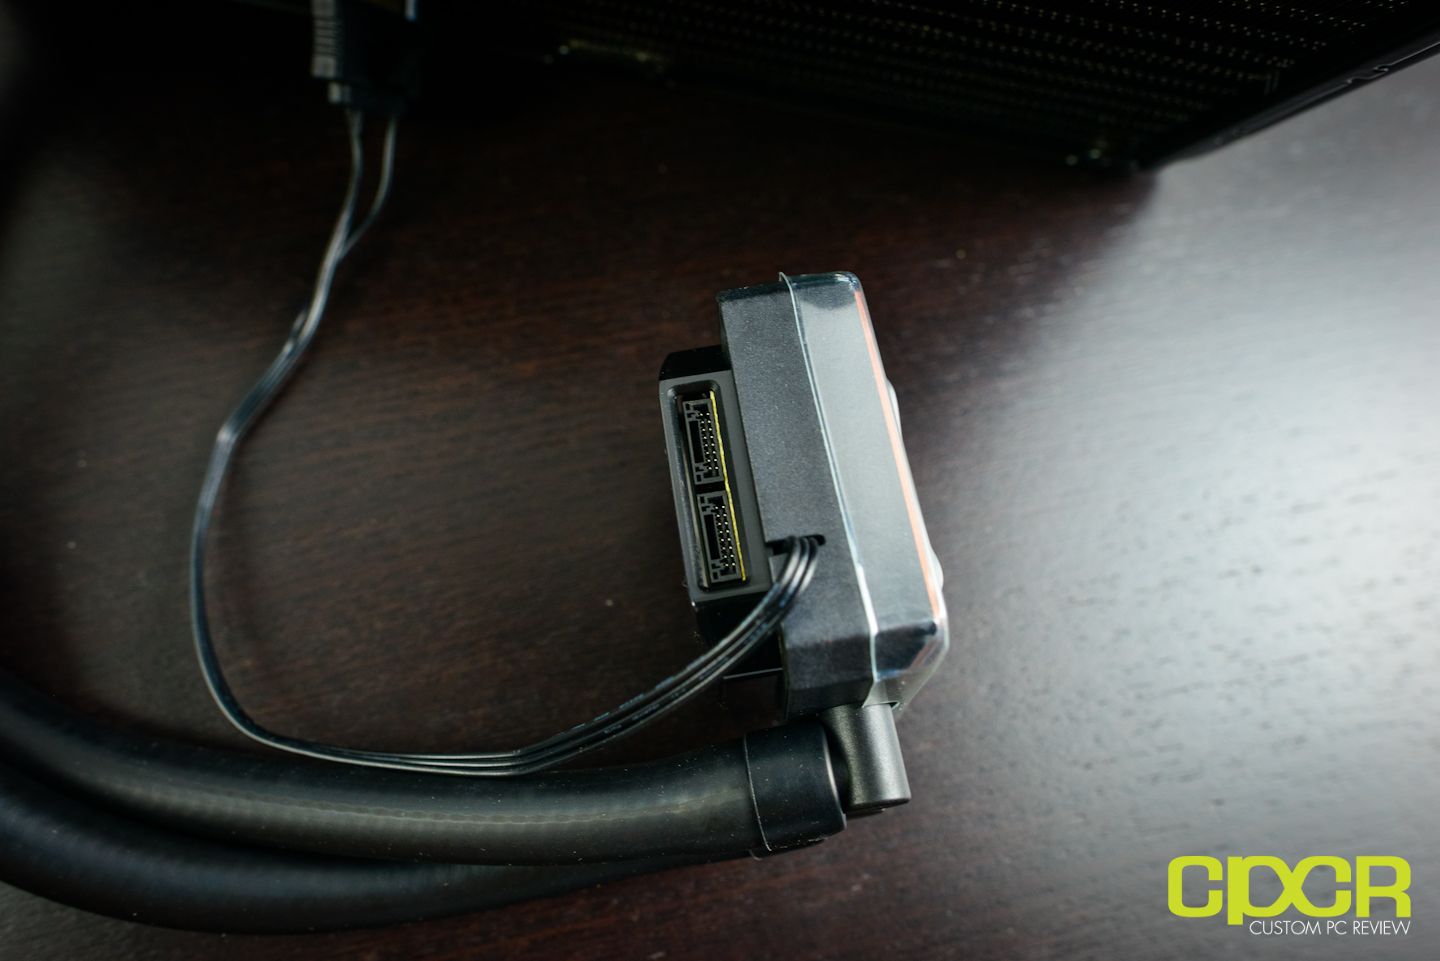
On the other side of the waterblock, there’s two ports for connecting fans. Corsair includes two proprietary adapters that connect to each of the ports shown here and splits into dual 4 pin fan connectors that allow fans to be connected to the pump. While it’s not 100% necessary for the fans to be connected to the waterblock, this solution allows the waterblock (and Corsair Link) to control fan speeds.
However, by connecting the fans to the pump, I did run into the issue of the stock fans making a high pitched squeal while in operation. This issue is only present when the stock fans are connected via the pump. It doesn’t happen with other fans I’ve tested and it doesn’t happen when the fans are connected via the motherboard header. This leads me to believe that it’s definitely a firmware issue, so hopefully this will be fixed in future firmware updates. (Testing conducted with Corsair H100i firmware 1.0.4)
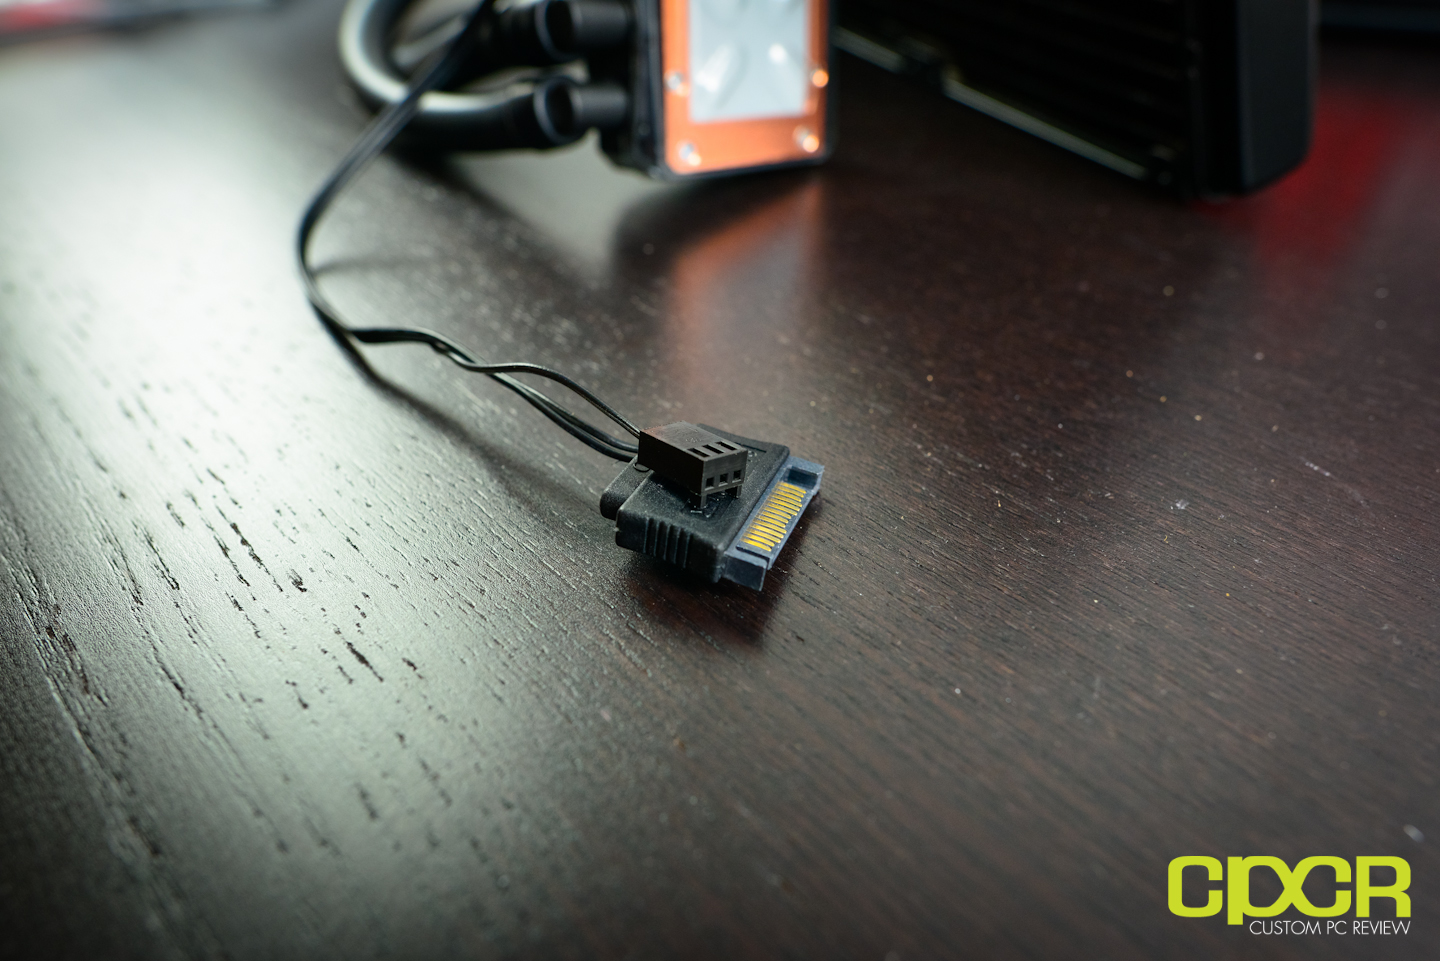
Additionally there’s also a SATA connector along with a 3 pin fan connector as well. This provides power for the fans and the pump.
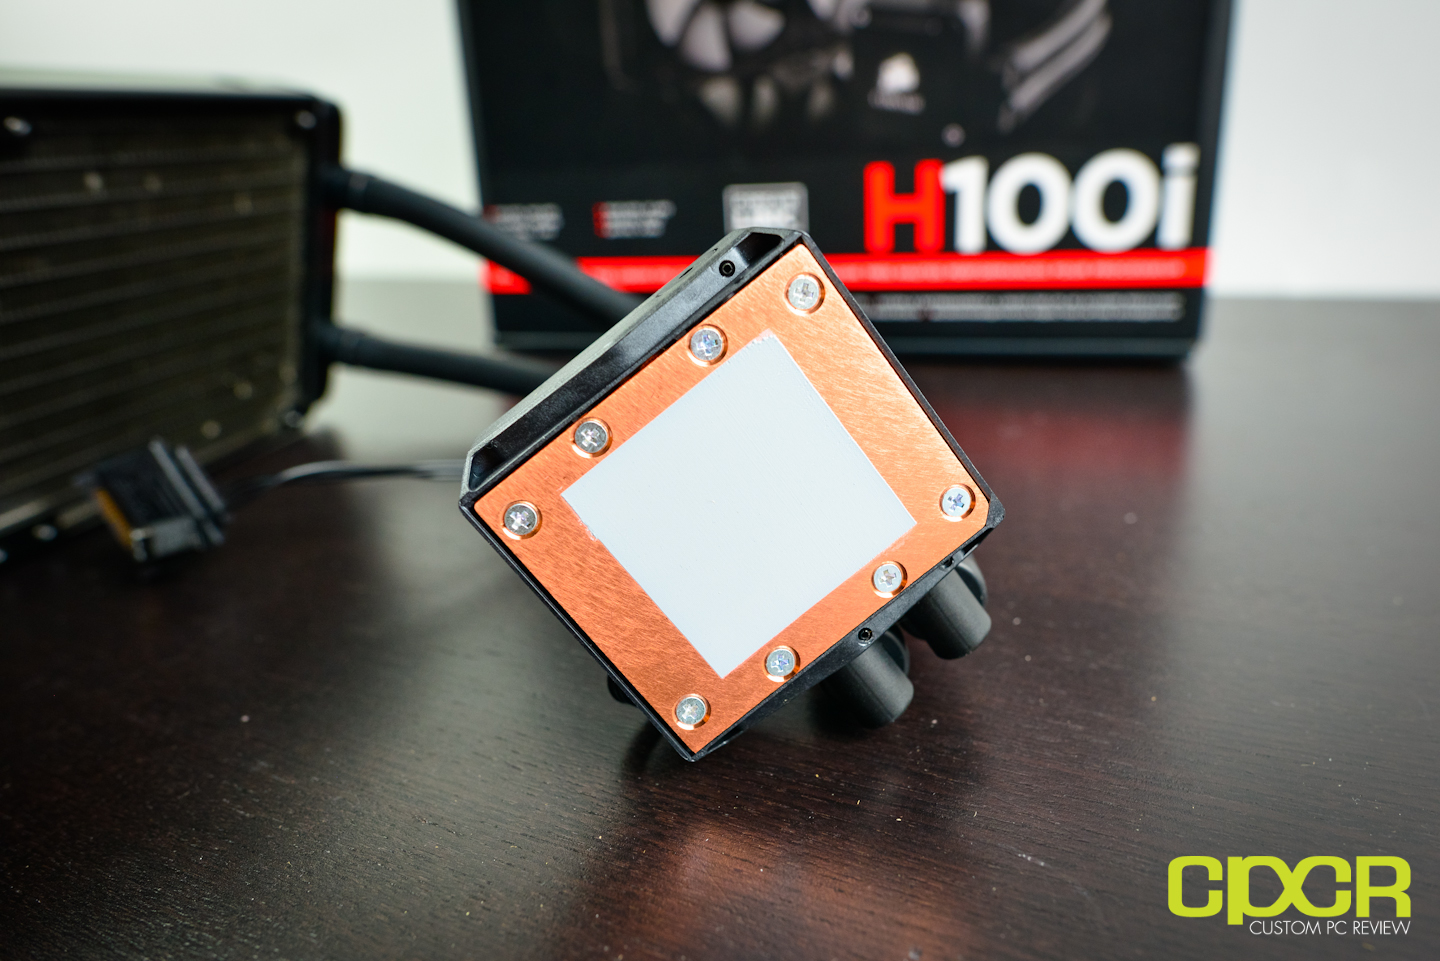
Moving to the bottom of the cooler, we can see that Corsair has also pre-applied thermal paste on the H100i which is a nice touch. It allows for more even application of thermal paste, which may make a huge difference in temperatures. Unfortunately since additional thermal paste is not included, you’ll need to purchase additional thermal paste if you’d ever want to re-seat the heatsink.
Before installing the cooler on the CPU, let’s install the fans on the radiator real quick and take a look at what that looks like. While only two fans are included (and installed at the moment), up to 4 fans may be installed.
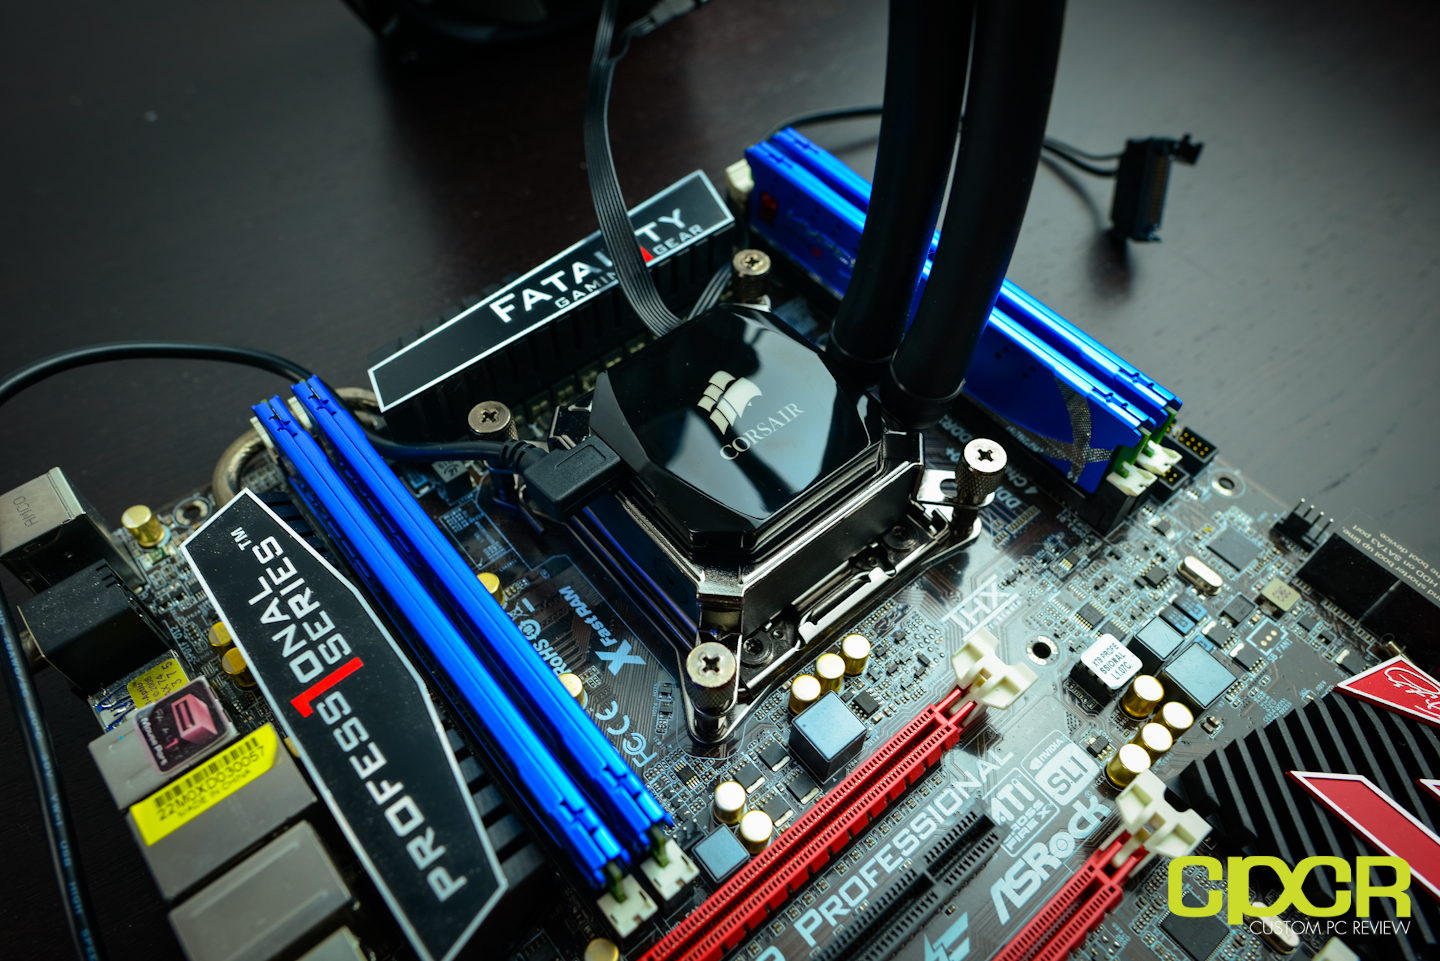
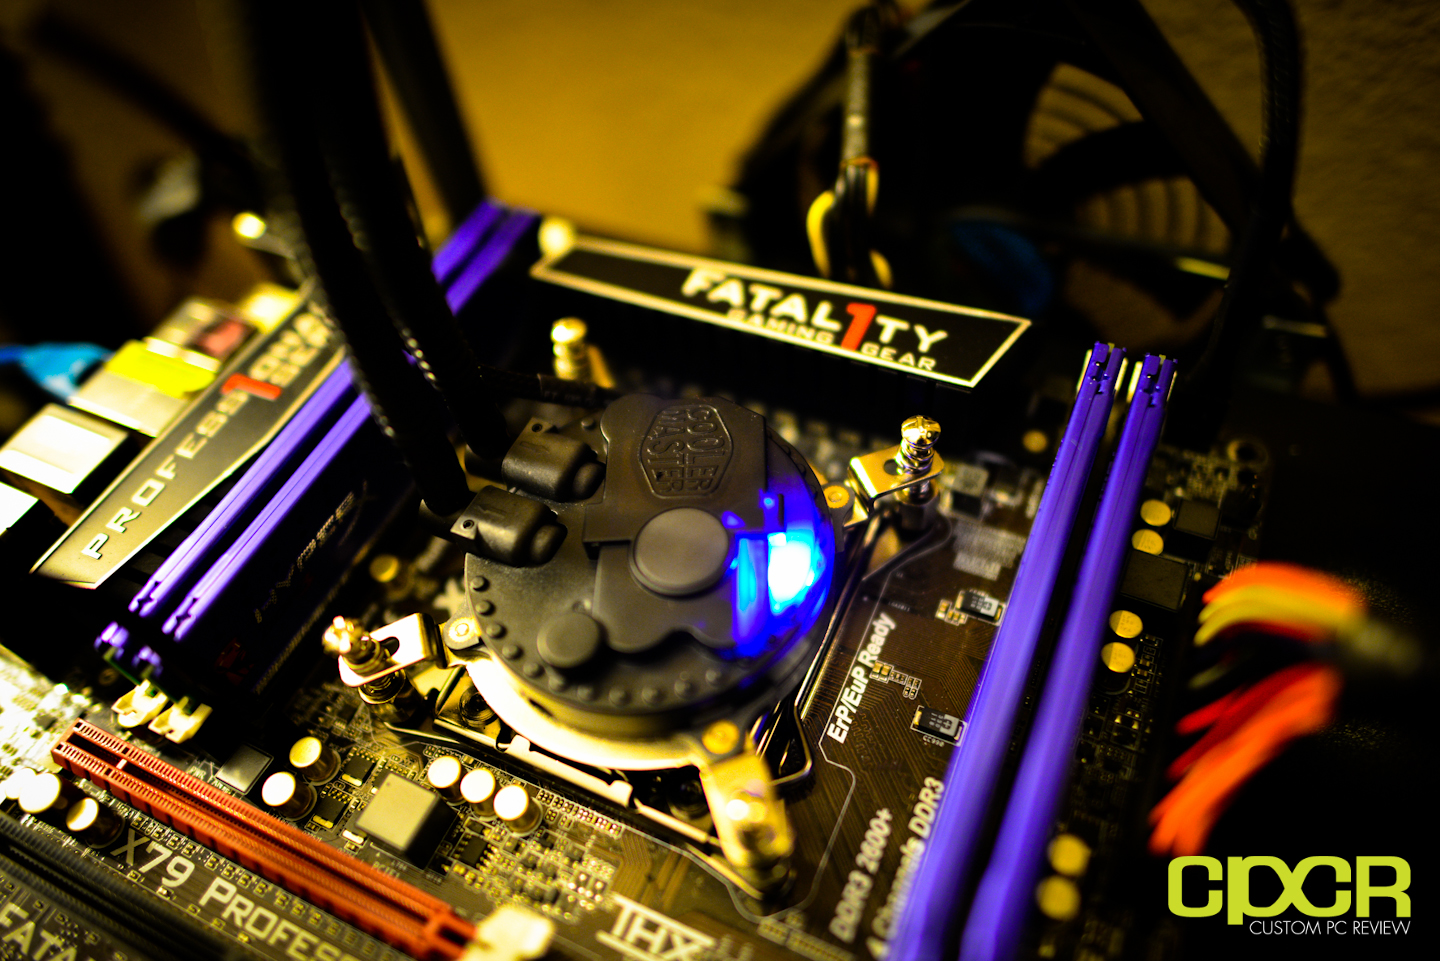
Let’s go ahead and install the H100i. With the LGA 2011 platform, the entire installation is a breeze as LGA 2011 comes with the heatsink bracket pre-installed on the socket.
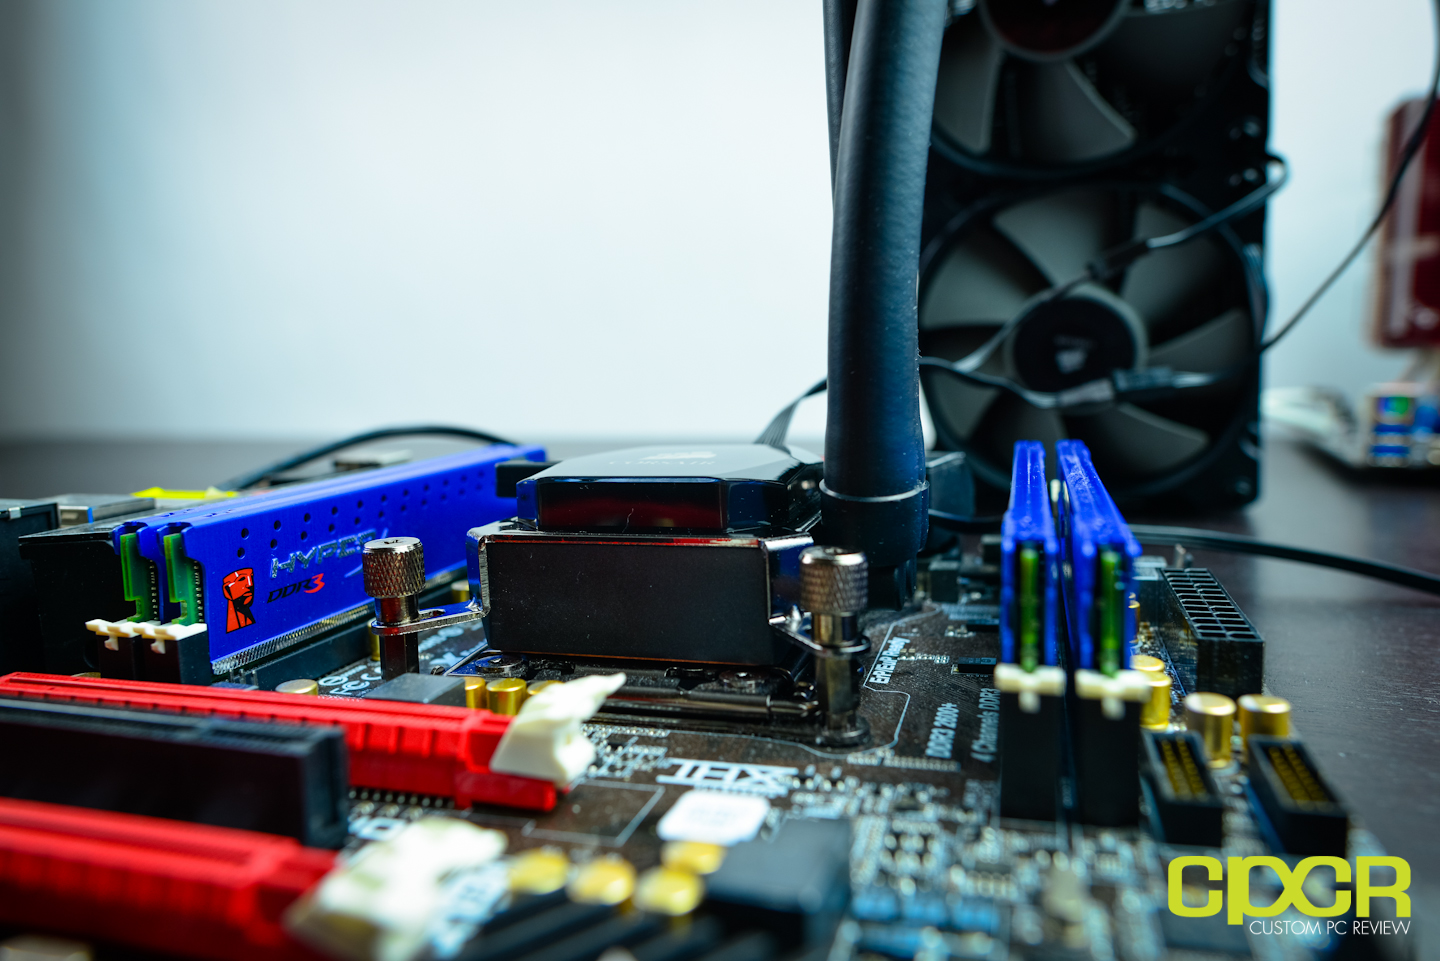
Nice thing about the H100i along with pretty much any other all in one water cooler is that you’re not really restricted on what kind of memory you can purchase, so higher profile memory isn’t an issue.
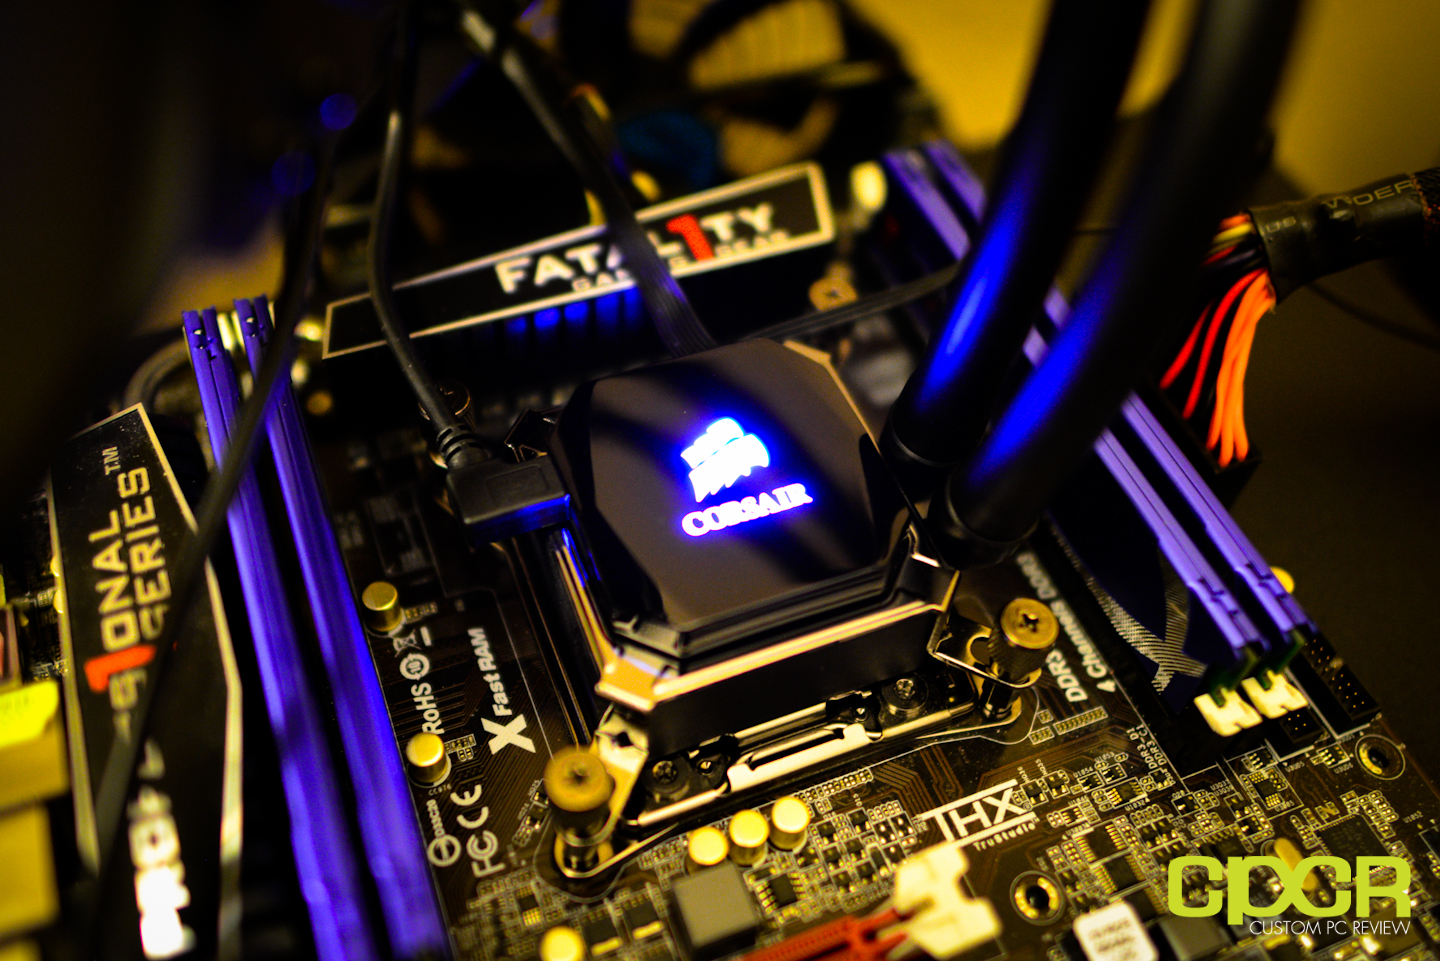
As mentioned previously, the Corsair logo on the H100i is RGB backlit. The software also allows you to adjust the functionality on the backlighting so you do some pretty neat stuff like set the backlighting color depending on the temperature.

Before we move on, let’s also take a look at the Corsair Link software that may be used to interface with the CPU block on the H100i. Of the coolers tested today, the H100i is undoubtedly the most advanced cooler of the bunch. The software allows the CPU block itself to adjust stuff like fan speeds, monitor the fans, monitor the temperatures, or change the lighting on the CPU block.
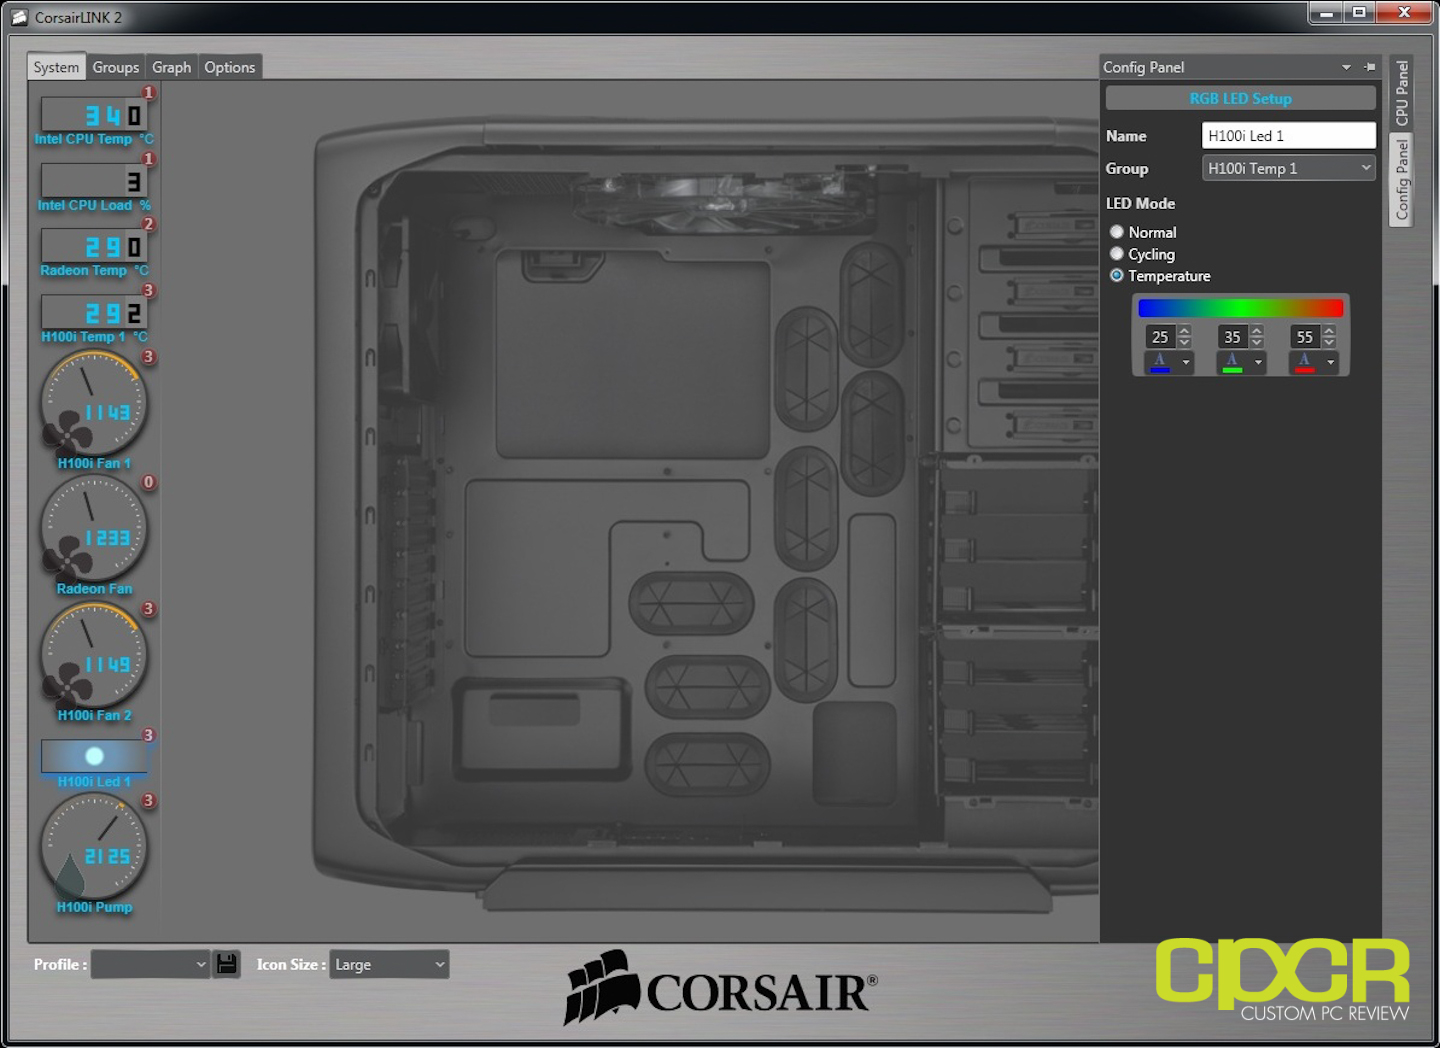
Here’s a look at the lighting settings adjustment page on the Corsair Link software. There’s a pretty cool mode here called temperature which will change the LED color based on temperature so if the sensor on the CPU block hits a certain temperature, the LED color would change. It’s always great when companies integrate something that’s flashy and cool, but also has some sort of utility as well.
[section label=”Cooler Master Seidon 240M”]
A Closer Look
Cooler Master Seidon 240M
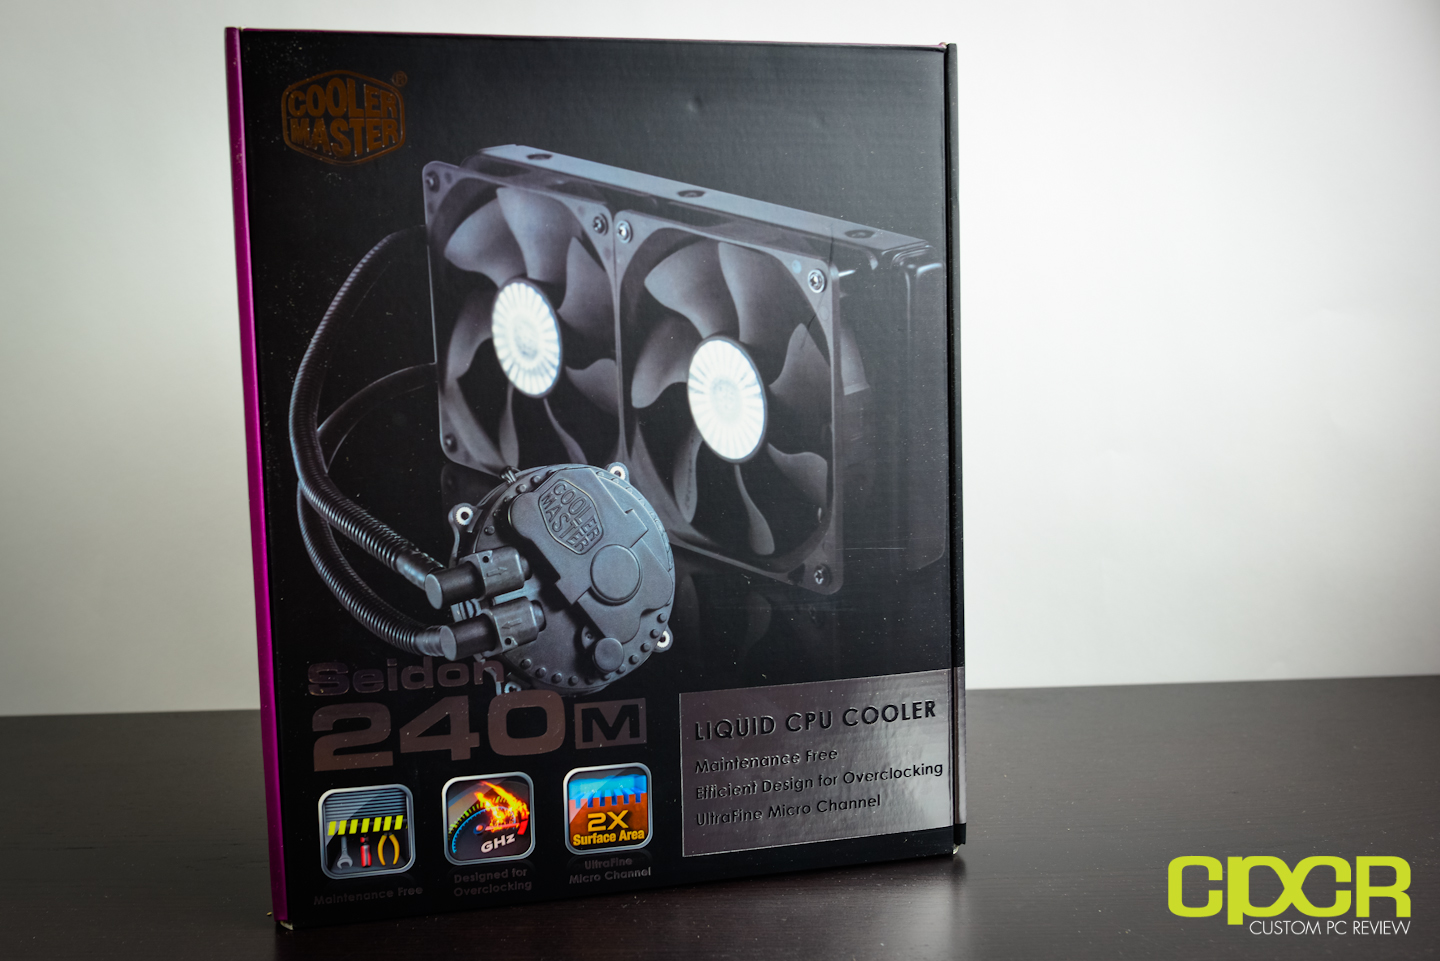
The second cooler up is going to be the new kid on the block in terms of all in one water coolers, the Cooler Master Seidon 240M. The Seidon 240M is Cooler Master’s first all in one water cooler offering and this one also includes a massive 240m radiator, which in theory should perform very well.
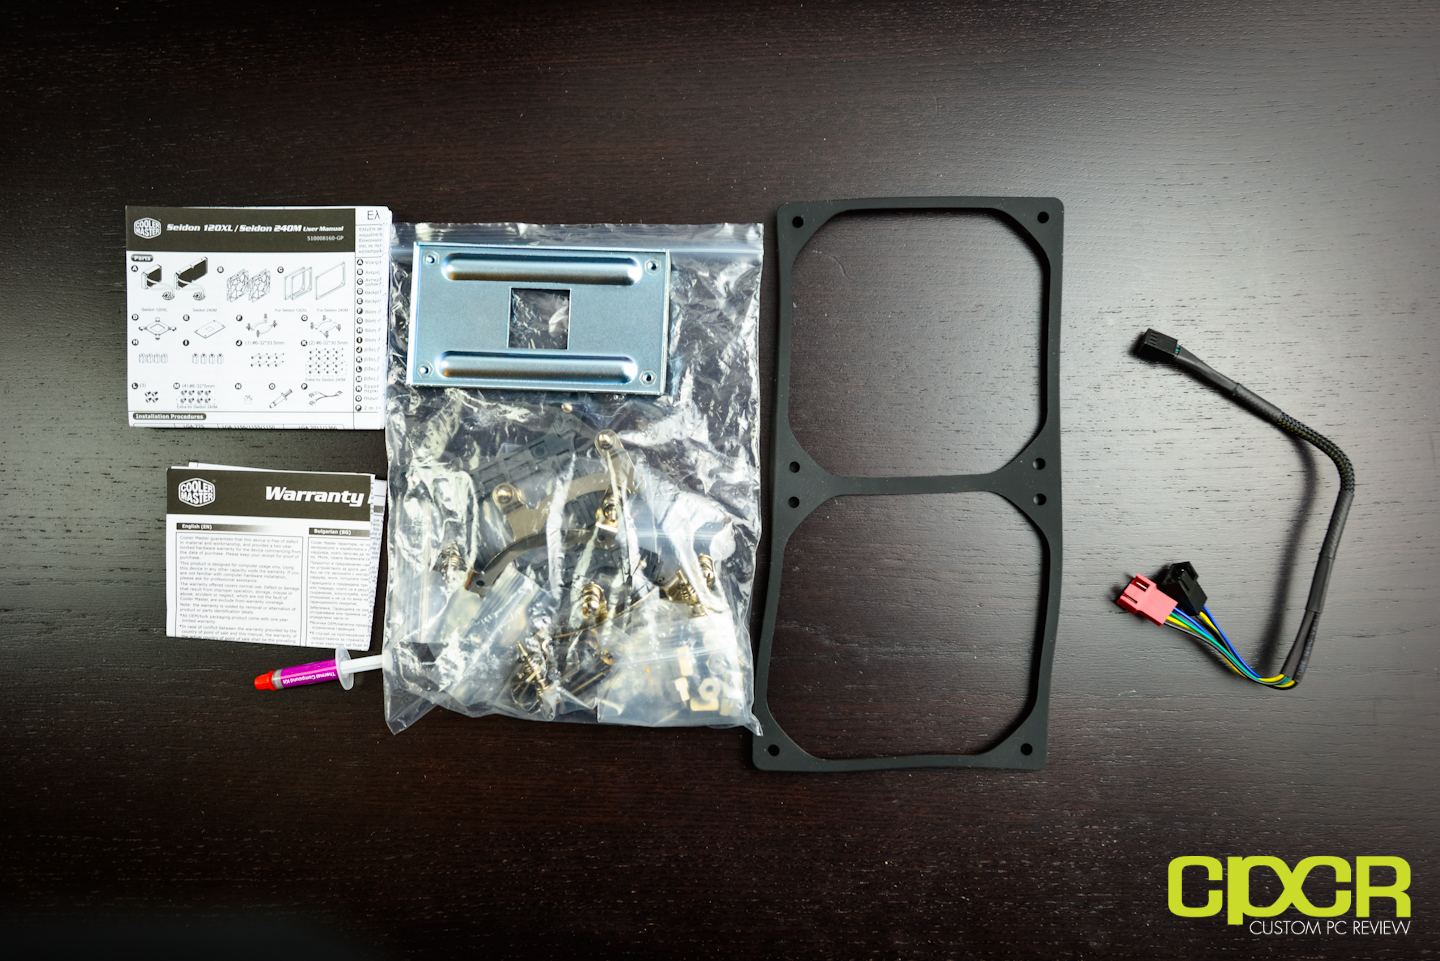
Included in the packaging is a whole slew of documentation along with mounting hardware as well.
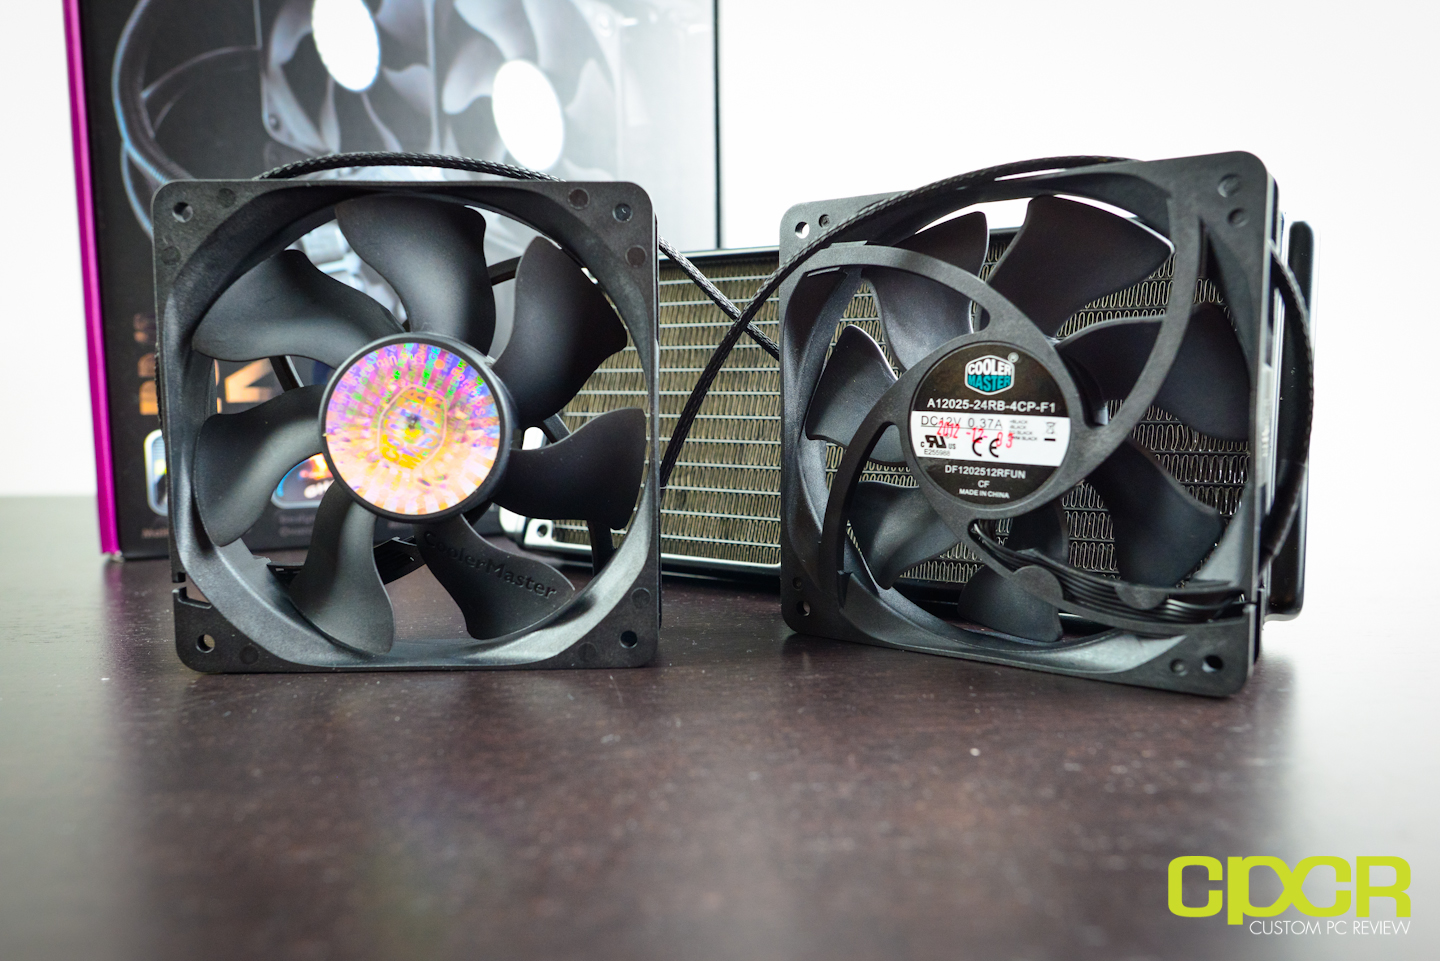
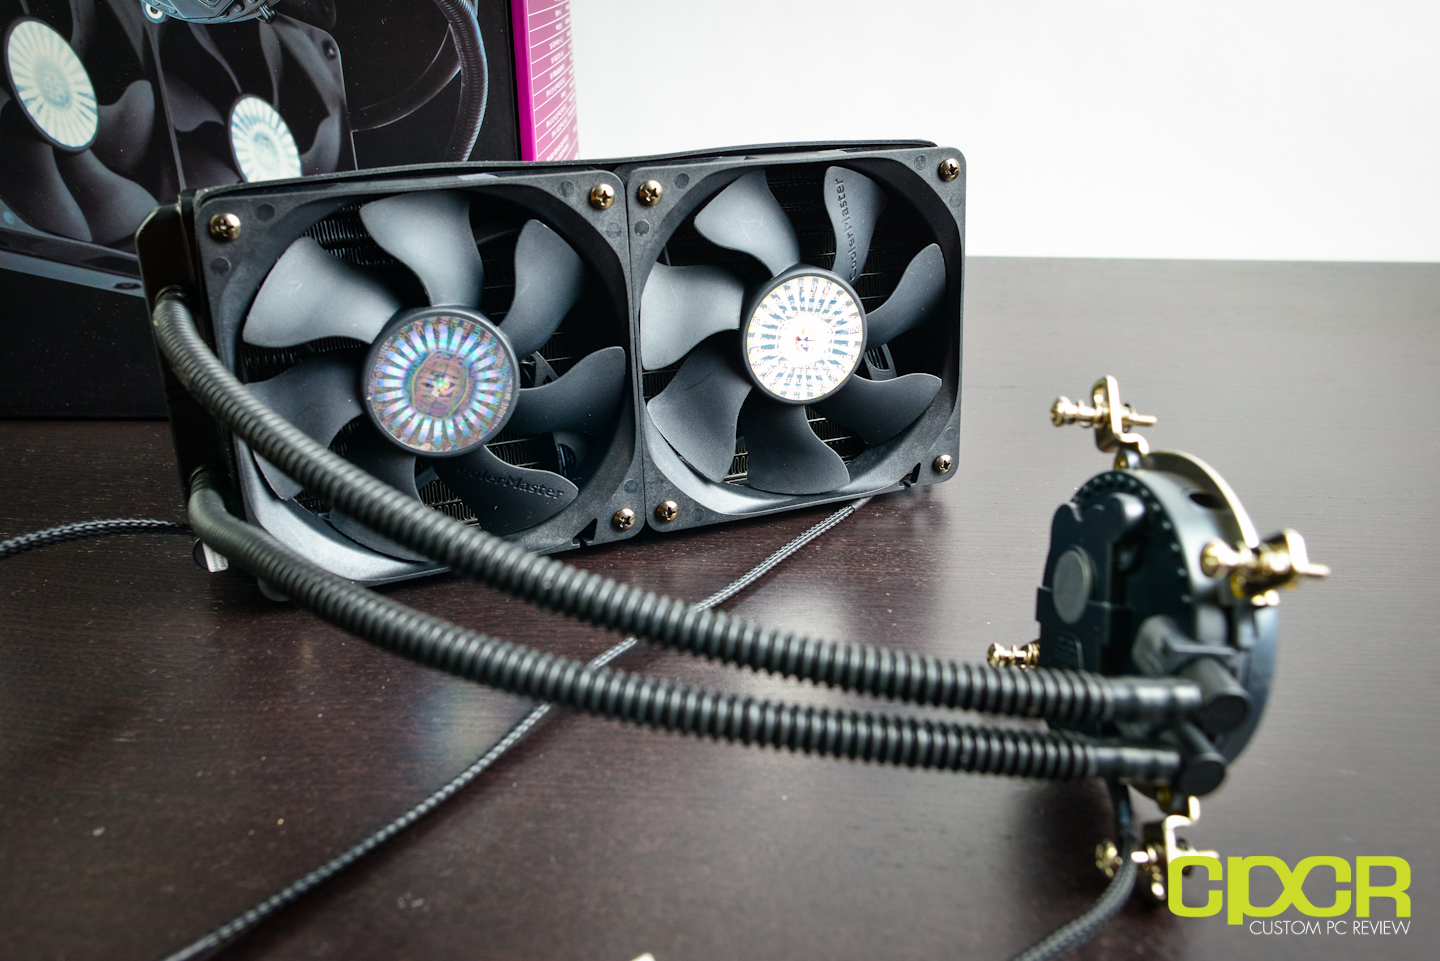
Here’s a look at the stock fans for the Seidon 240M. They’re optimized for high static pressure, which allows the fans to better push air through the dense fin array of the radiator.
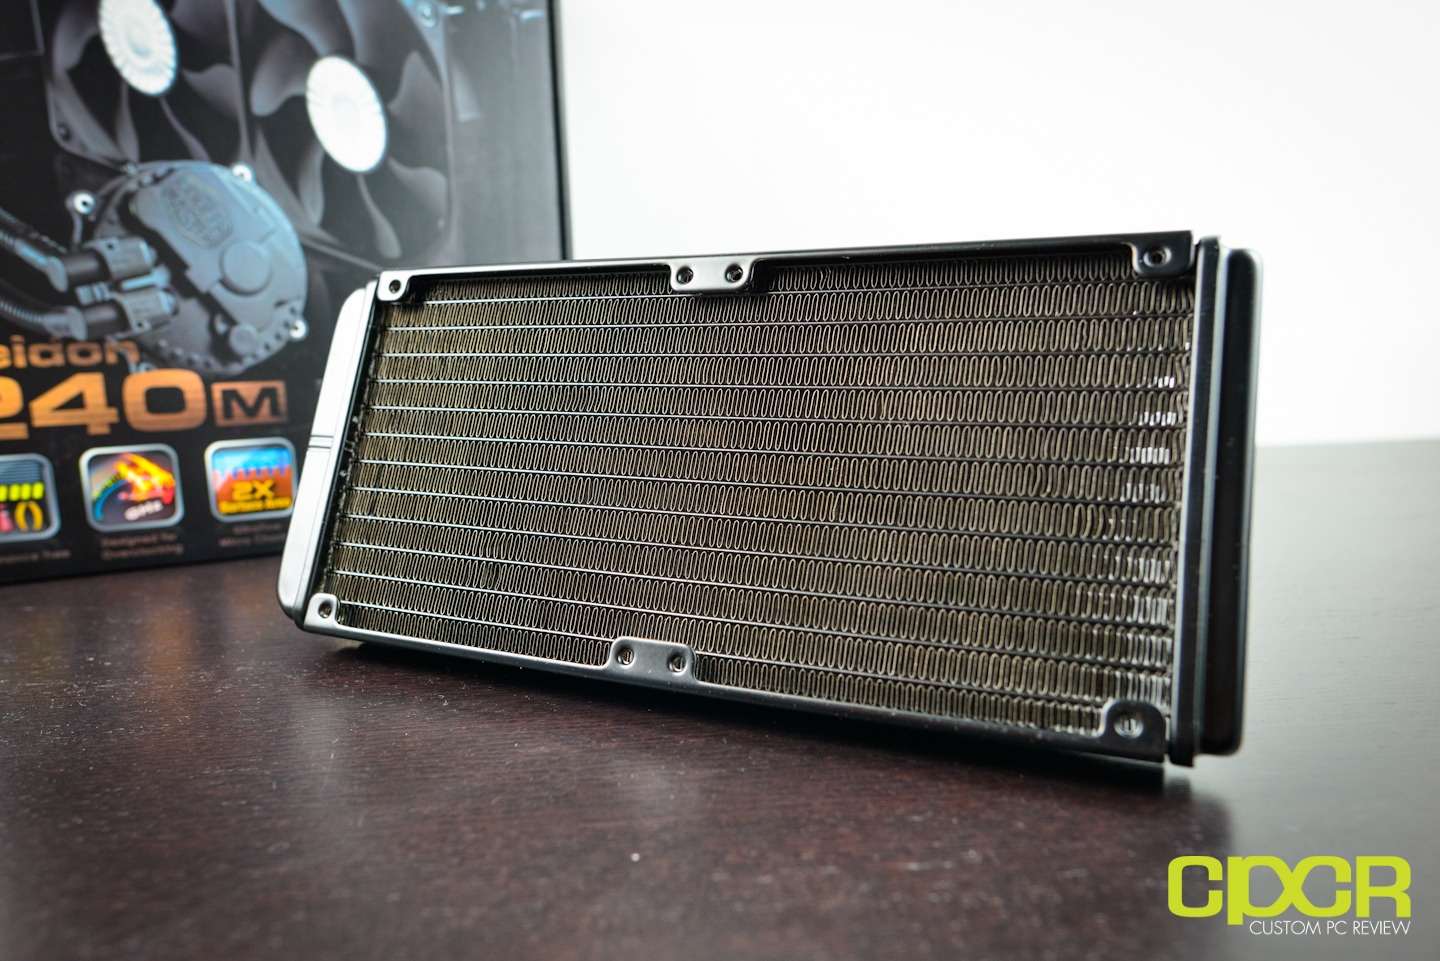
Here’s a look at the radiator for the Seidon 240M. Just like the Corsair H100i, the Seidon 240M uses a 240mm radiator for maximum cooling performance.
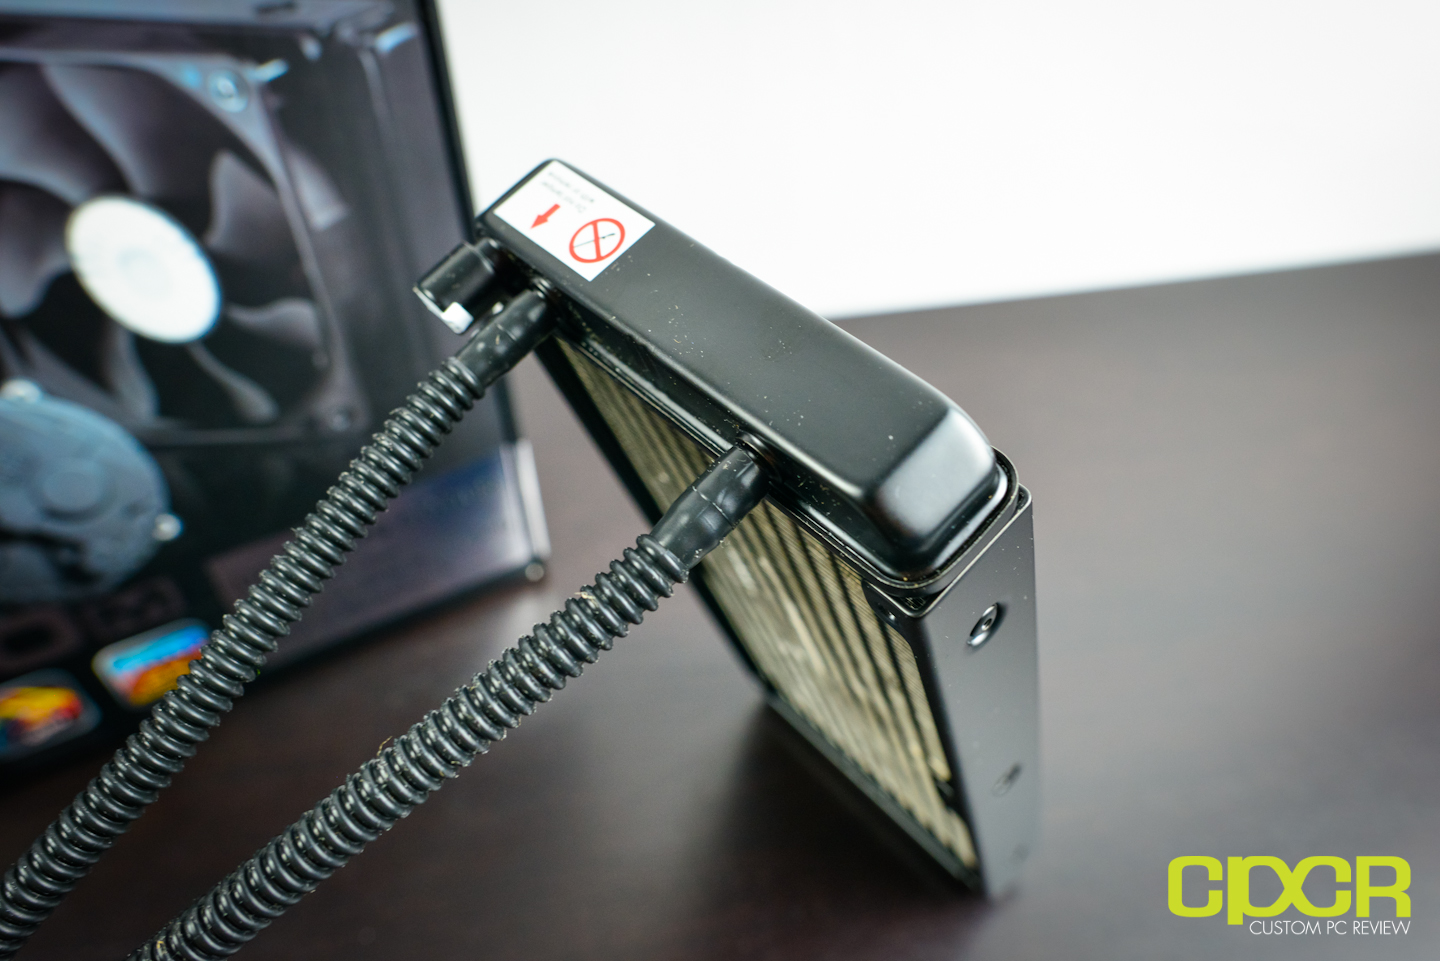
Here’s a look at the tubing for the Seidon 240M. It’s fairly stiff and durable, but definitely not as thick or as nice as the tubing found on the H100i.
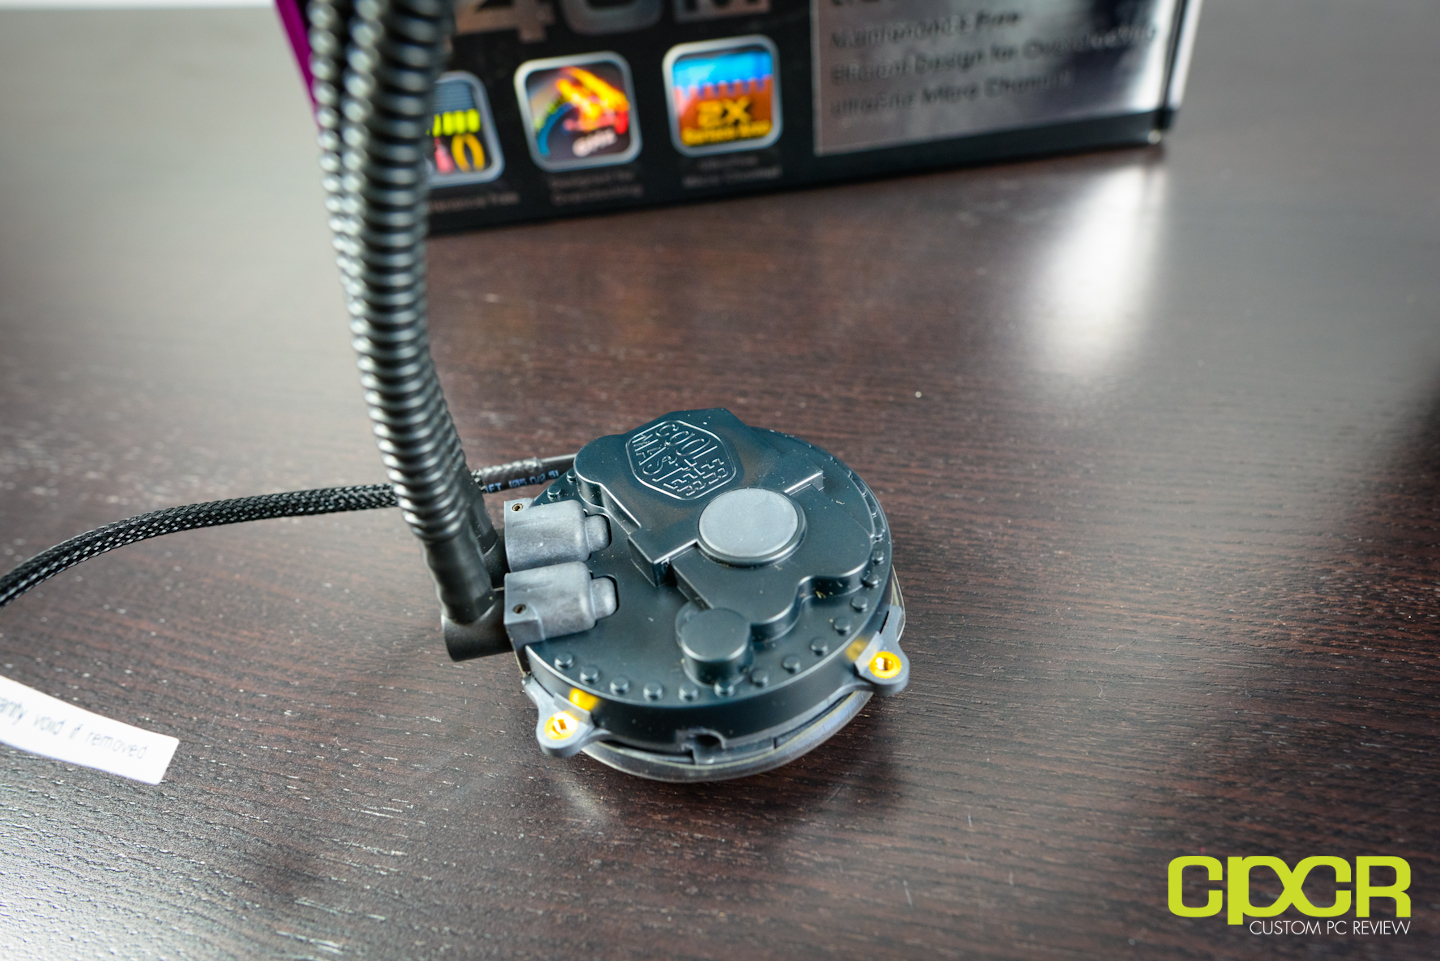
Here’s a look at the CPU block for the Seidon 240M. There’s a Cooler Master logo up top here along with a single blue LED backlight as well.
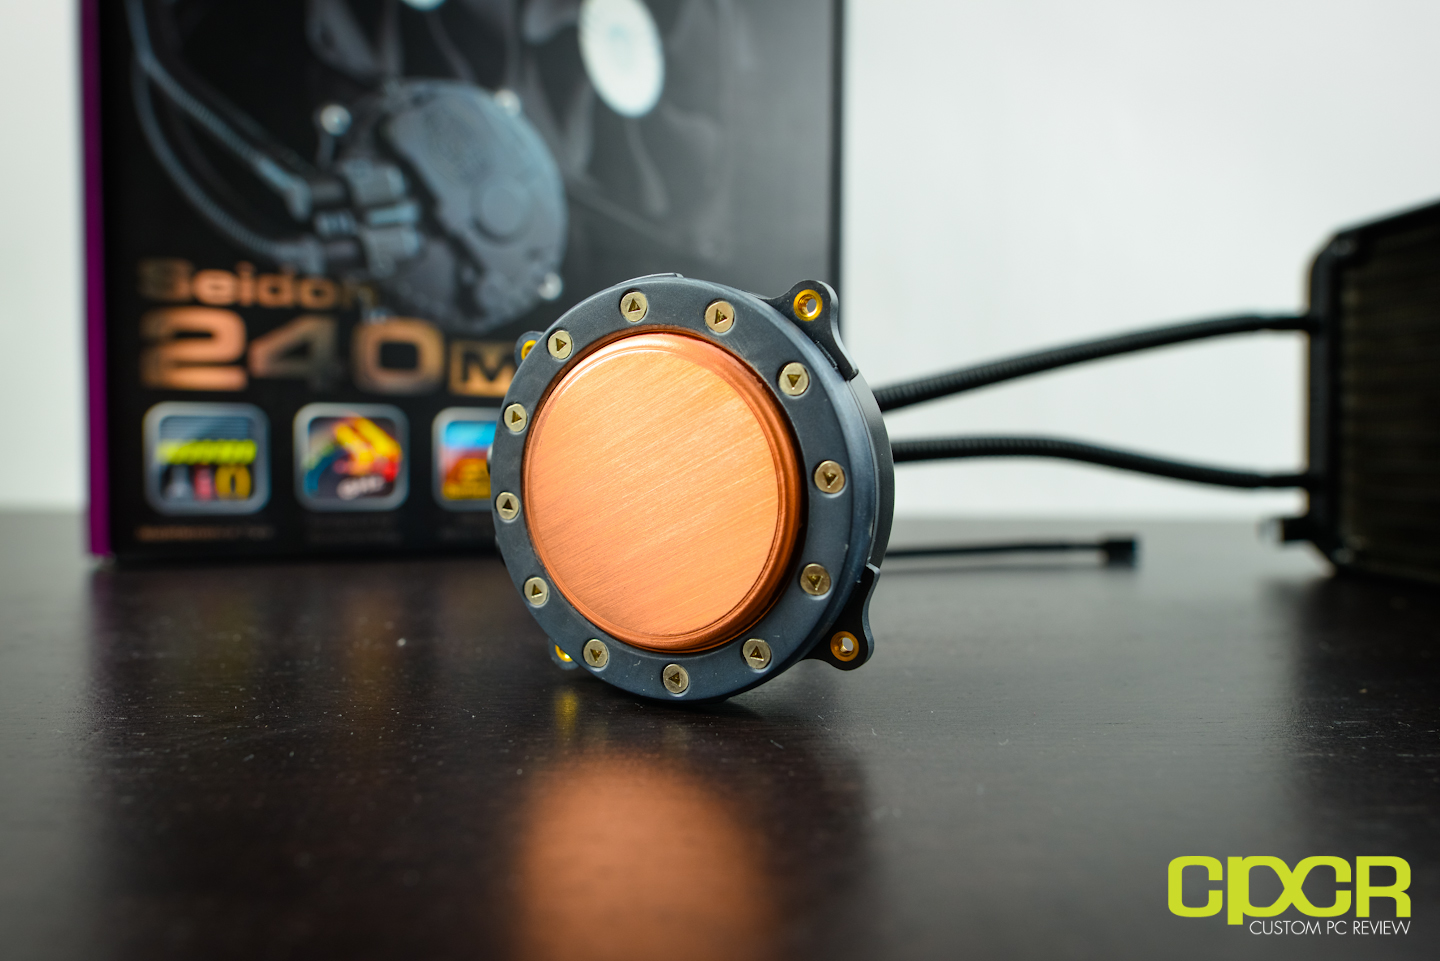
Here’s a look at the bottom of the CPU block. The copper here is machined very well and the bottom of extremely smooth, which allows for good contact between the CPU and the CPU block.
Here’s a look at the Seidon 240M with the stock fans installed. Prior to installing the CPU block on the CPU, some mounting hardware must be installed on the CPU block as well (as shown above).
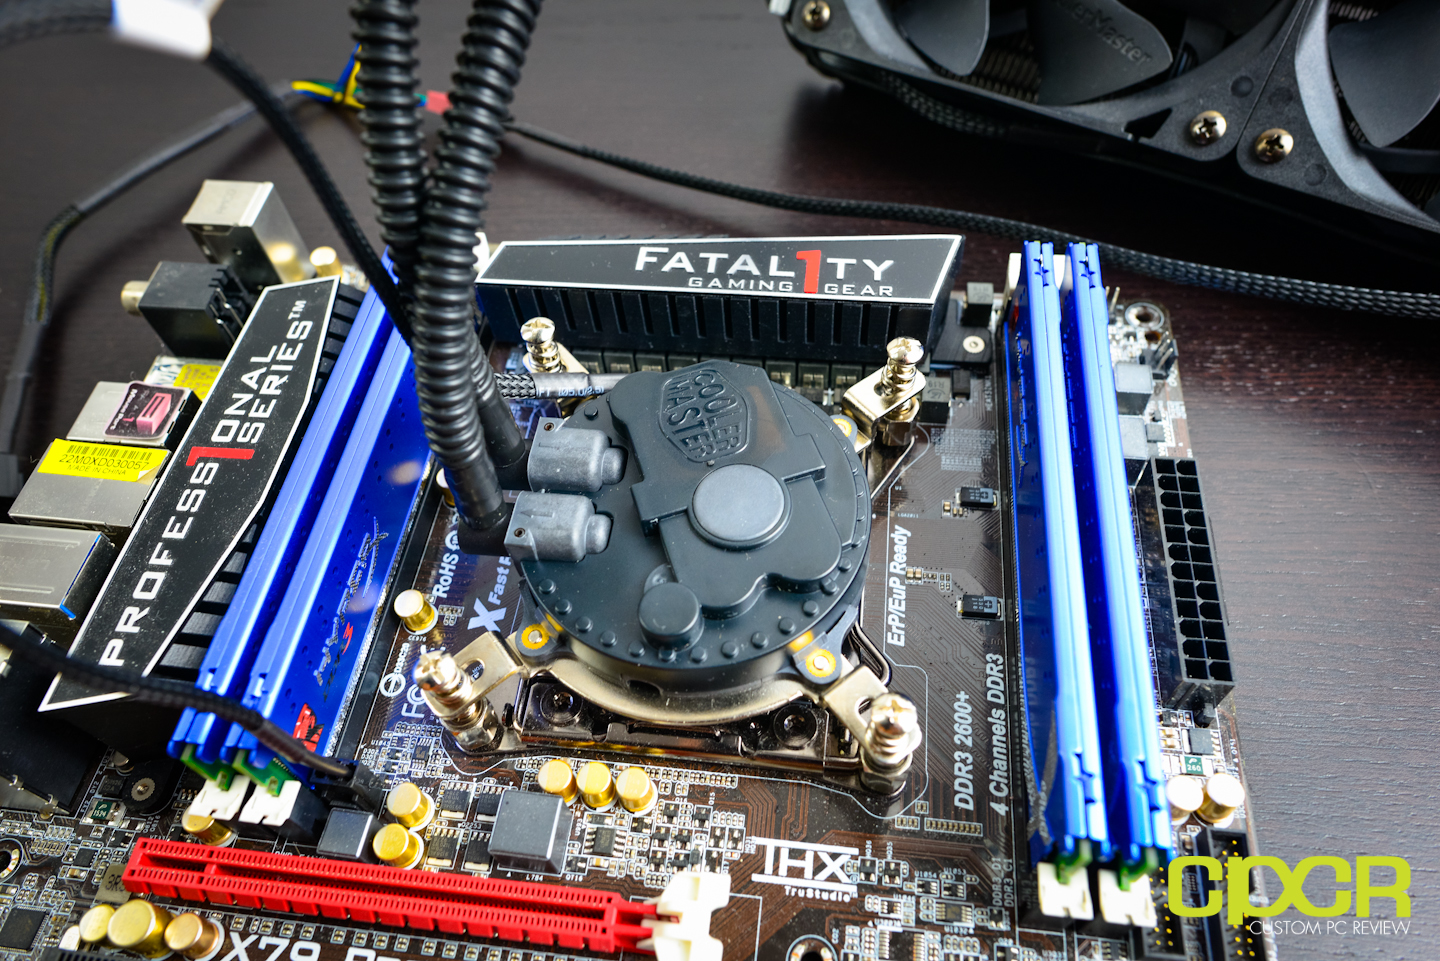
Installation of the Seidon 240M isn’t bad on the LGA 2011 socket, but then again installation of anything on LGA 2011 isn’t too bad at all. The worst thing about installation is simply finding the correct mounting hardware. It would be VERY nice if Cooler Master individually packaged some components to make it easier to locate.
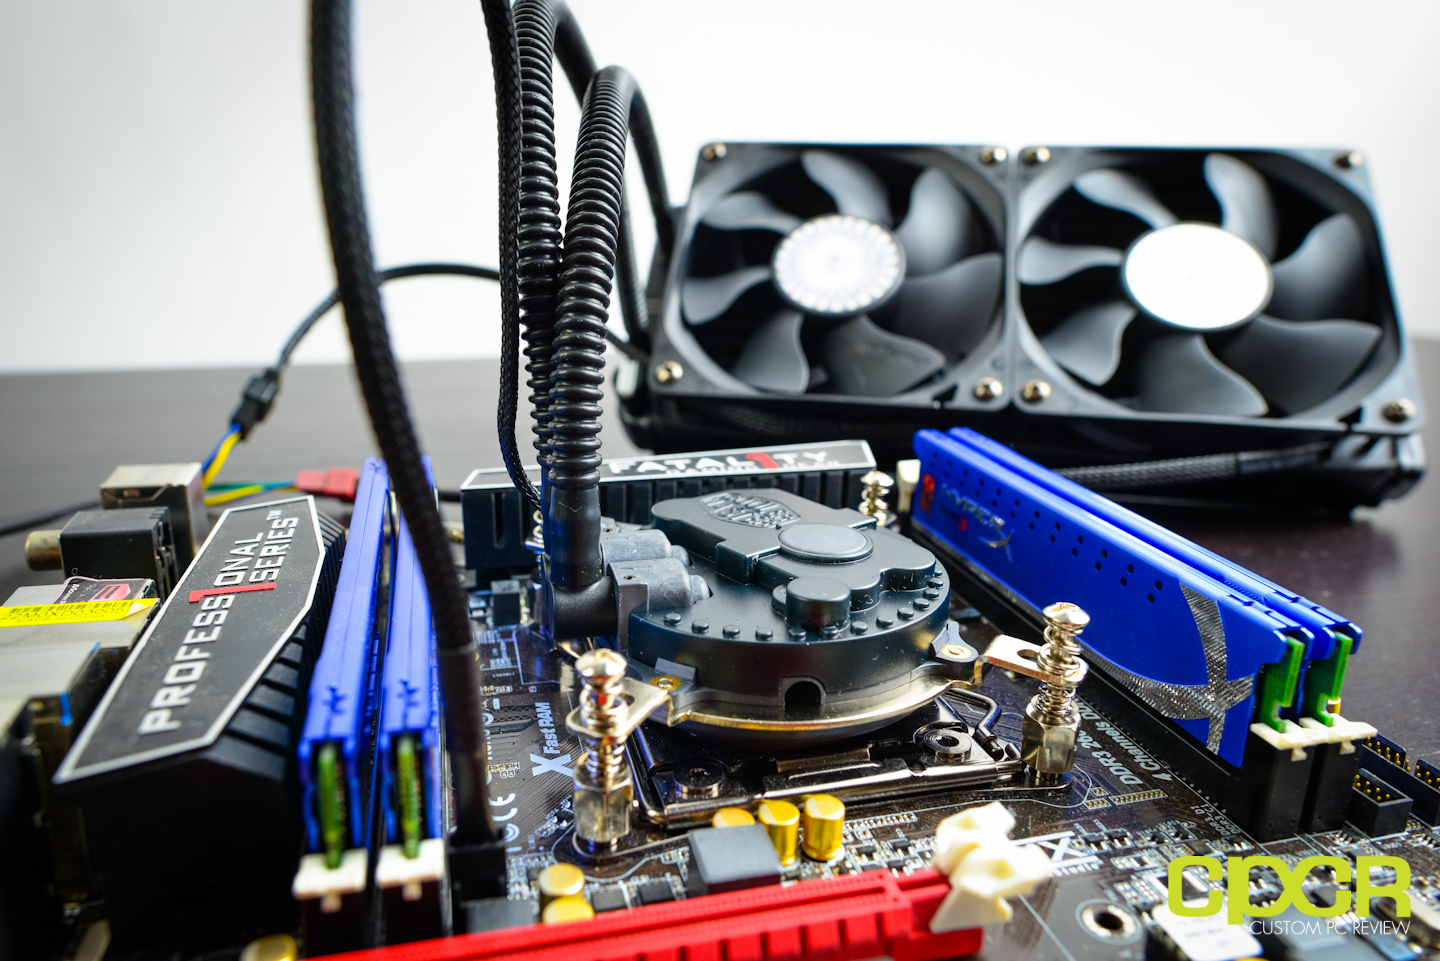
Just like what we saw with the Corsair H100i, there’s absolutely no memory clearance issues, so those looking to invest in some Corsair Dominator Platinum or Kingston Predator memory will be fine.
Here’s a look at the Seidon 240M in operation. As mentioned previously, there’s a single blue LED that lets you know that it’s working.
[section label=”Phanteks PH-TC14PE”]
A Closer Look
Phanteks PH-TC14PE (2013 Revision)
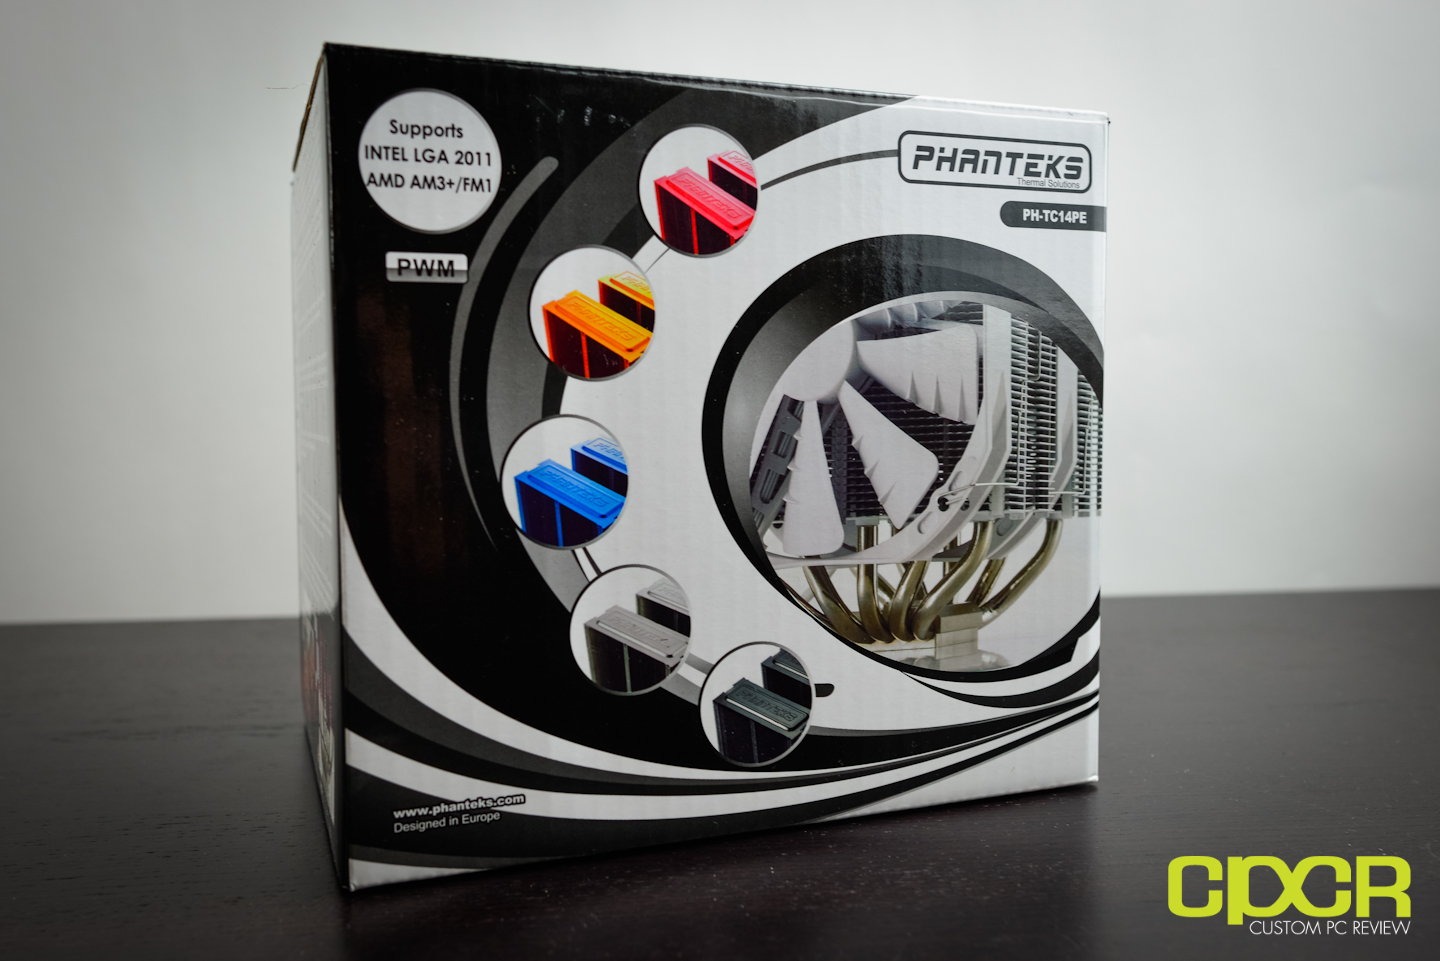
Here’s a look at the Phanteks PH-TC14PE. This cooler isn’t new to us, but we’ve been told that the cooler has been updated recently with new and improved fans.
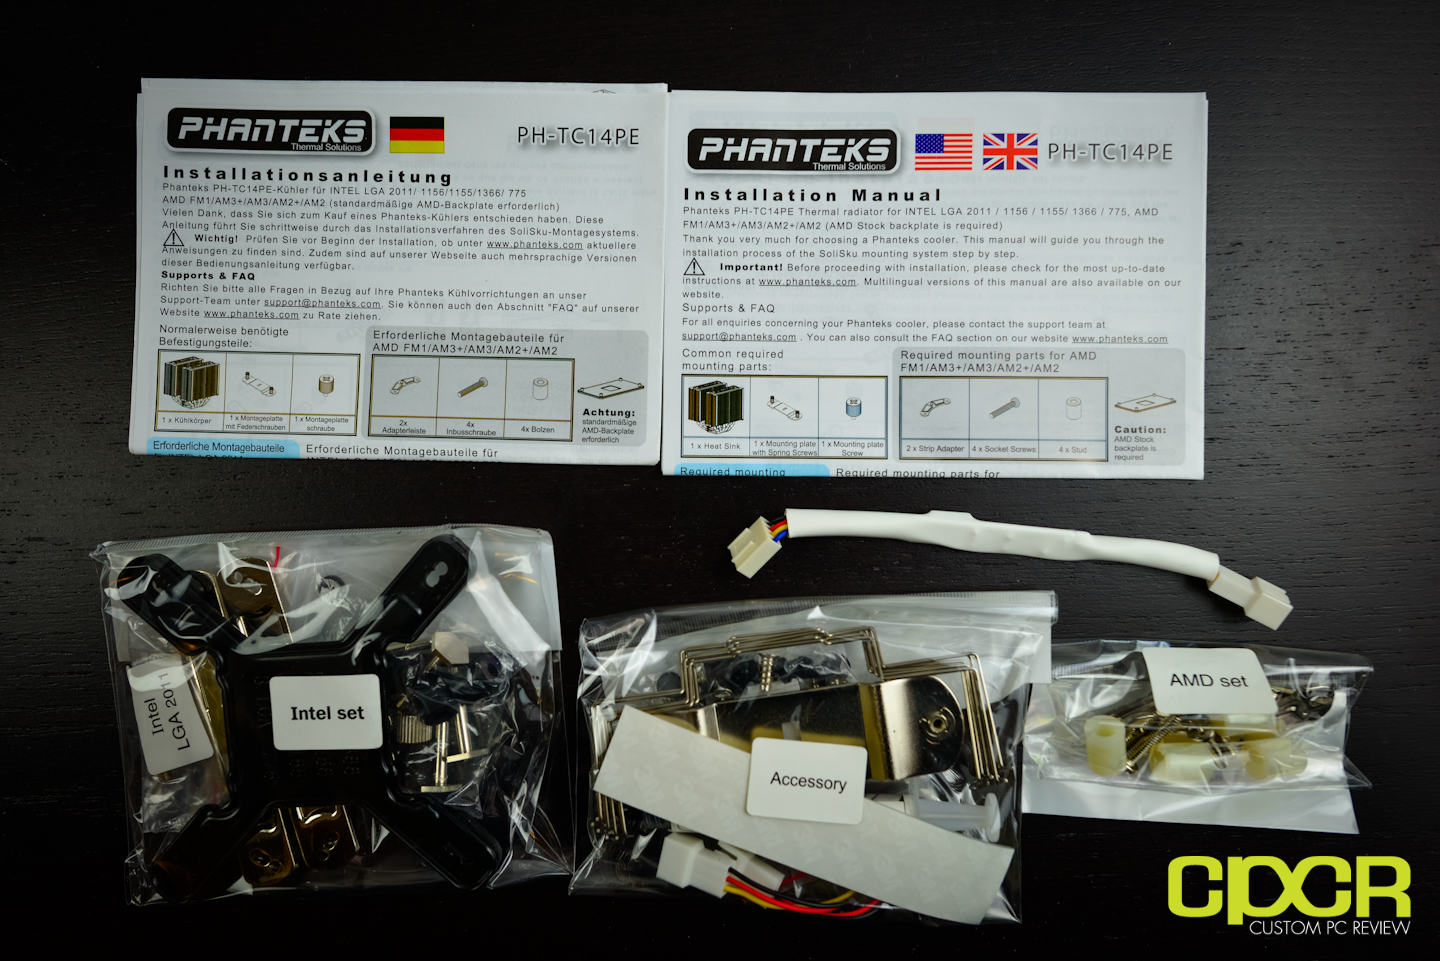
Here’s a look at the accessory package with the PH-TC14PE. Everything’s still just as I remember from our last review, but they’ve also included a 3 pin to 4 pin PWM adapter, which allows the fans to be controlled via any 4 pin motherboard adapter. This allows fans to spin down when they’re not used to reduce noise. Nice thing about Phanteks packaging is that all the parts needed for the Intel set or the AMD set is labeled in individual packs. This makes it easy to identify all the mounting hardware needed for installation.
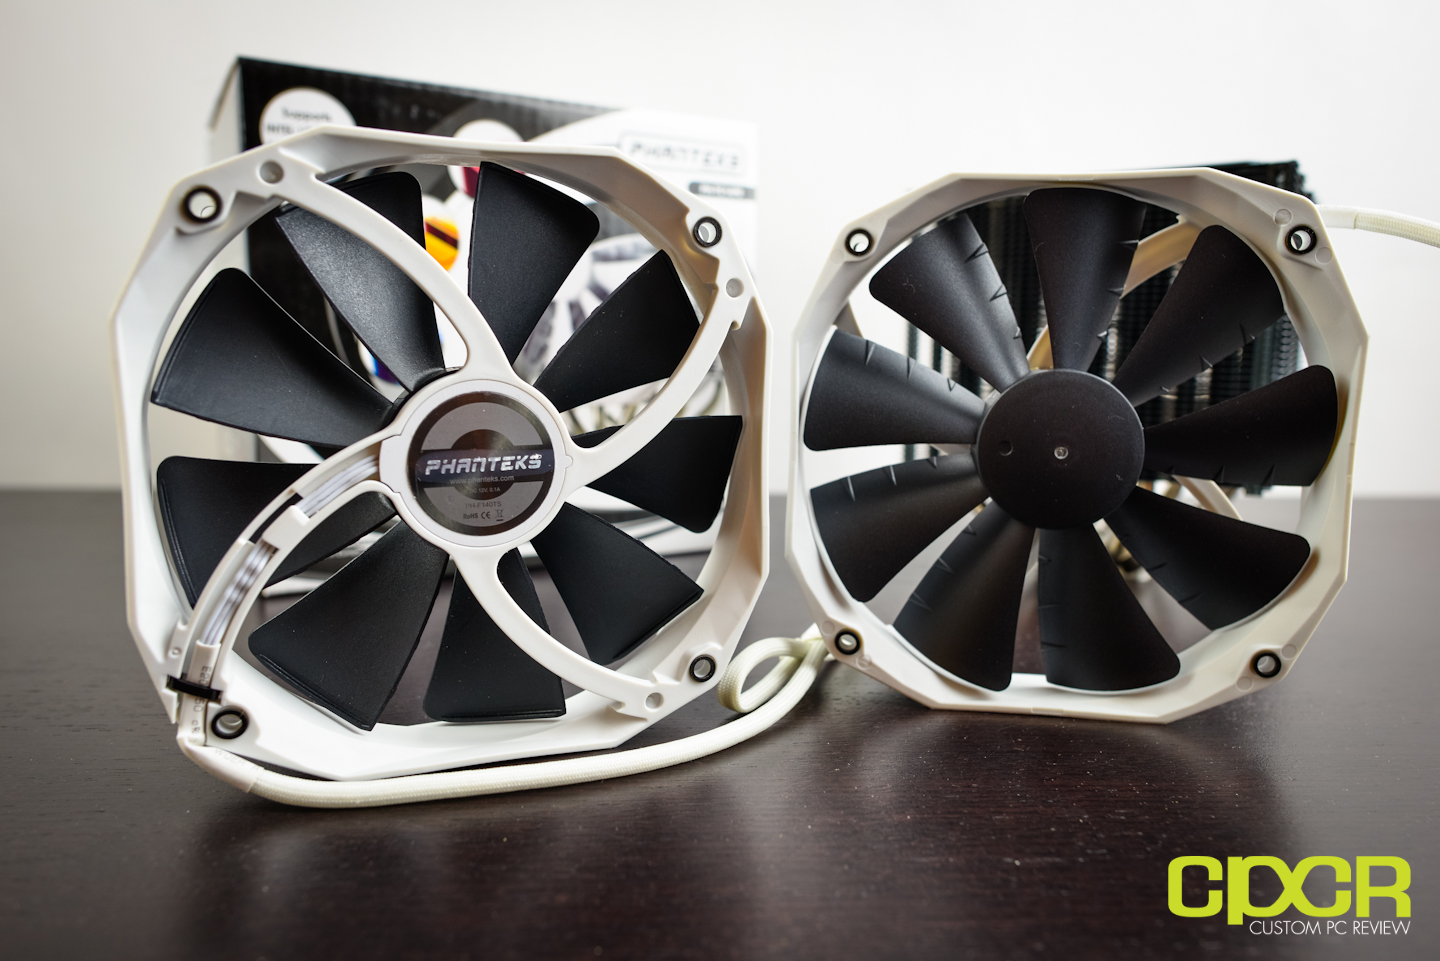
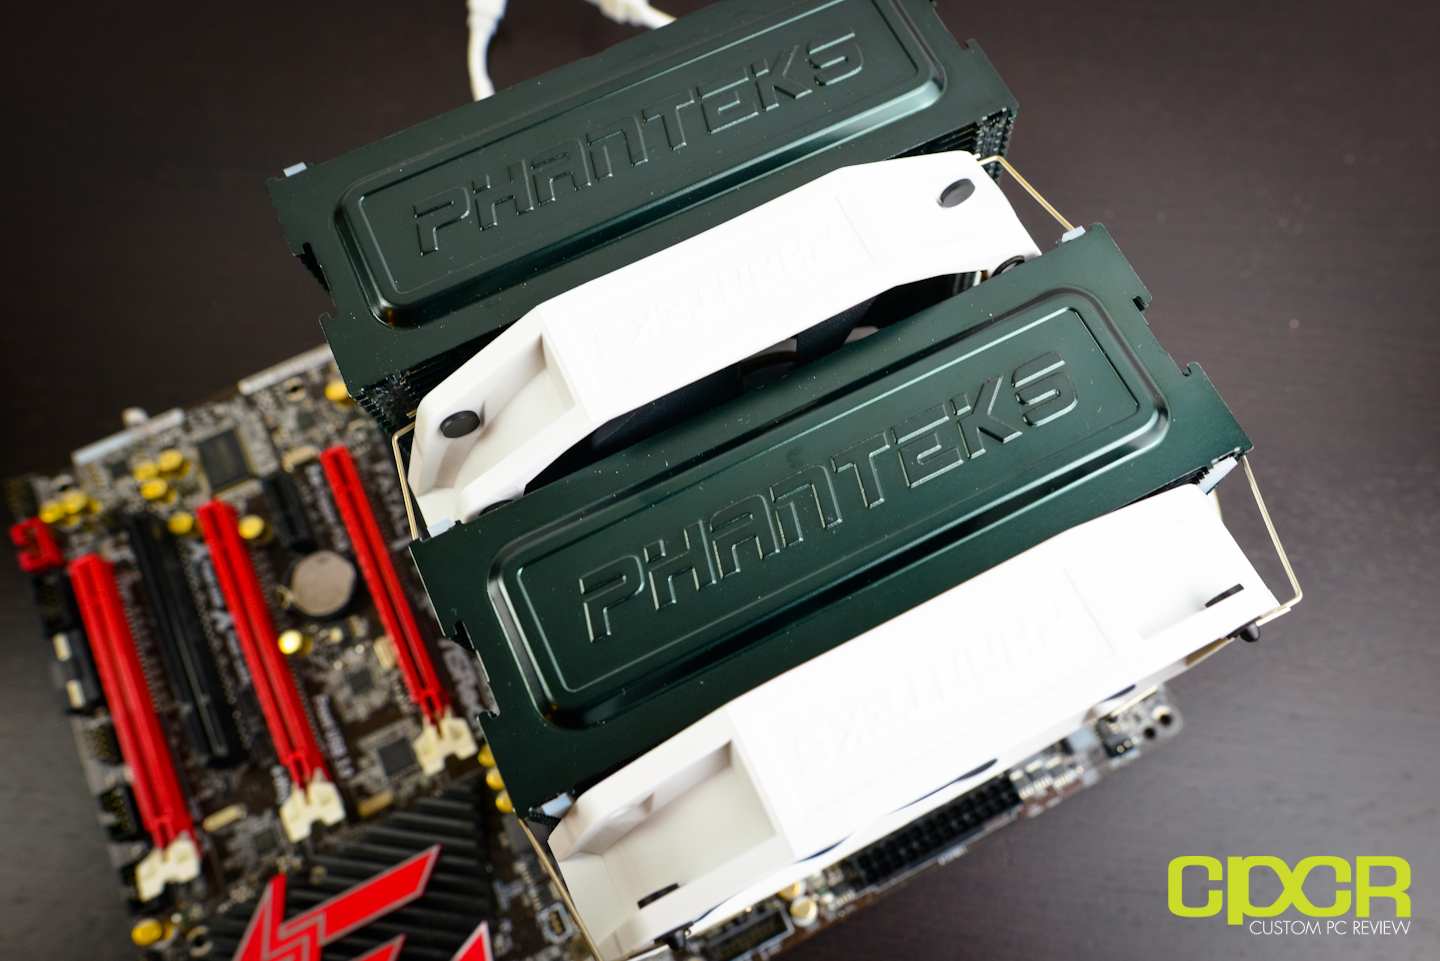
Here’s a look at the fans on the new revision of the Phanteks PH-TC14PE. The fans now include 4 struts in the rear instead of 3. They’re still 140mm fans with 120mm mounting holes so no change there.
They’re also just 3 pin fans, but remember there’s now a 3 pin to 4 pin adapter that comes pre-included in the package.
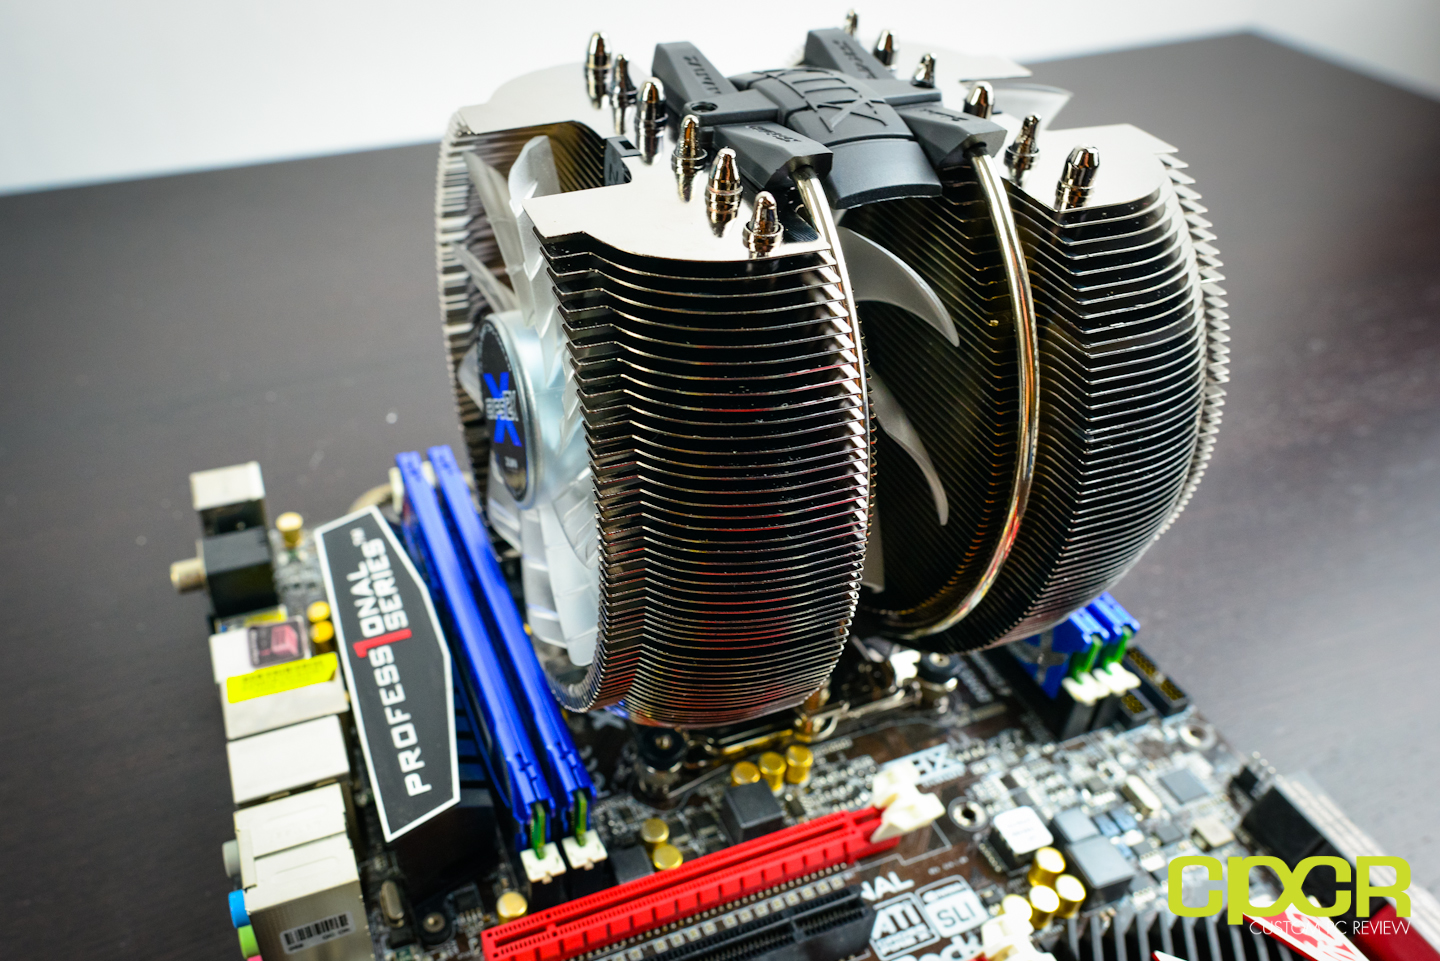
Well, this is a familiar sight… Although, since the last time we reviewed the Phanteks PH-TC14PE, Phanteks has added the option of having a black heatsink, which I personally like very much.
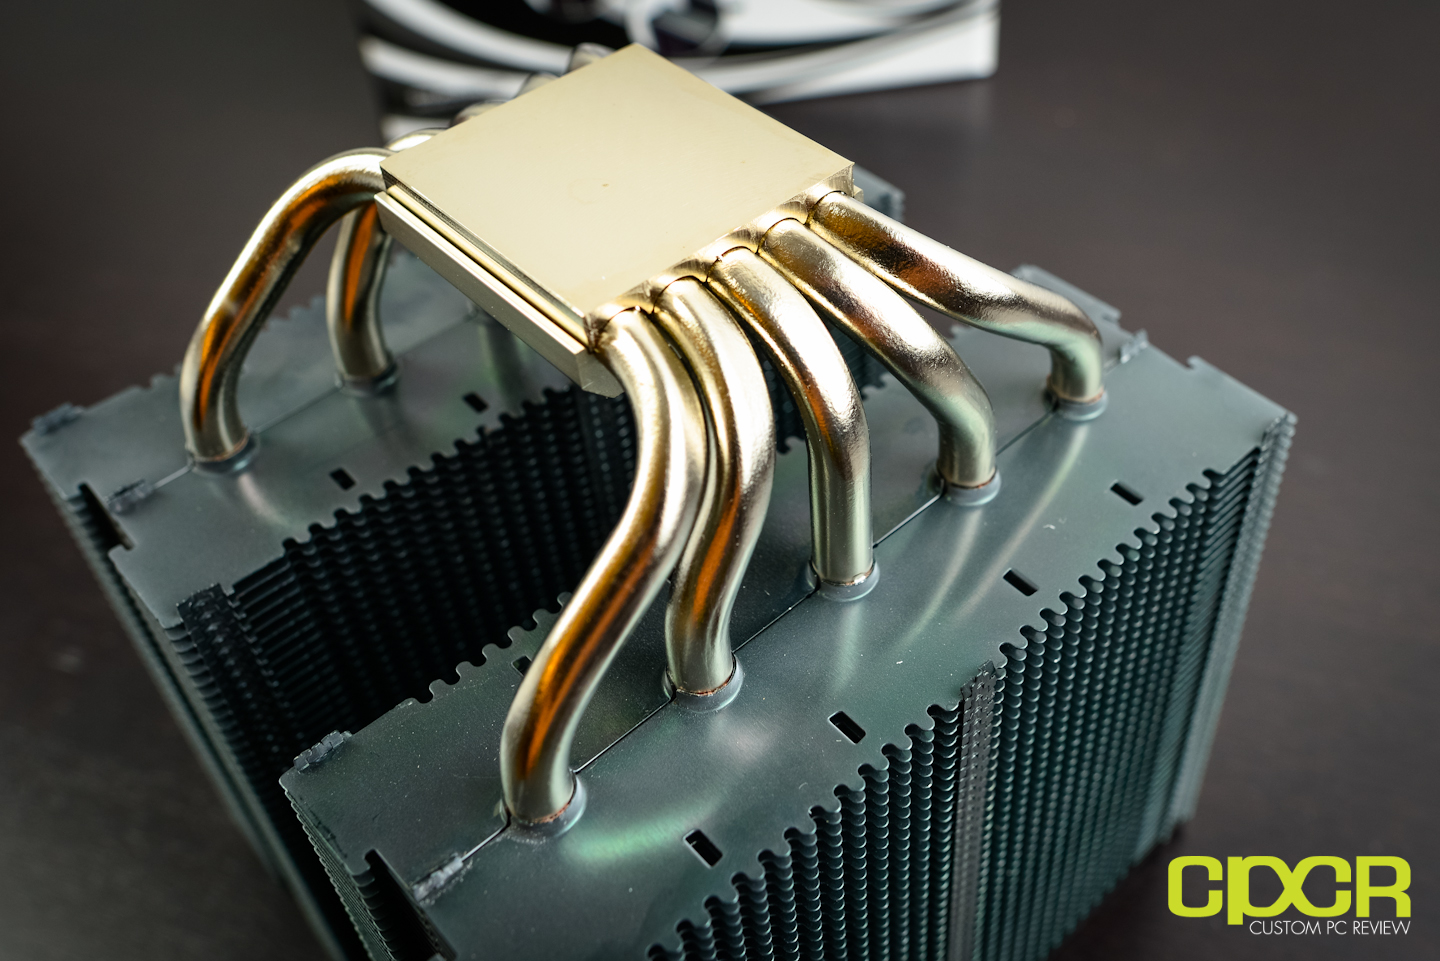
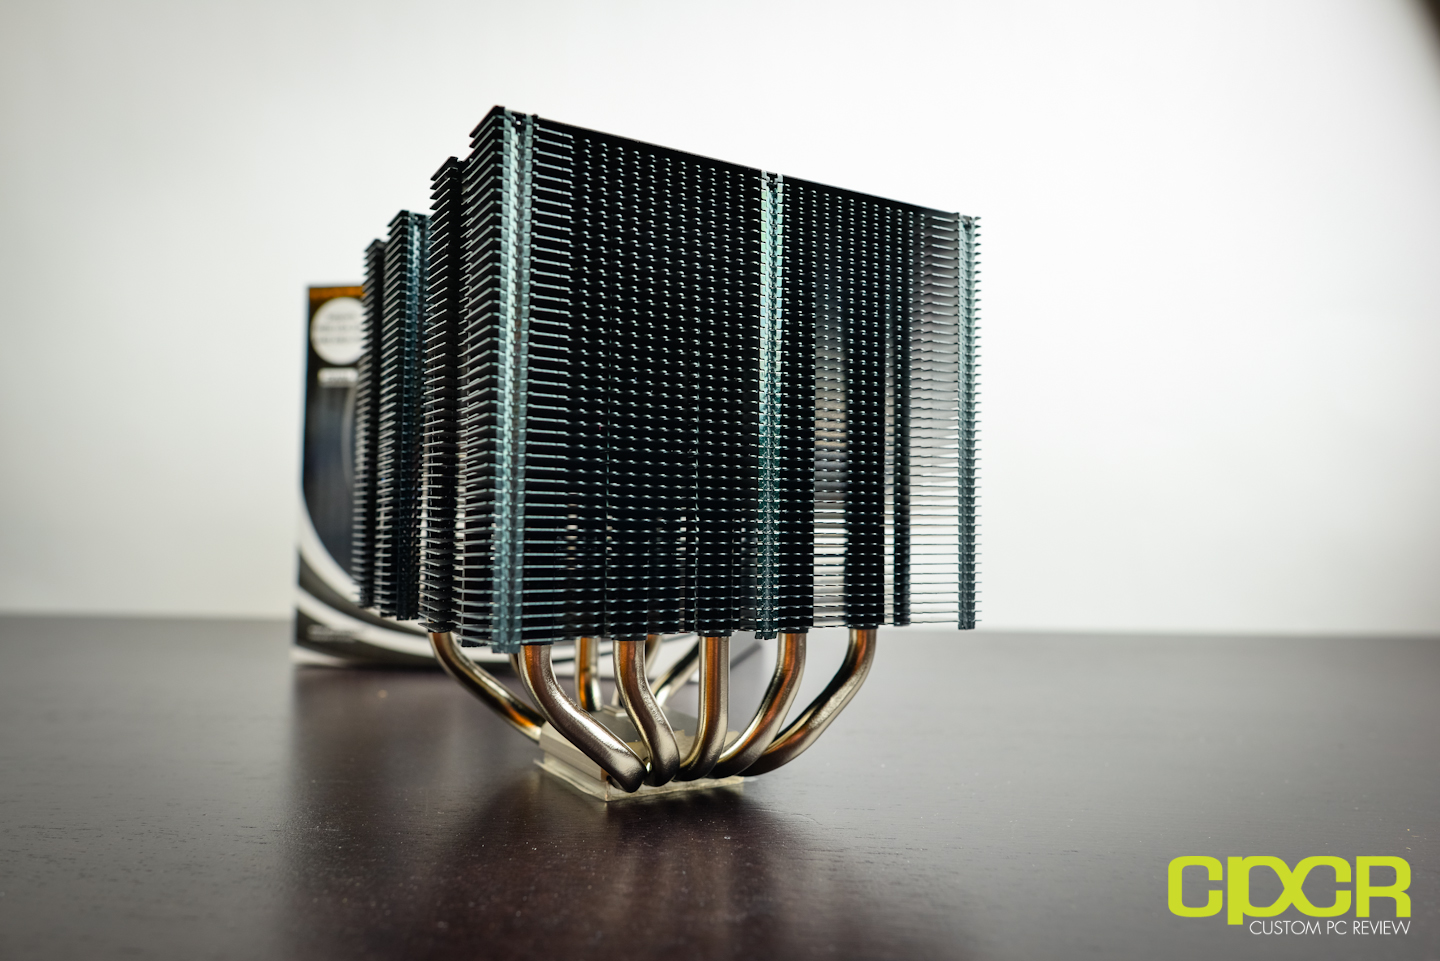
Here’s a look at the base for the PH-TC14PE. Very well machined base here, which should conduct heat very well. Phanteks has gone with a five massive 8mm heatpipe array which bring heat away from the CPU into the heatsink to be dispersed.
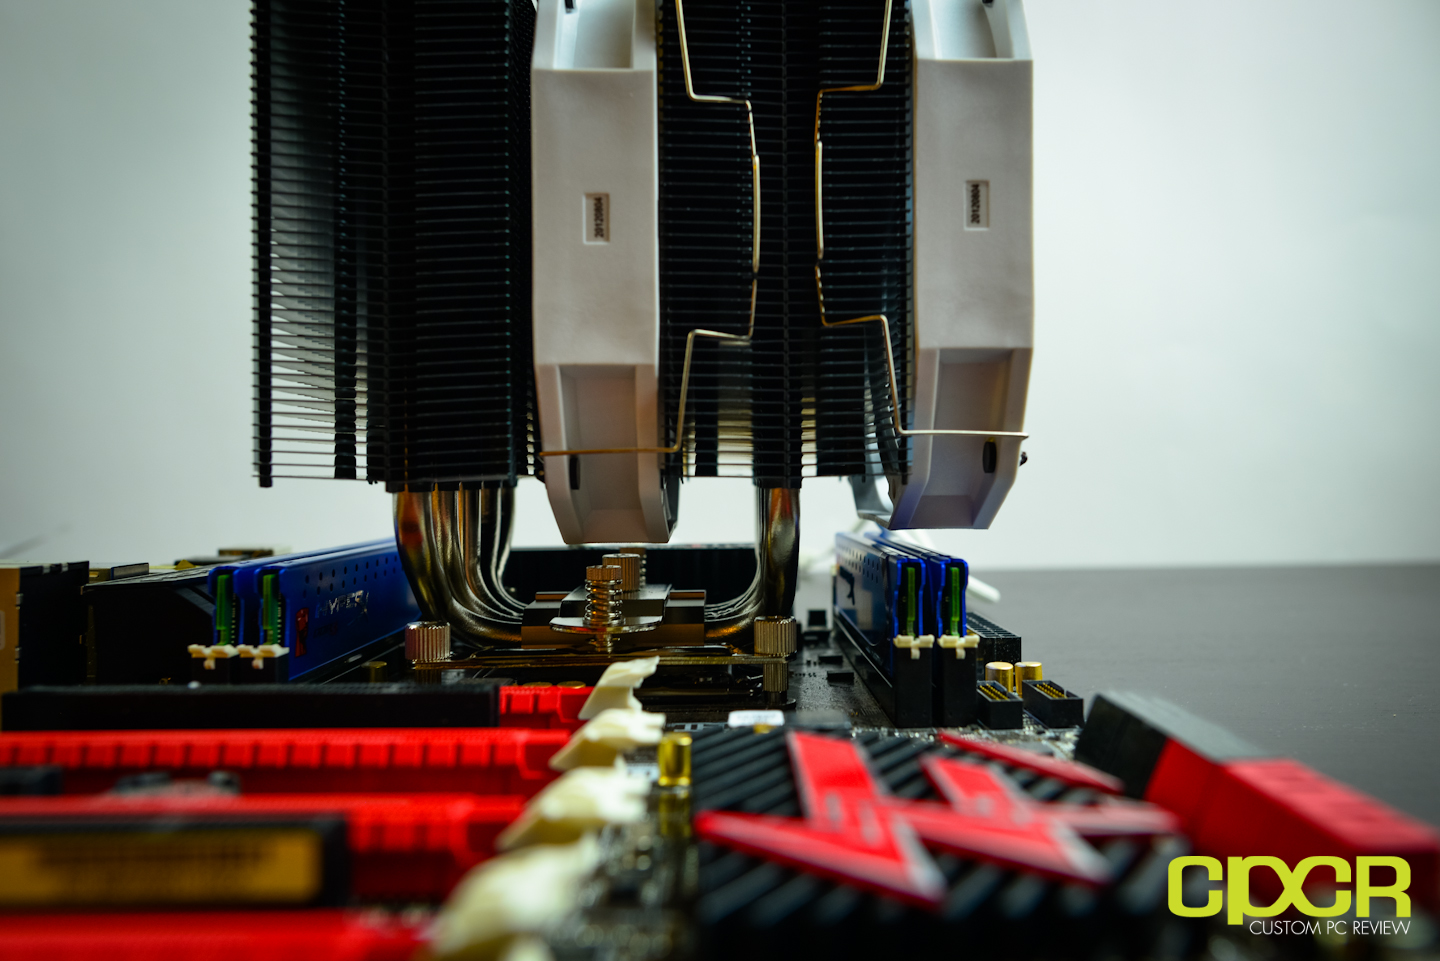
In terms of memory clearance, you’ll definitely want to go with low profile memory with the PH-TC14PE. As you can see, there isn’t much clearance between the Kingston HyperX Genesis we have here and the PH-TC14PE so definitely don’t go with memory with oversized heatsinks as it simply won’t fit.
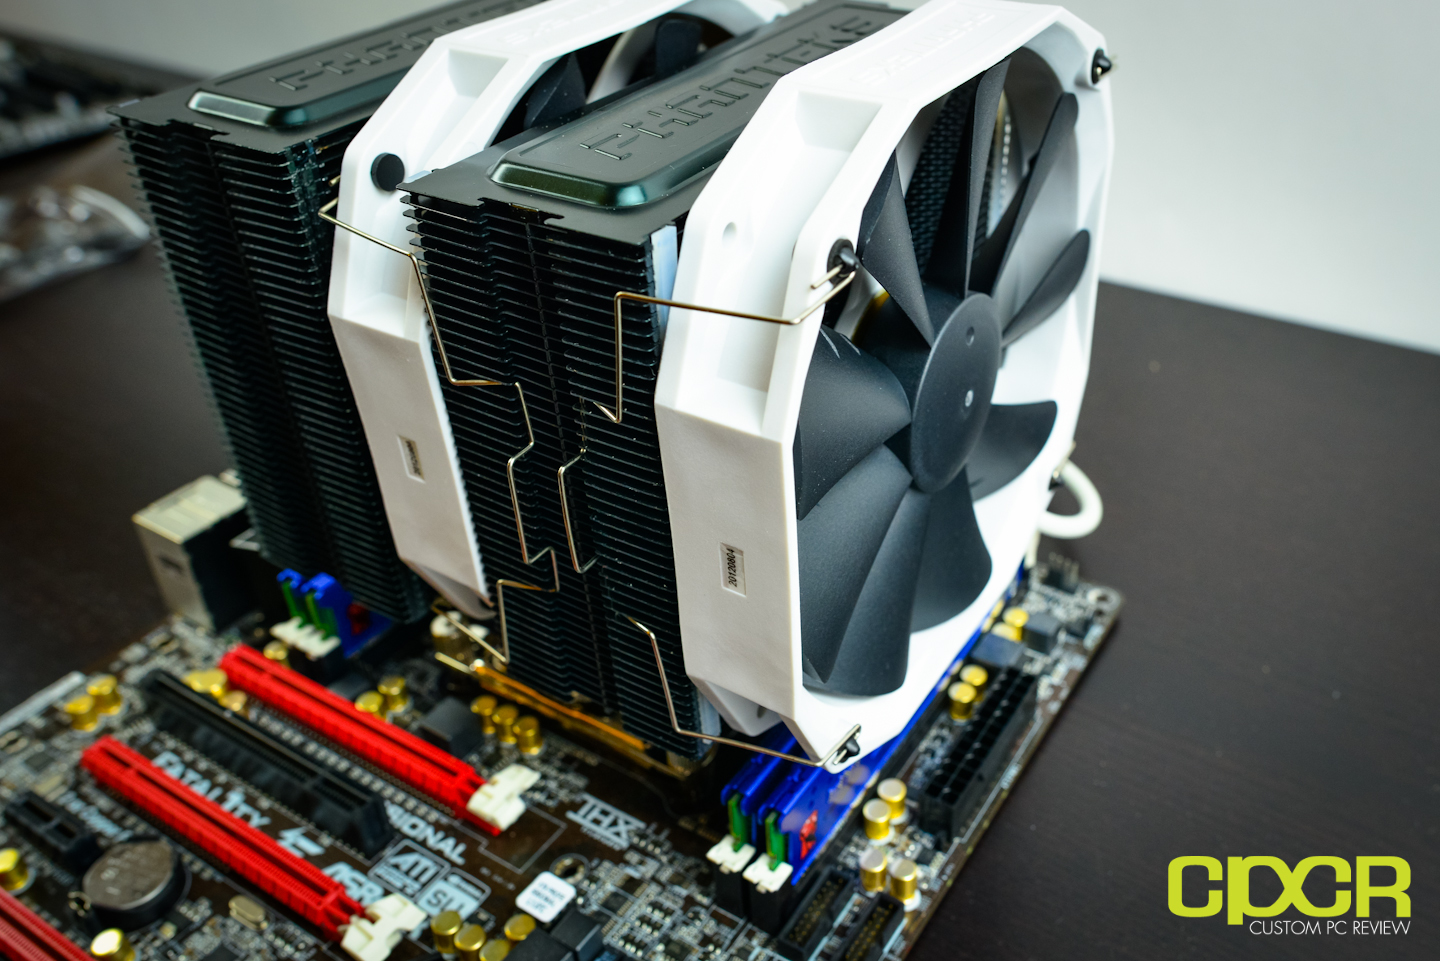
Here’s a look at the PH-TC14PE black installed.
[section label=”Noctua NH-D14 SE2011″]
A Closer Look
Noctua NH-D14 SE2011
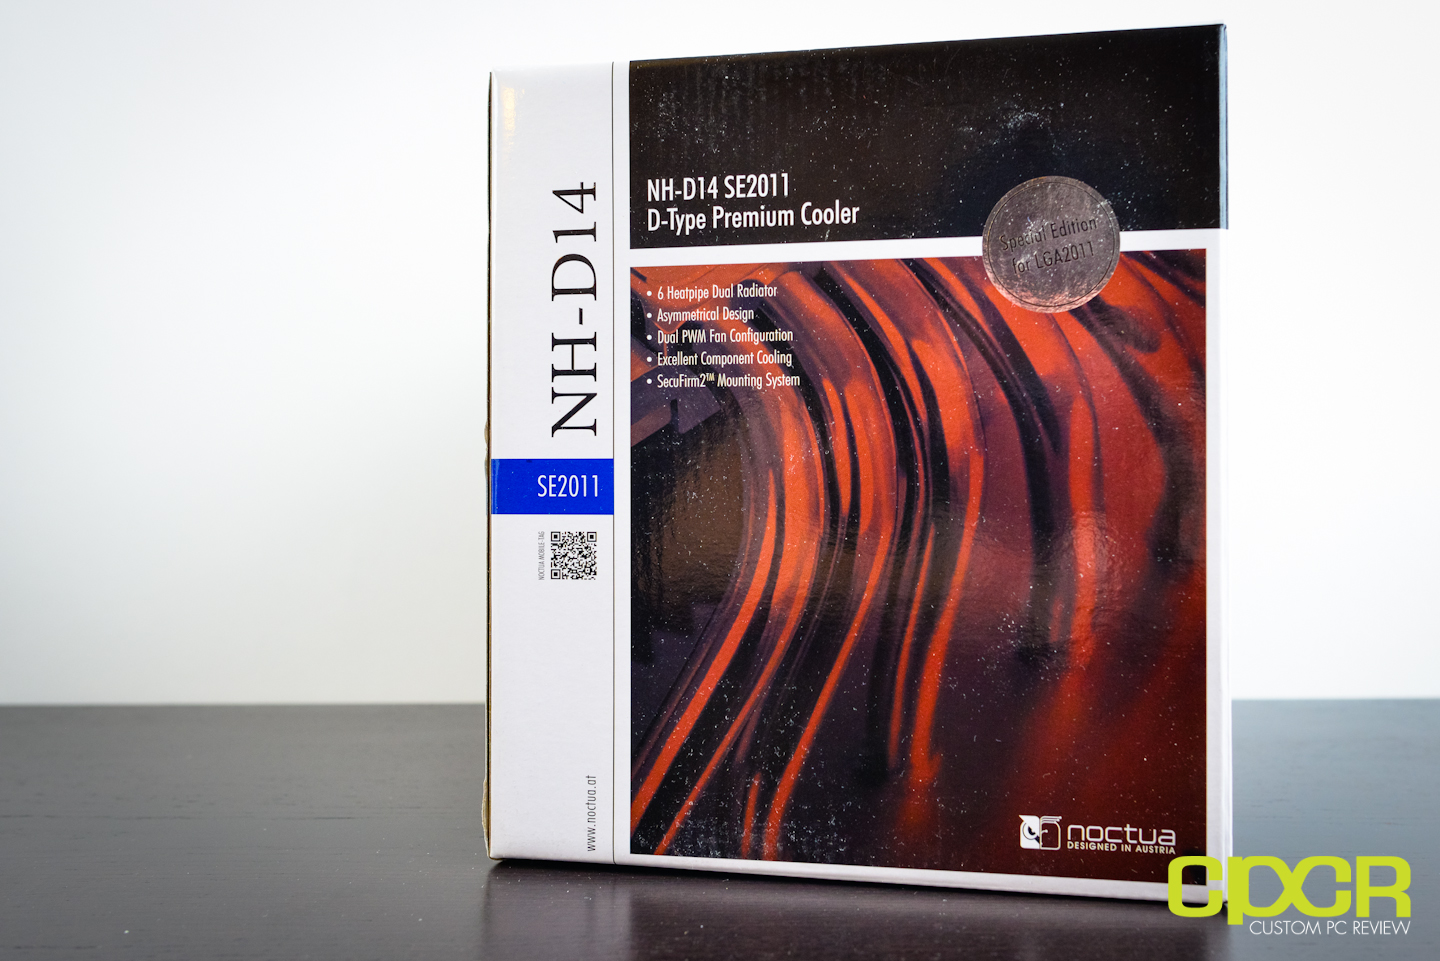
Here’s a look at the packaging for the Noctua NH-D14 SE2011. It’s pretty much a simple white box, but definitely watch out for the SE2011 branding. The SE2011 only supports LGA 2011 while the non-SE2011 one supports practically everything else. Why Noctua didn’t just add support for LGA 2011 with their standard NH-D14 I have no idea, but you’ll definitely want to watch out for the SE2011 branding if you’re buying the NH-D14 for the LGA 2011 socket (and vice versa if you’re not).
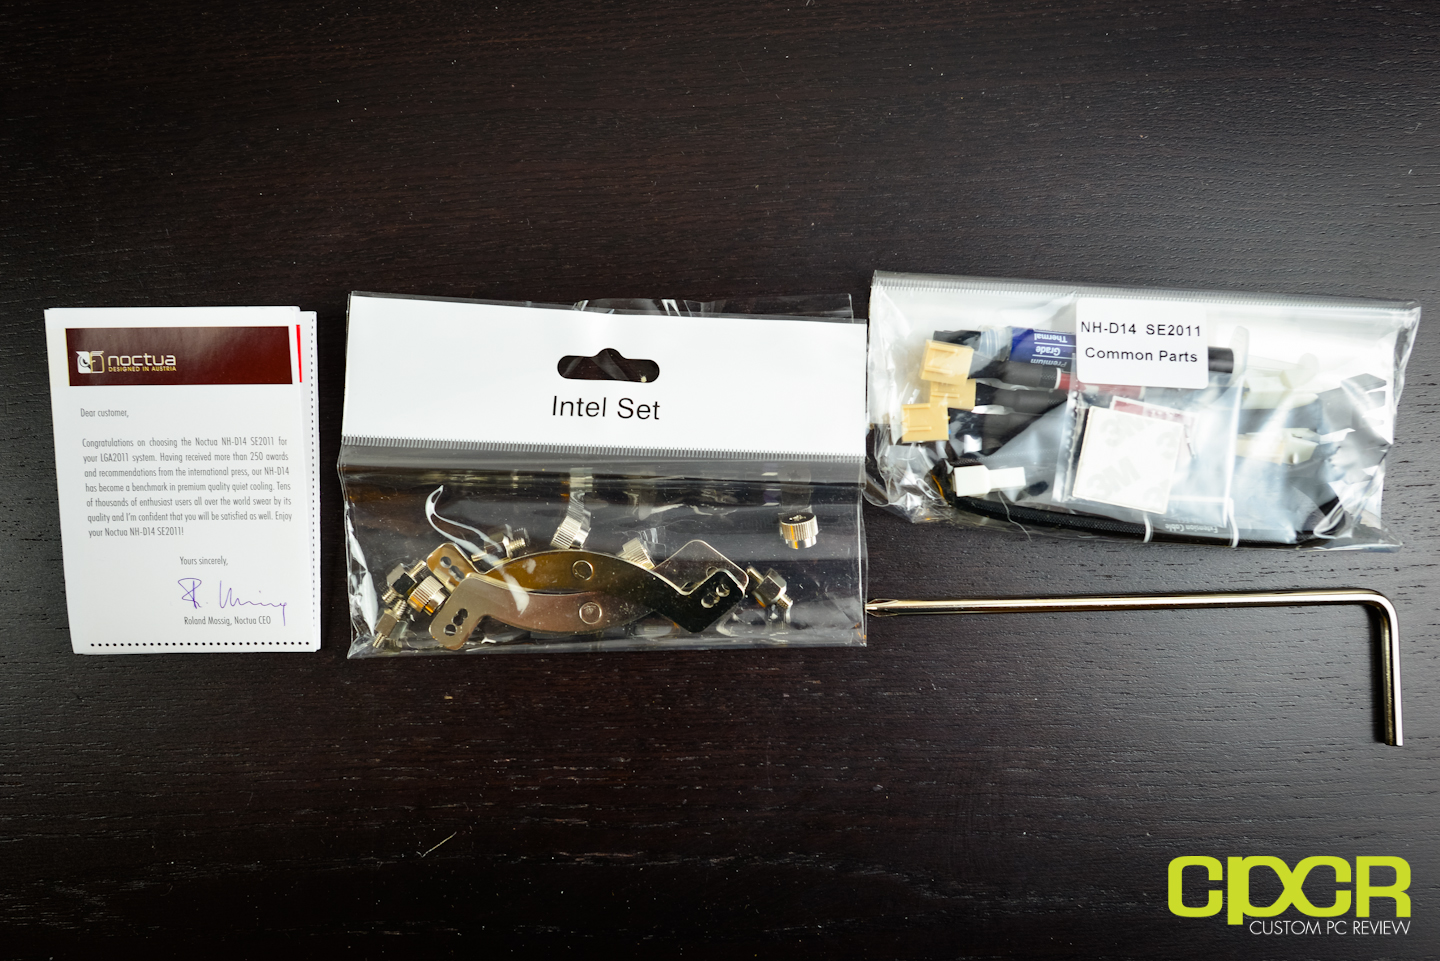
Like always, Noctua’s packaging is absolutely top notch. Each bag is individually labeled/packaged, instructions are amazing, and they’ve also included a little screwdriver for you just in case you don’t have access to one for installation. Whenever you deal with a Noctua product, the packaging itself simply lets you feel like you’ve purchased a high end product. Way to set the standard, Noctua.
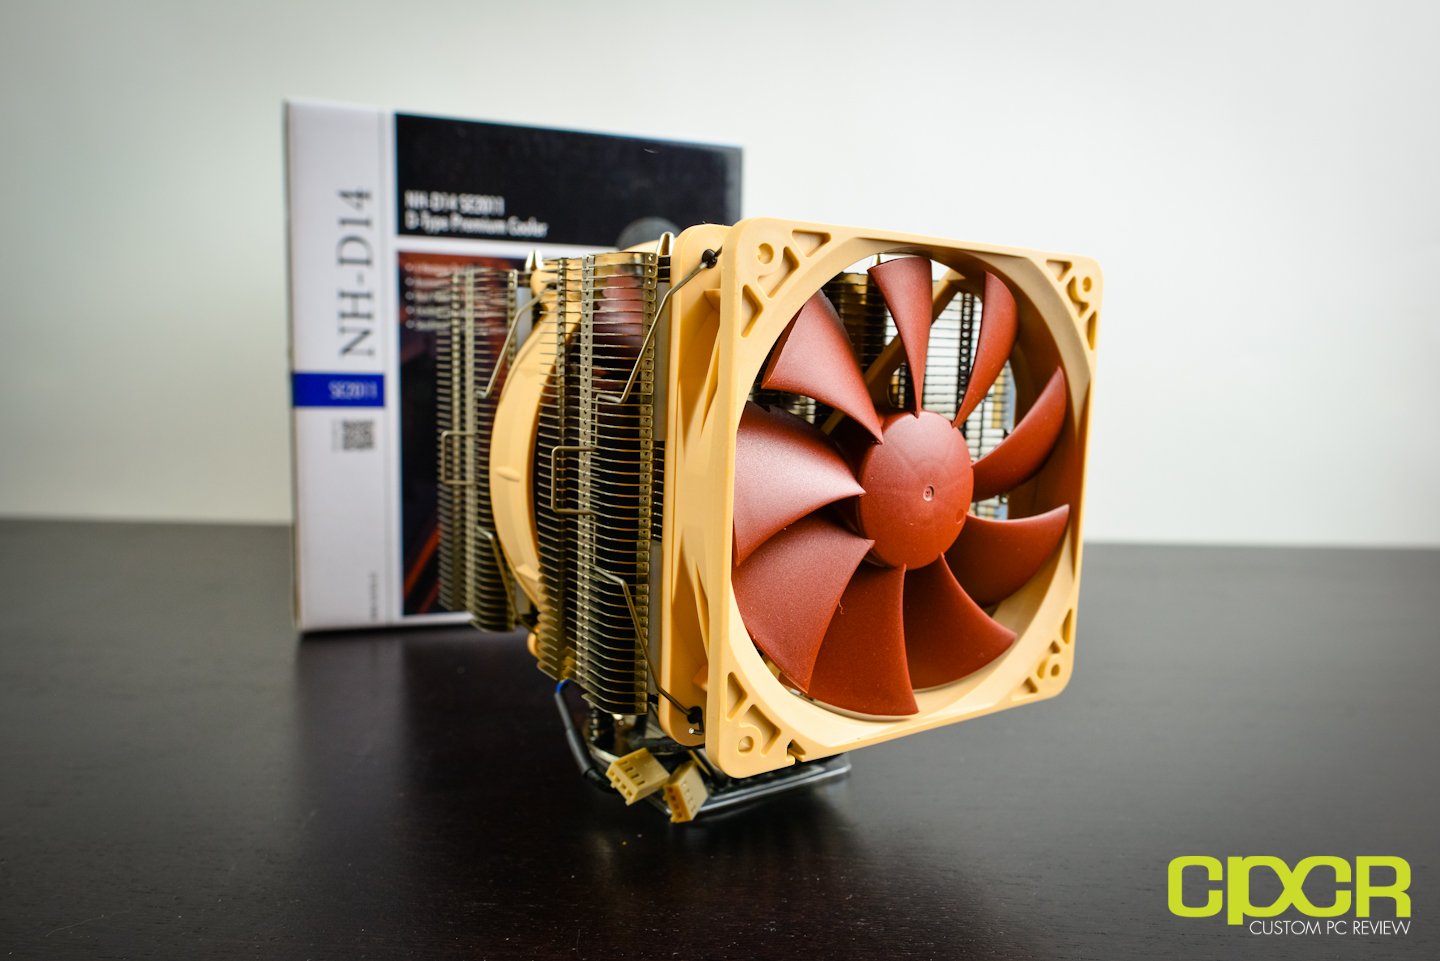
For those who wondered why the NH-D14 SE2011 box was so big, it’s because Noctua ships the NH-D14 SE2011 with the fans pre-mounted on the cooler. This way, you know exactly how the fans should be mounted, which is a nice touch since you do need to figure all this out on other coolers. It’s generally not a difficult process, but it’s always nice when something is done for you straight from the factory. Again, it’s all about that premium feel, which Noctua excels at.
What’s interesting about the NH-D14 SE2011 is that Noctua went with a NF-P14/NF-P12 fan configuration which uses a combination of a 120mm fan up front and a 140mm fan in the center rather than two 140mm fans or two 120mm fans.
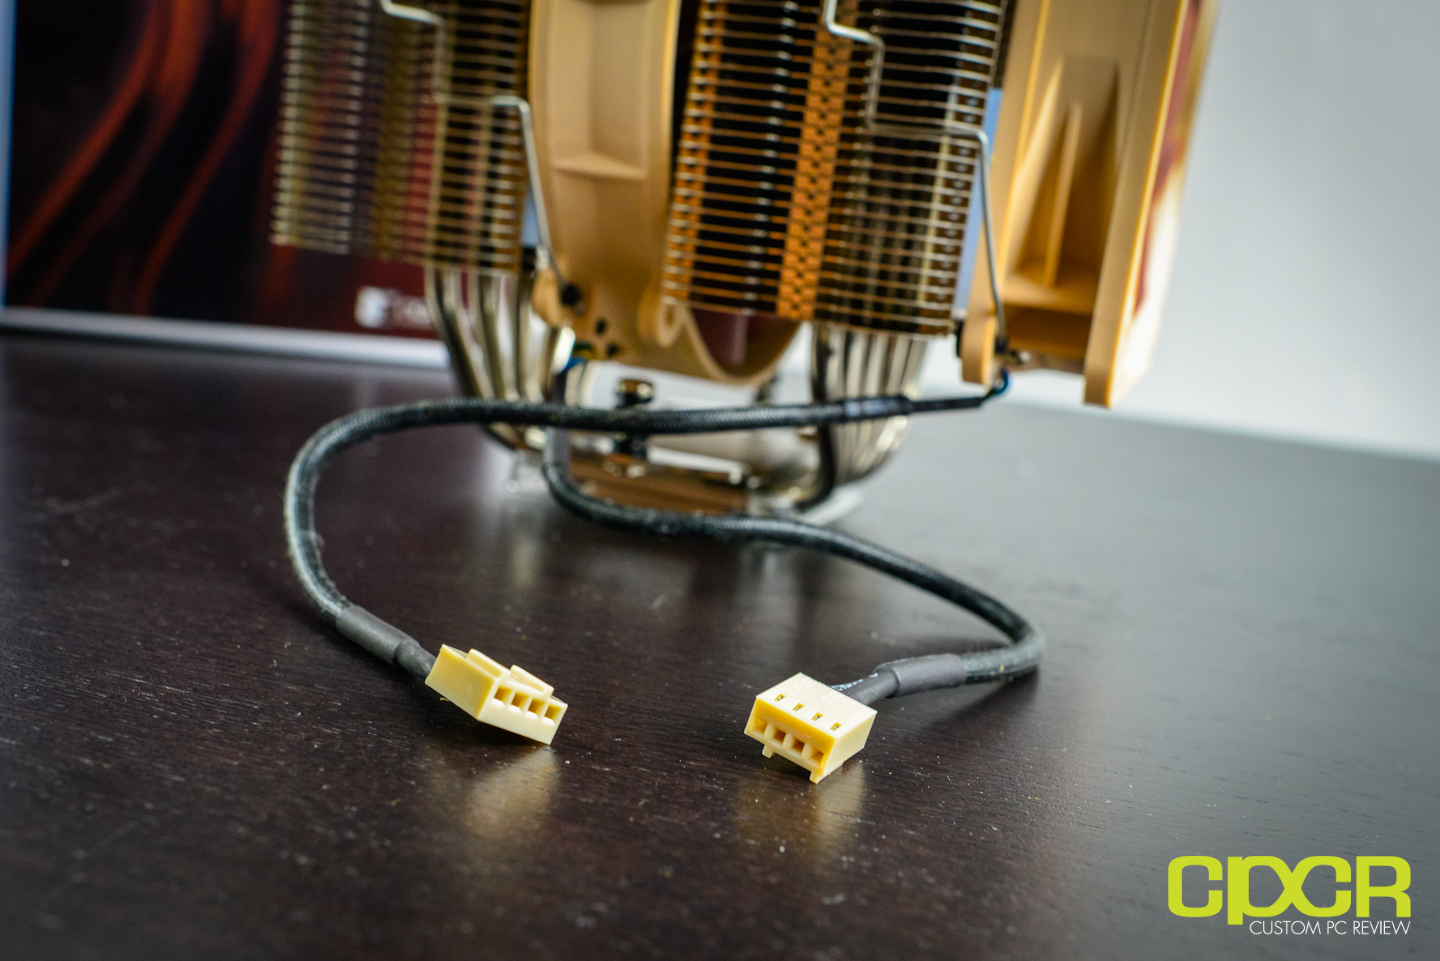
Each fan on the NH-D14 SE2011 is a 4 pin PWM fan, so the fans may be controlled via the motherboard. Noctua does a ton of research in producing fans that are both quiet and perform well, which is why 4 pin PWM fans are a staple on their coolers.
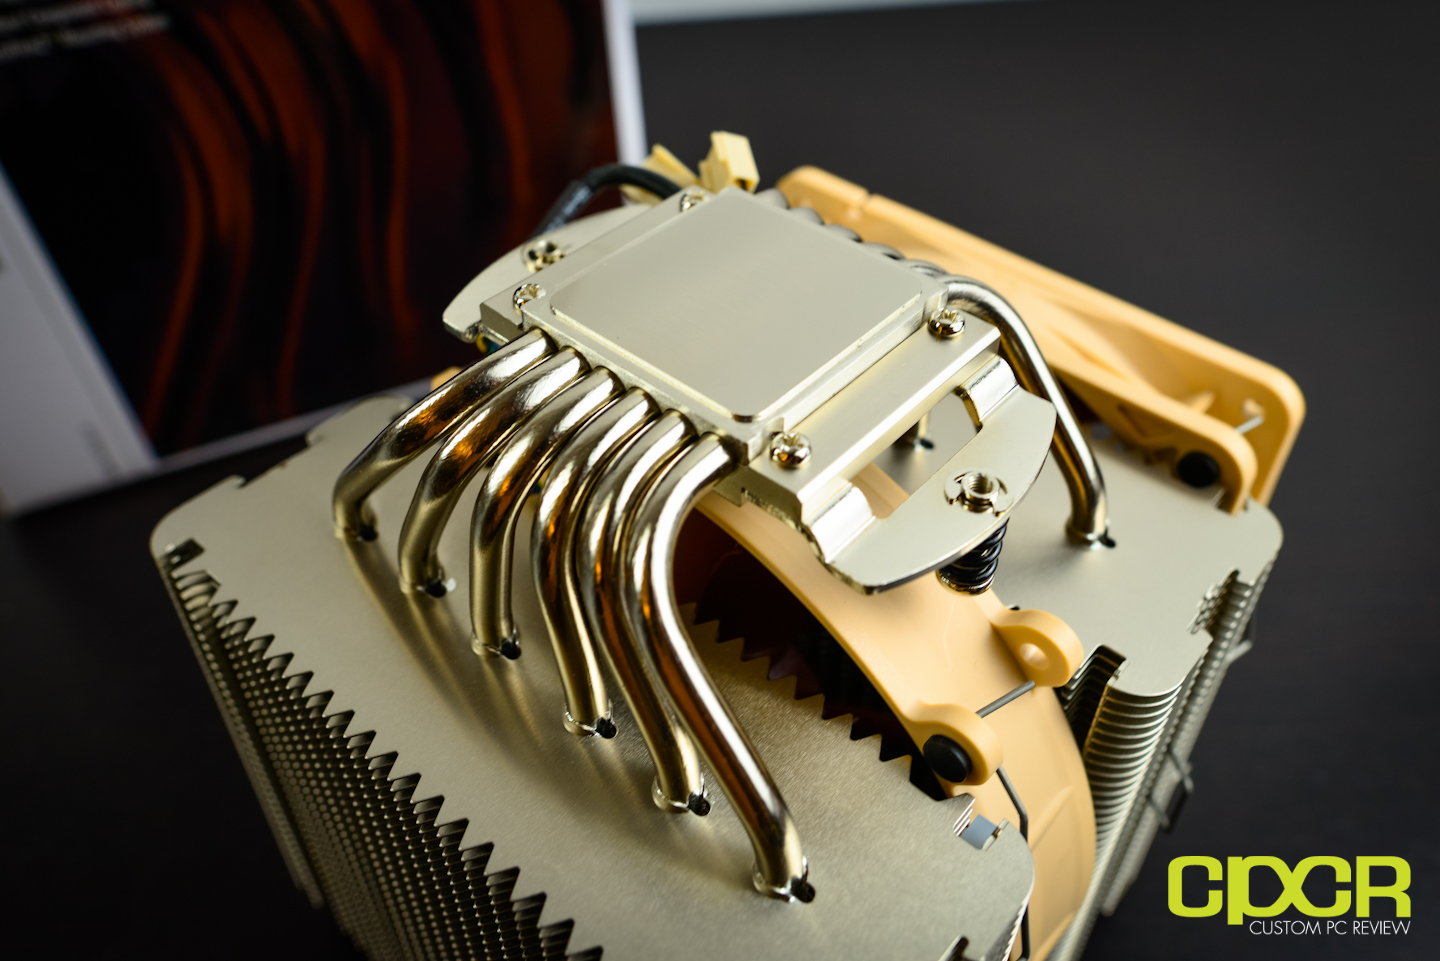
Here’s a look at the base of the cooler. As expected, the machining is fantastic and the base is absolutely huge, which is great for the LGA 2011 processor as the processor itself is huge as well. This allows more surface area to touch the CPU therefore dissipating the maximum amount of heat.
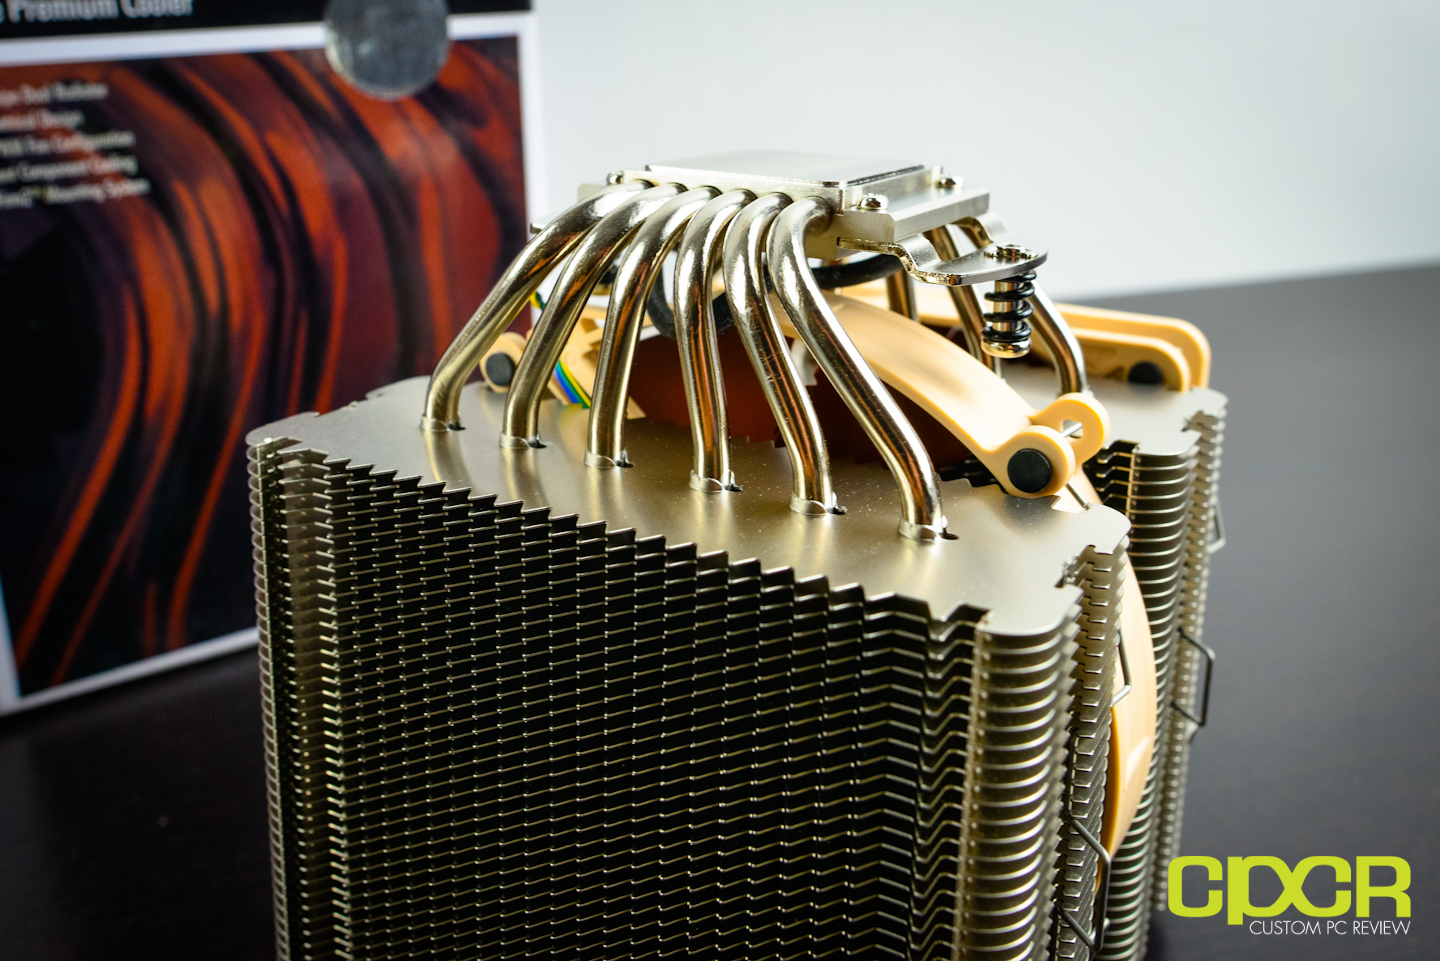
The NH-D14 SE2011 also includes a full array of six 6mm heatpipes for bringing heat away from the base. As you can see, Noctua is practically maxing out the amount of heatpipes as there physically isn’t any room for more heatpipes to be integrated onto the base.
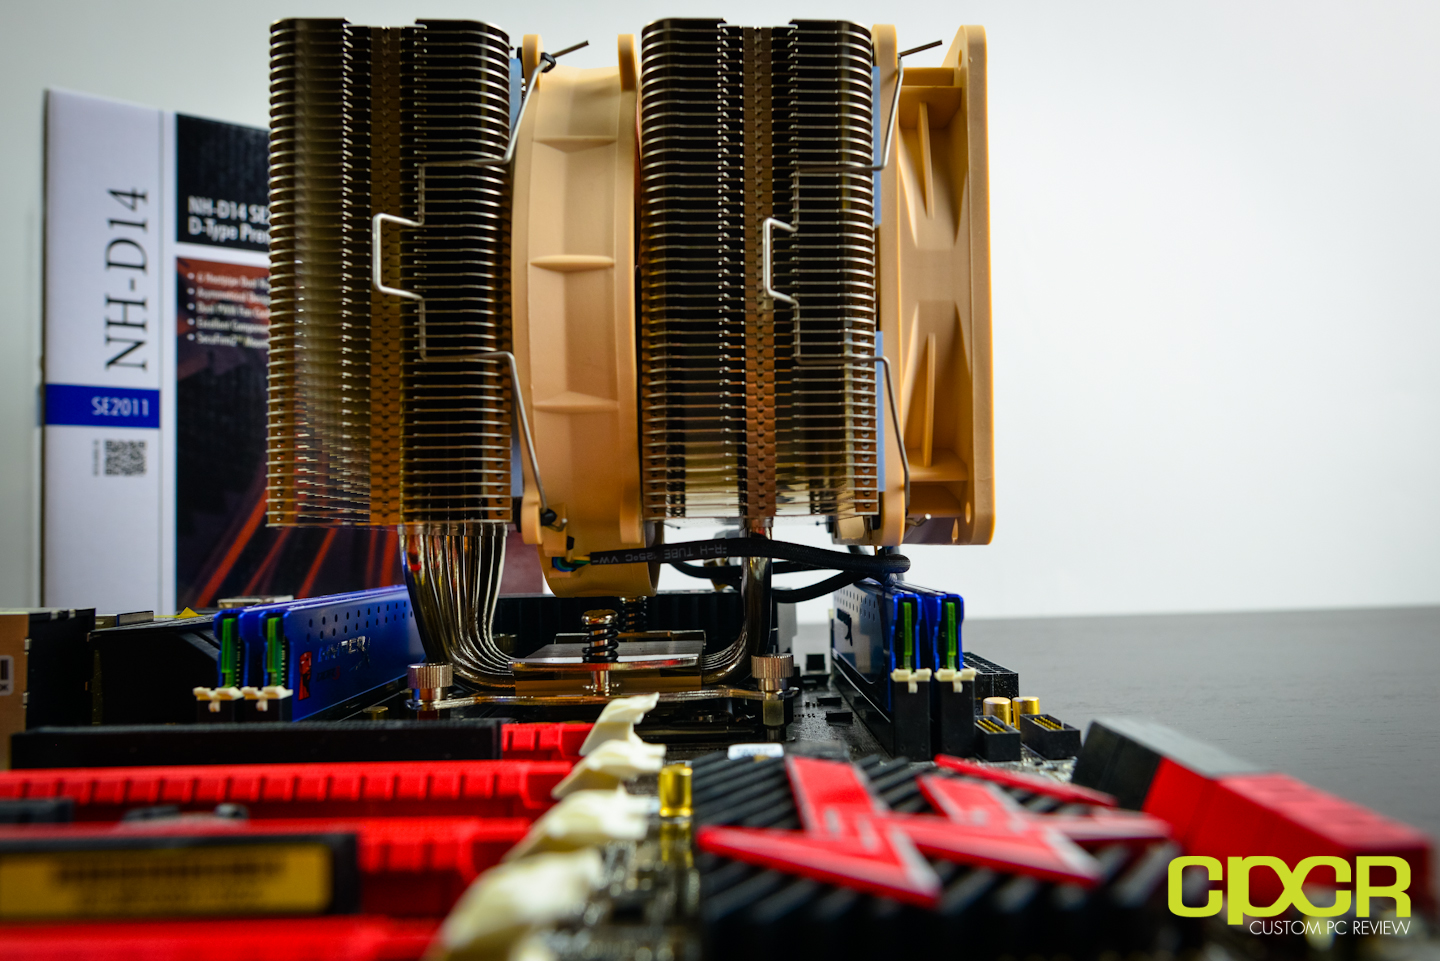
Like the Phanteks PH-TC14PE, there’s very little zero room for higher profile memory, so definitely be sure to purchase some low profile memory if you’re planning to use this cooler just to be on the safe side. The Noctua NH-D14 is a massive cooler, so even if you had beautiful heatsinks on your memory, there really isn’t much of a point as you probably wouldn’t see it.
[section label=”Zalman CNPS 12X”]
A Closer Look
Zalman CNPS 12X
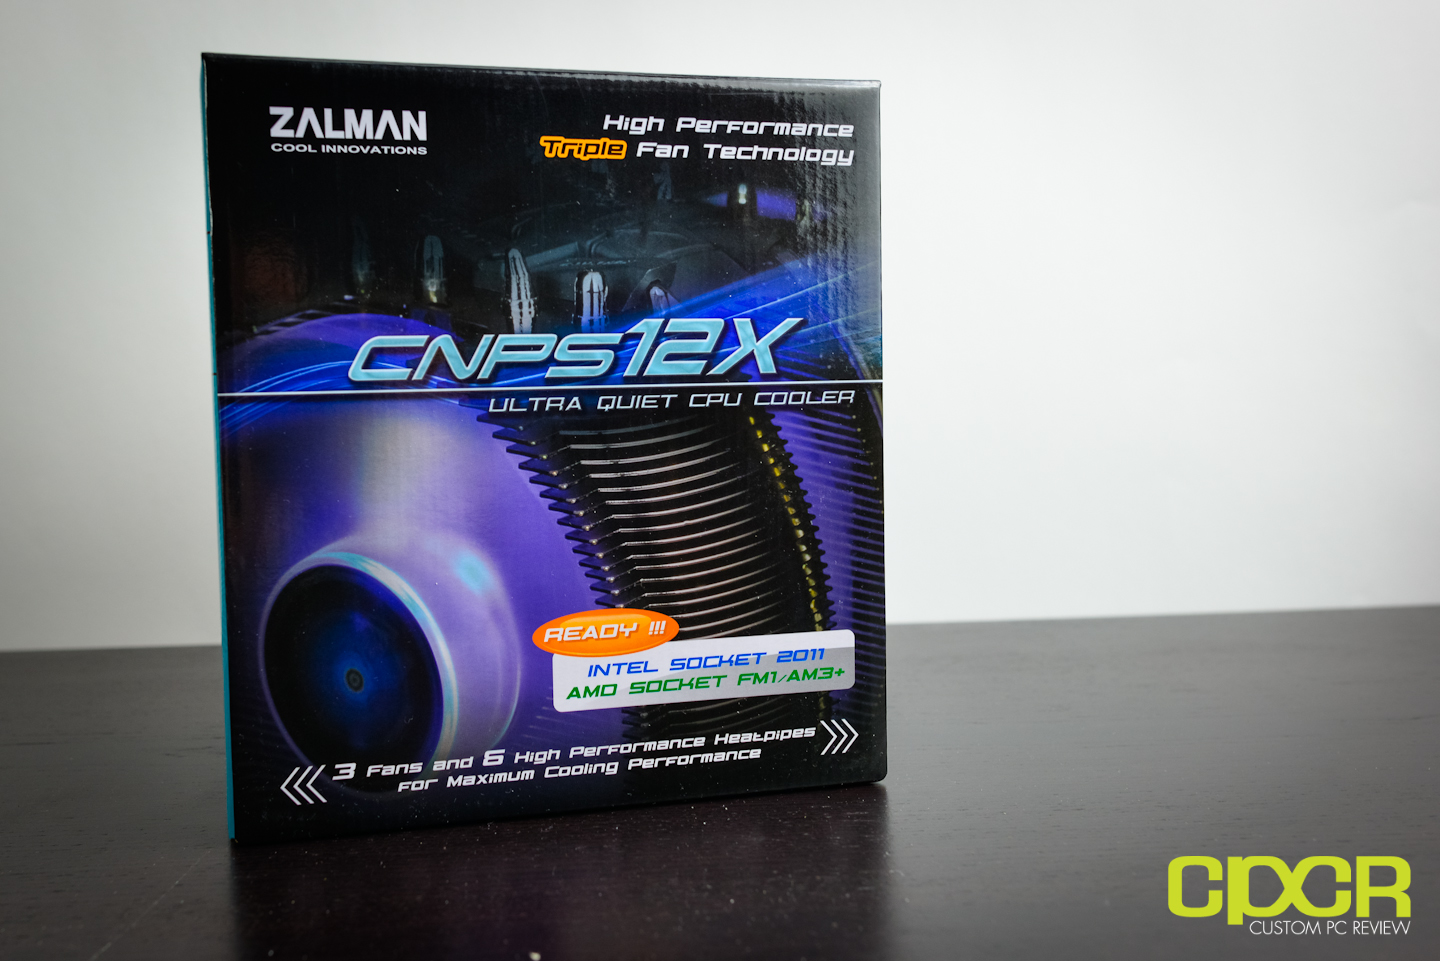
Here’s a look at the Zalman CNPS 12X. Zalman definitely has a very unique design with their new cooler, so let’s dig in and take a look.
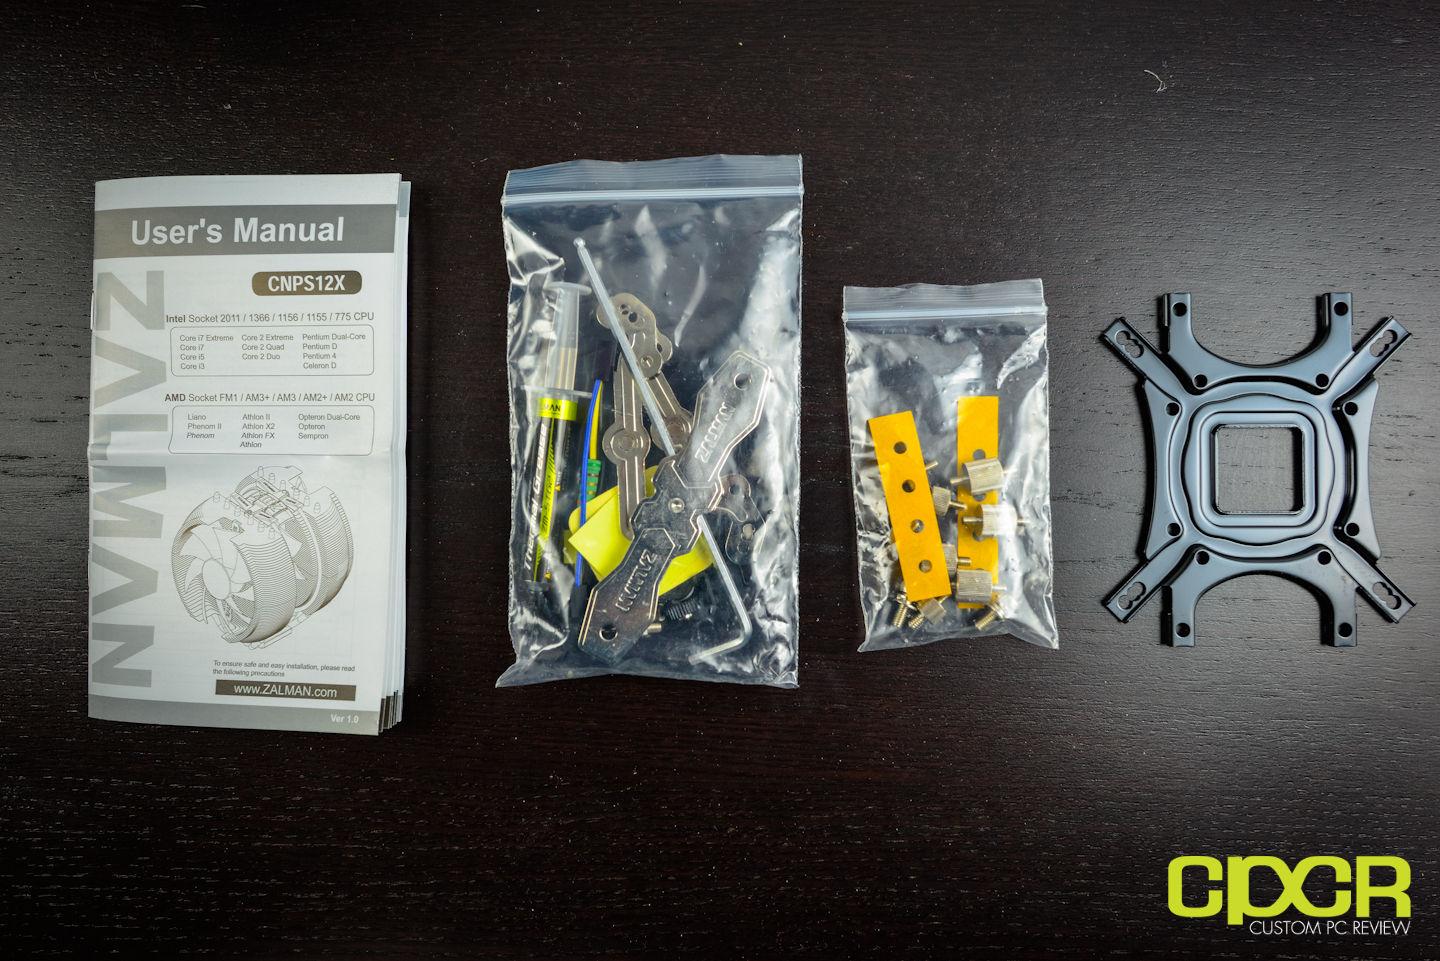
Here’s a look at the accessories for the CNPS 12X. Unfortunately, the bags are not labeled which makes it quite difficult to find what mounting hardware is necessary to mount the cooler. This definitely isn’t Noctua!
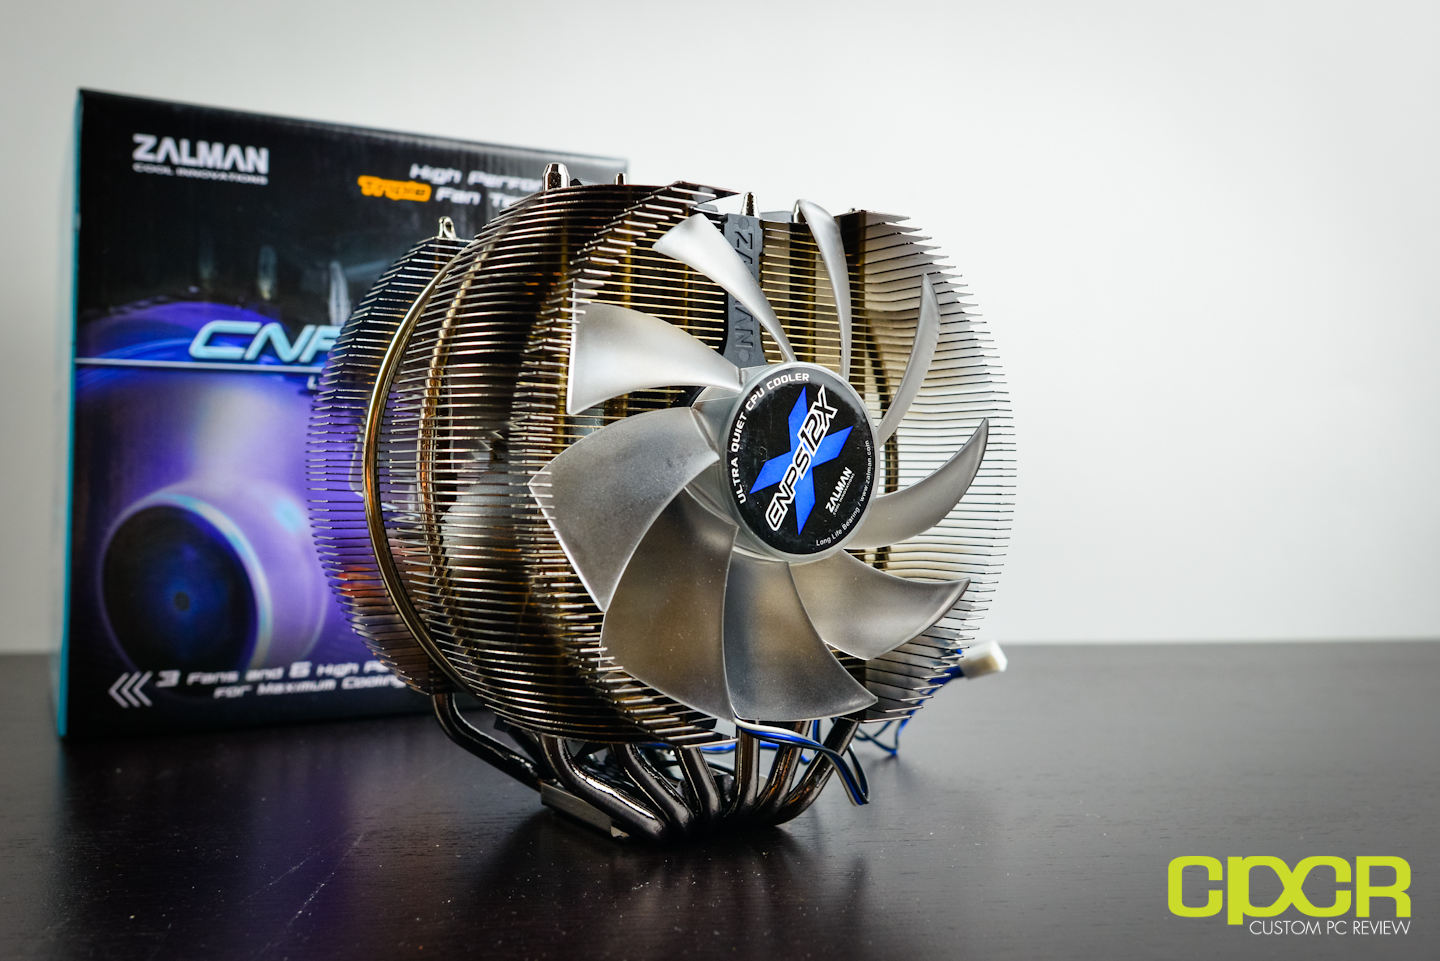
Here’s a look at the cooler itself. As I mentioned, it’s a very unique, circular design and it comes from the factory with three fans onboard. The fans are pre-installed so that they turn in different directions to provide a push/pull configuration straight from the factory. That said, the fans will probably not be user replaceable so if any of the fans die, you’ll have to go through Zalman to have it fixed.
With the CNPS 12X, Zalman has gone with a direct touch heatpipe design where the heatpipes themselves actually touch the top of the CPU to provide the maximum heat dissipation possible.
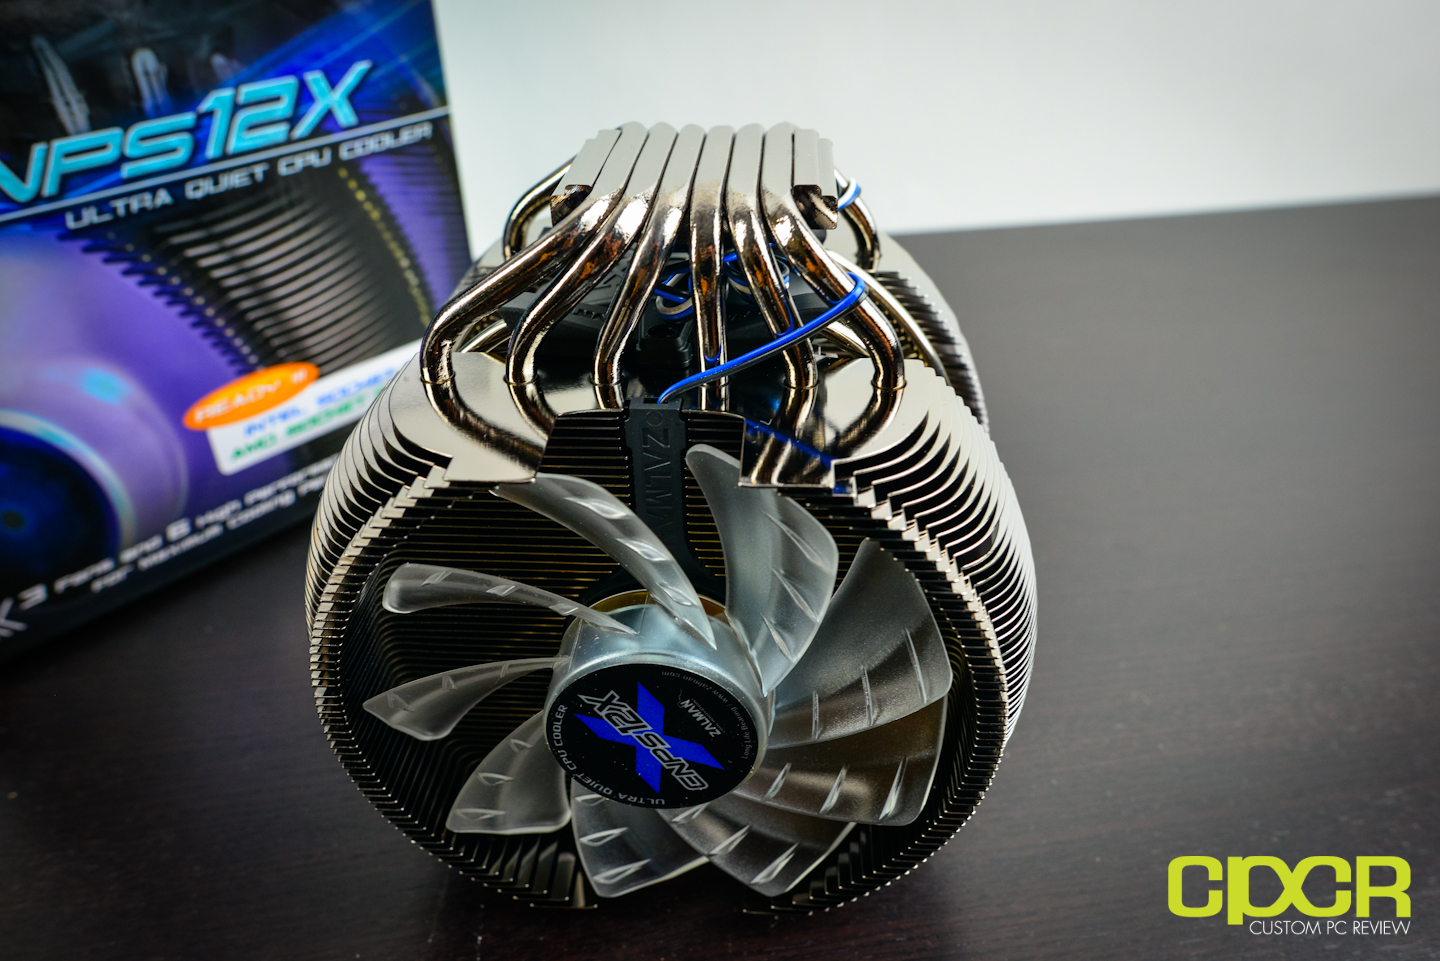
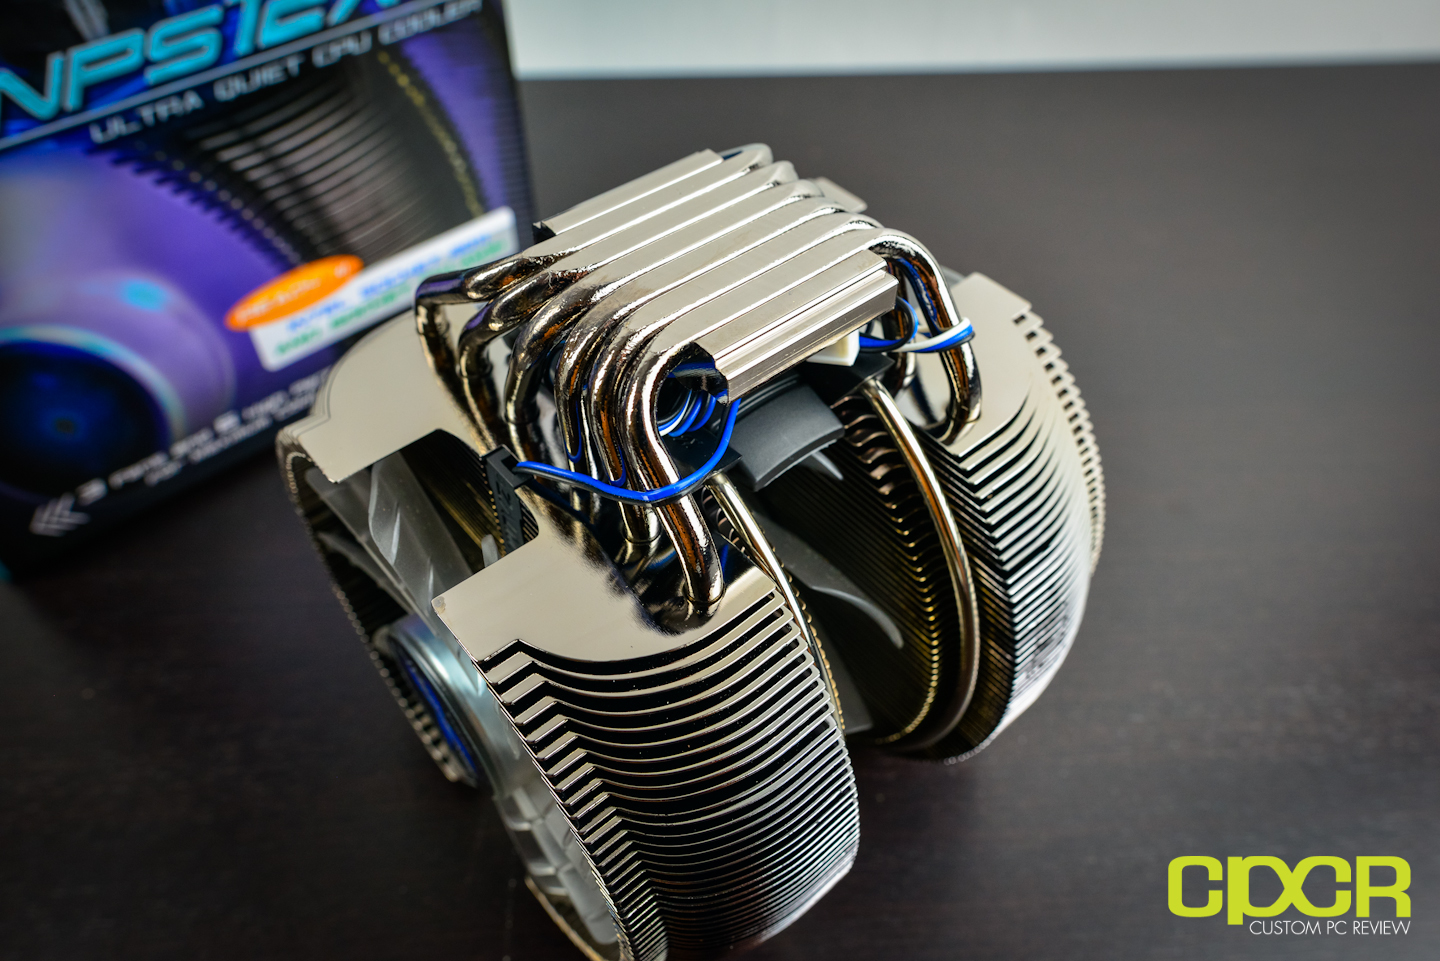
To bring heat away from the CPU, Zalman is using six 6mm heatpipes, which like the Noctua NH-D14 SE2011 is about as much as you can physically fit on the base of the cooler.
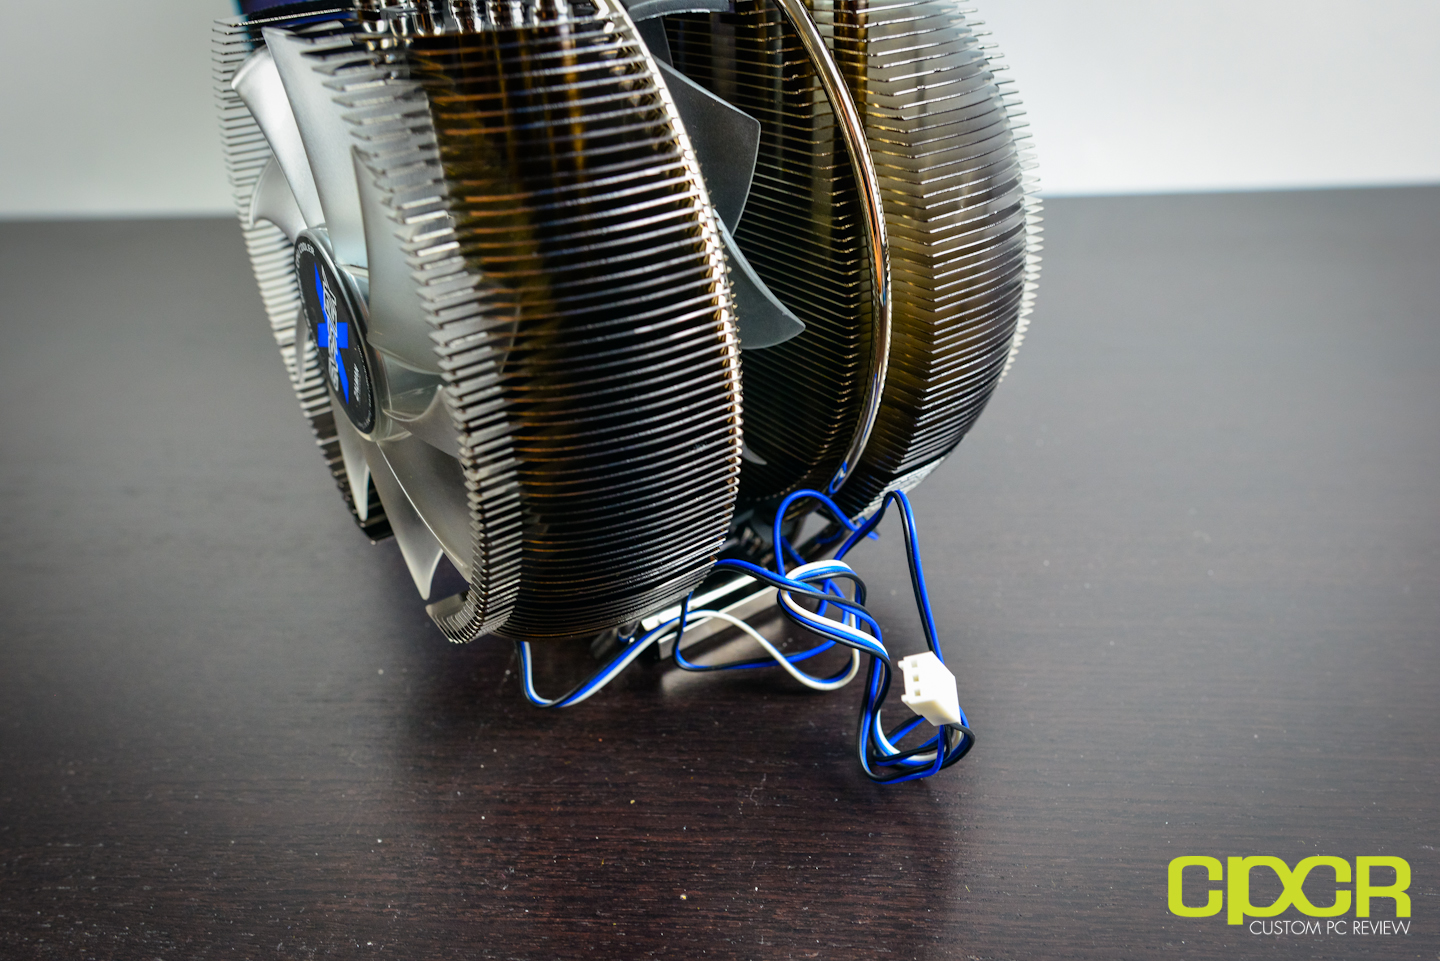
Despite having three fans, they’re all powered by a single 3 pin connector, which means you may or may not have control of the fans via the motherboard header depending on the motherboard you own. That said, the fans themselves are rated for a maximum of 1200 RPM with a quiet fan resistor included as well for those who want to reduce the maximum fan speed to 1100 RPM.
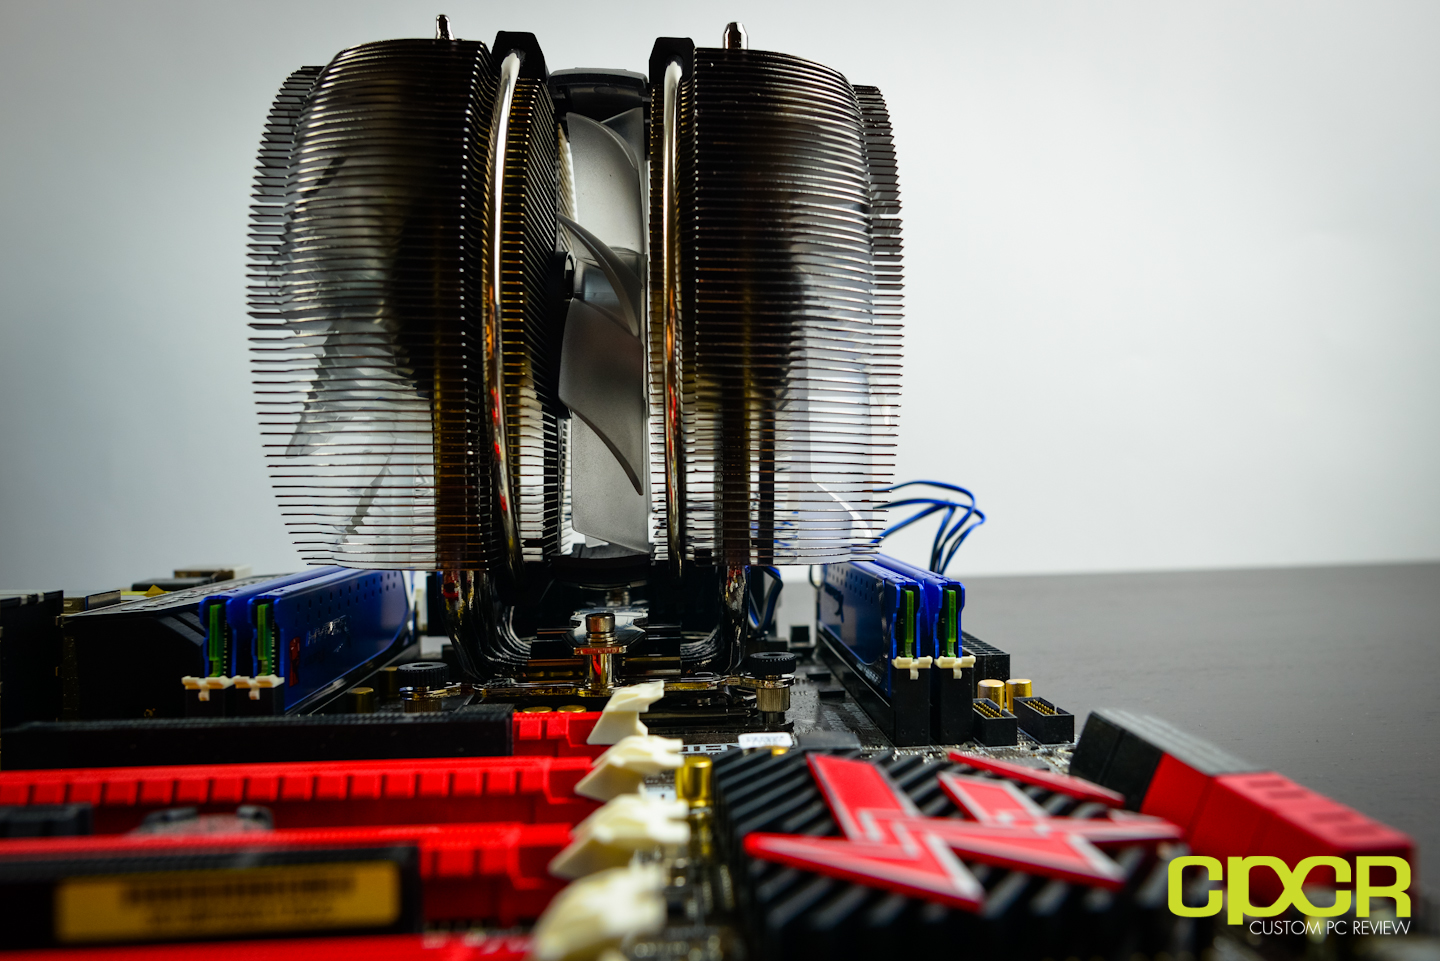
As expected, you’re definitely not going to fit anything under the CNPS 12X other than low profile memory, so don’t waste your money on the high profile stuff.
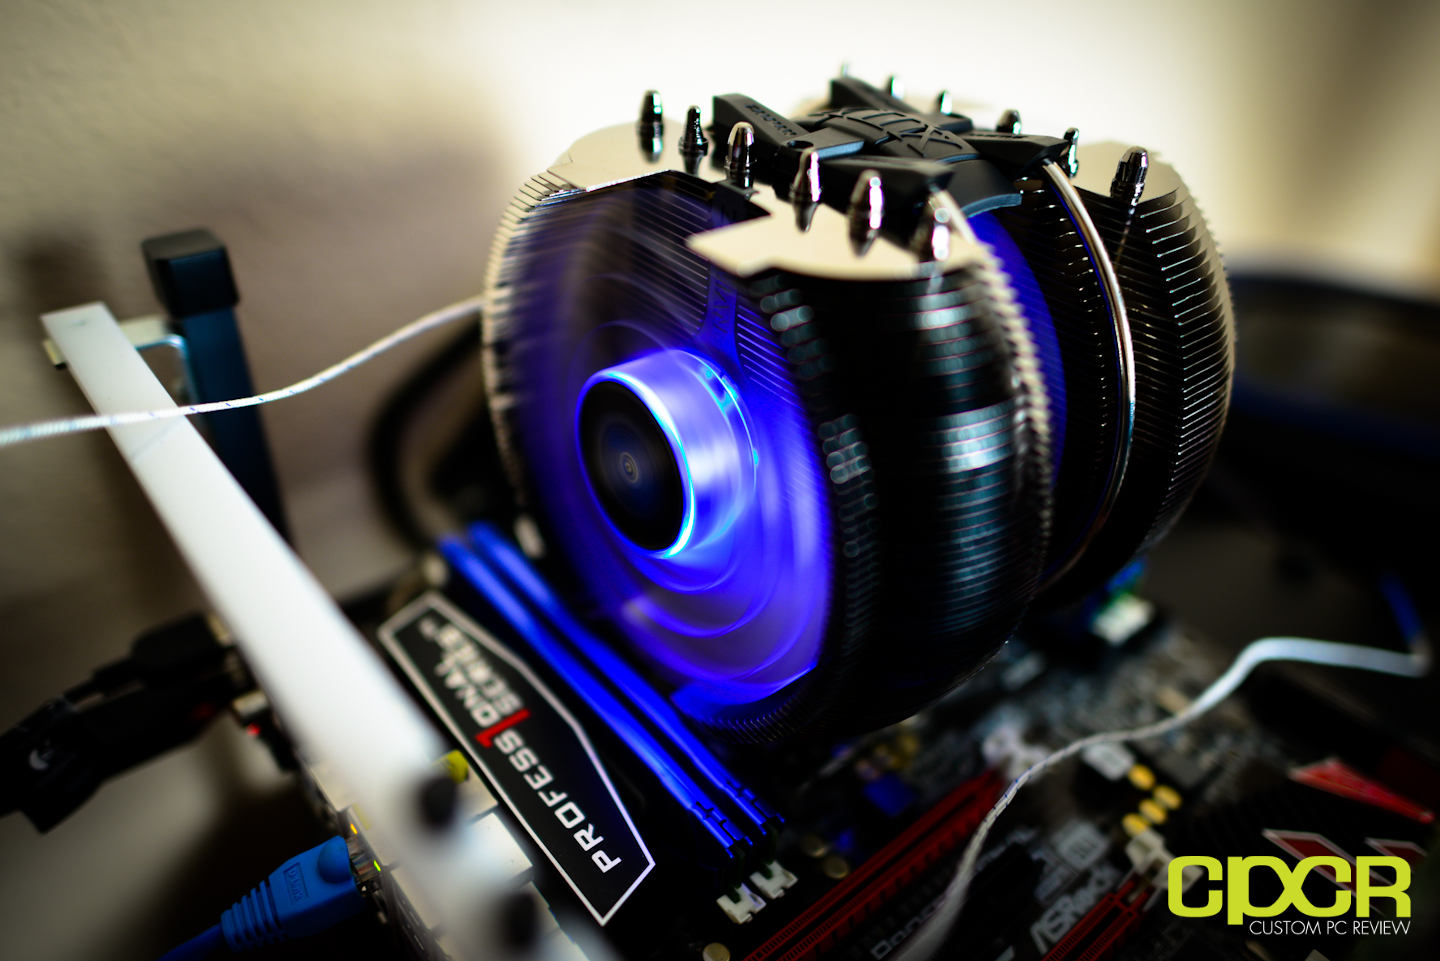
In operation, the Zalman CNPS 12X is quite possibly the most beautiful looking cooler of the bunch with its unique design along with its blue LEDs lighting each side of the cooler up. It’s also really damn quiet too, but we’ll get into that in the next section.
[section label=”Performance”]
Performance
Testing Setup
Sandy Bridge-E Test Bench
Despite Intel’s introduction of Ivy Bridge back in 2012, the Sandy Bridge-E processors still maintain the performance crown when maximum processing capacity is necessary. For our testing of top end coolers then, we’ve decided to use our top end Sandy Bridge-E system as well. For reference, we’ve also included the Intel “stock” air cooler, the Intel BXRTS2011AC. That said, with LGA 2011 processors, an actual “stock” cooler isn’t included and must be purchased.
| CPU | Intel Core i7-3960X |
|---|---|
| Motherboard | ASRock Fatal1ty X79 Professional |
| Memory | Kingston HyperX Genesis 16GB DDR3 2133MHz |
| Graphics | Sapphire Radeon HD 7770 Vapor-X |
| Boot Drive | OCZ Vertex 4 128GB SSD |
| Storage Drive | Western Digital Caviar Green 3TB |
| Power Supply | Corsair HX650 |
| Case | HSPC High Speed Tech Station |
| Optical Drive | ASUS OEM DVD Drive |
| Operating System | Windows 7 Ultimate x64 SP1 |
Special thanks to Intel, ASRock, Kingston, OCZ Technology, ARCTIC and HSPC for sponsoring our test bench!
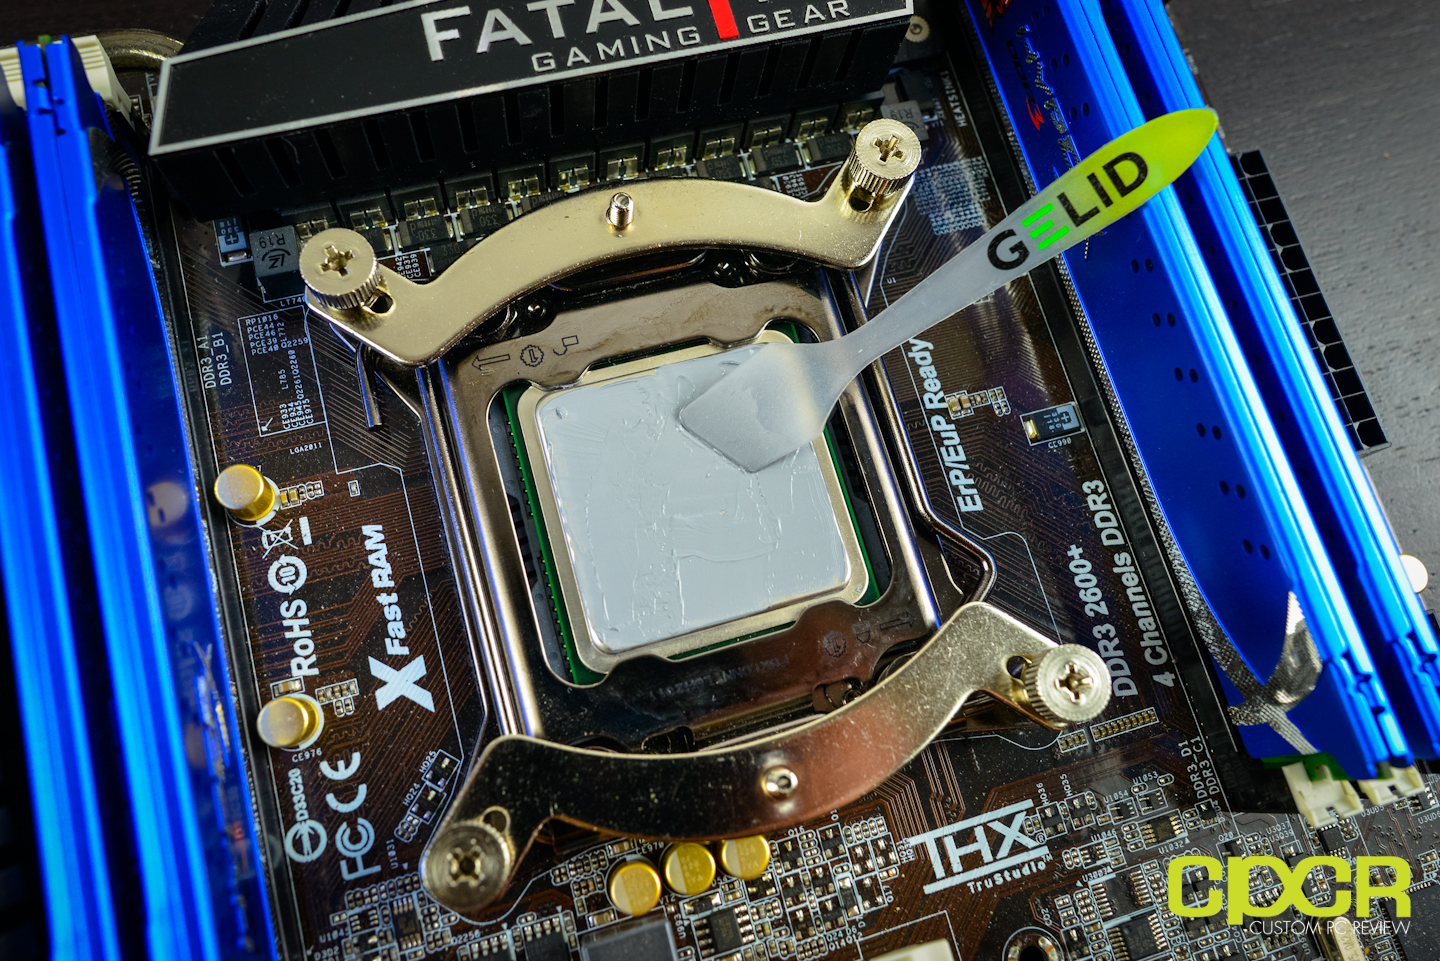
In order to produce consistent results across the board, we’ll be using the ARCTIC MX-4 Thermal Compound applied in a thin, even layer with a Gelid applicator. Each time a CPU cooler is switched out, the old thermal compound is removed completely and fresh thermal compound is applied.
After thermal compound application, the CPU is set to 4.4GHz and burned in for 30 minutes to allow the thermal paste to settle. The CPU is then shut off for a minimum of 5 minutes then turned back on for testing. In order to generate the maximum amount of heat possible, all tests are conducted with Prime 95. Two 30 minute tests are run at both the stock clocks (3.6GHz) as well as overclocked clocks (4.4GHz). Again, between each of the tests, the computer is shut down for a minimum of 5 minutes to allow for the CPU to cool down between tests.
Results
All temperatures measured are average temperatures across all six cores. Temperatures are measured using HWMonitor and the maximum temperature on each core is used. Ambient temperatures are taken using a calibrated Extech EA10 Dual Probe Thermometer at each cooler’s fan intake.
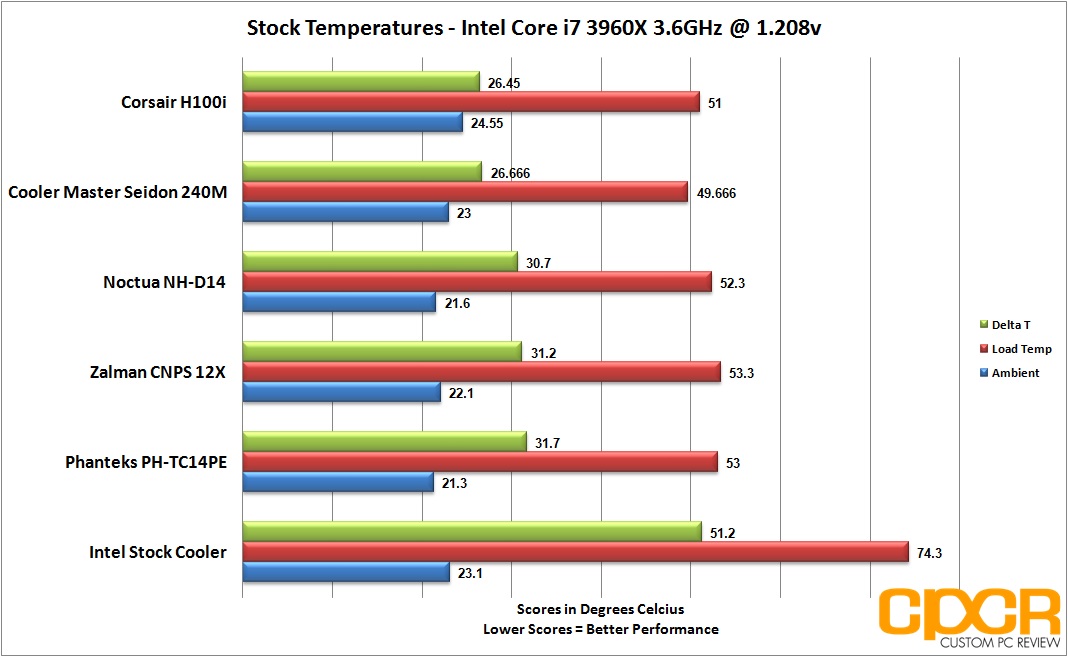
At stock clocks, all the high end coolers perform relatively similar; however, the two all in one water CPU coolers led the pack keeping the CPU at a delta of ~26°C, roughly ~5°C cooler than the air coolers. The Phanteks PH-TC14PE in this case performed worst here with a delta of 31.7°C, but all results from the air coolers were within a single degree, which is well within the margin of error.
In comparison to the Intel’s stock air cooler, each cooler tested today performed about 20°C better.
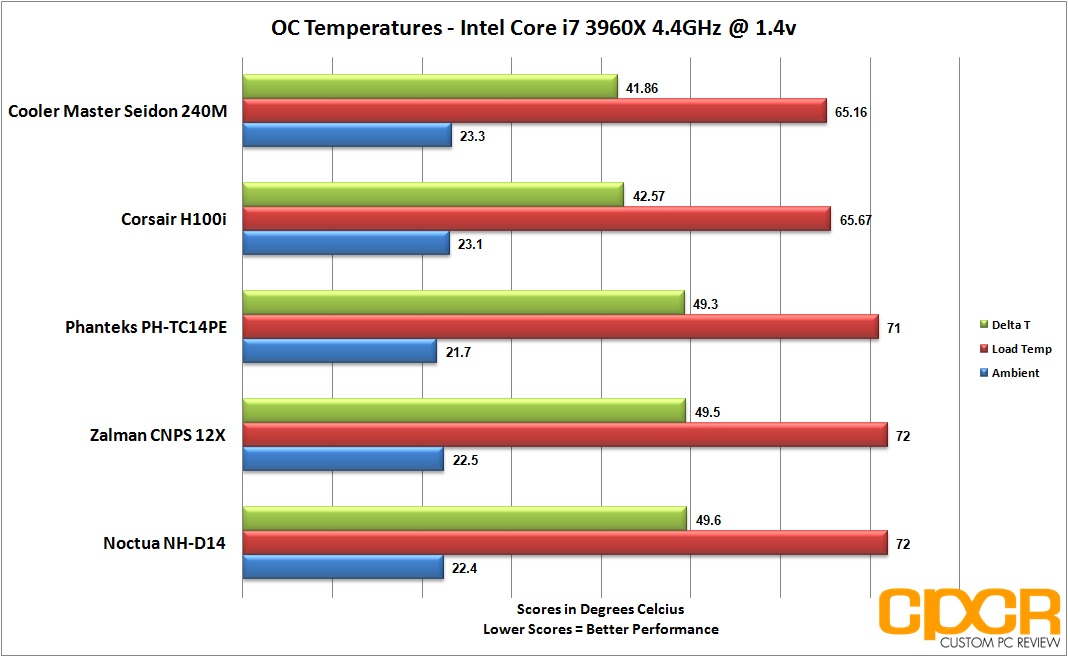
Moving onto some overclock testing, once again the results are similar to what we’ve seen with stock clock testing. The all in one water coolers led the pack with a delta of ~42°C. All the air coolers this time performed roughly the same once again, but they ran roughly ~7°C warmer than the two AIO water coolers tested today. Surprisingly all the air coolers again ran within a single degree of each other despite the different designs.
Unfortunately, I was unable to get any usable numbers with the Intel stock cooler as I was unable to complete the overclocking test. Once overclocked, the temperatures quickly soared above 85°C which started causing system instability.
Noise
All noise testing is conducted with a calibrated Extech 407750 Sound Level Meter. The minimum noise floor on the sound level meter is 30dB, so testing will be conducted with the sound level meter placed on a tripod approximately 1 ft from the fans. Since a lot of us generally sit farther than 1 ft from a PC, I’ve also estimated what the sound level might be at 3 ft as well. For those interested in learning more about this estimation process, be sure to check out this link here.
All results are reported in decibels (dB). Those interested in learning more about dB, be sure to check out the link here.
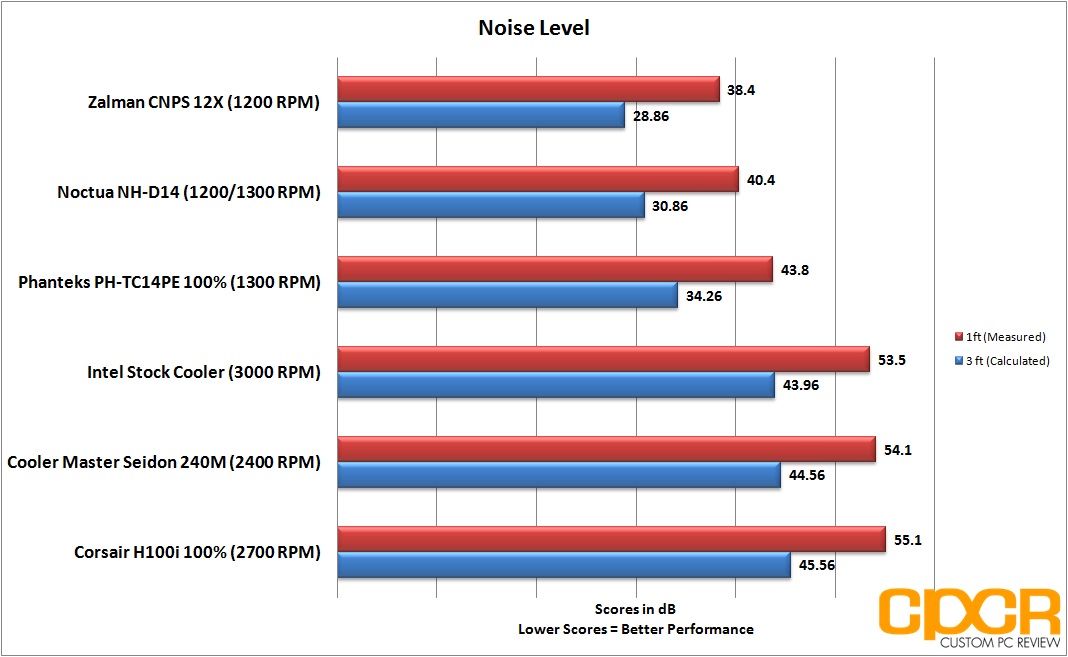
As far as noise performance, the two all in one water coolers were the loudest coolers of the bunch pushing over 10dB louder than the loudest air cooler in the roundup. (Not including the Intel stock cooler, of course) This definitely makes sense as the Seidon 240M is using dual 2400 RPM fans while the H100i is using dual 2700 RPM fans, both of which double or more than double the fan rotation speed of the air coolers tested today. The only exception to this is the Intel stock cooler, which ran at a whopping 3,000 RPMs and as you imagine is extremely loud and annoying.
[section label=”Conclusion”]
Conclusions
 Starting with the two water coolers, these are definitely going to be the top tier in terms of cooling performance short of a fully custom water cooling loop. Let’s talk about the Corsair H100i. There’s no debate here. Corsair pretty much popularized the all in one water cooling coolers and well, they’re still the leader in the category. Period.
Performance is top notch and the “polish” on the H100i definitely feels like a product that’s been perfected through experience. Build quality is fantastic, tubing is nice and thick, the mounting mechanism is top notch, and overall the H100i is simply solid. The only problem I found was a firmware glitch (as of 1.0.4) that’s making the fans squeal when connected to the pump, but this issue disappears when the fans are connected via the motherboard headers, so it’s not a huge problem. That said, you do lose the ability to control the fans via Corsair Link, but I am told a firmware update is in the works and should be available shortly if it isn’t available already.
“Beginning in late December, all H100i and H80i units have been shipping with PWM fans which have resolved the issues that people were having with buzzing. We have a fix for people who received earlier production units, which should be available in early February. This fix will include the new PWM fans and a firmware update. Once the fix becomes available we will post the instructions for getting the fix on our cooling forum, found here:
Alright, so let’s talk about the new kid on the block – the Cooler Master Seidon 240M. This is a relatively new cooler by Cooler Master introduced only a few weeks ago; however, it’s definitely the most surprising cooler of the bunch. Despite the Seidon 240M being Cooler Master’s first entry into the all in one water cooling market, they were able to pull off performance numbers identical to the Corsair H100i. Given the fact that the H100i is already in its second generation, Corsair having years of experience with all in one water cooling setups, and it’s using higher RPM fan, that to me is very impressive.
Build quality with the Seidon 240M was good, but the product definitely doesn’t feel as polished as Corsair’s H100i. The mounting mechanism was definitely a bit more difficult than it needed to be and the packaging could use a bit of labeling, but overall it’s a very solid offering for something that can be called Cooler Master’s first. I’m definitely very interested in seeing what Cooler Master will introduce in the following months when the Seidon 240M becomes a second, third or fourth generation product.
That said, the Corsair H100i and Cooler Master Seidon 240M were both neck to neck in terms of performance, but were able to defeat all the top air coolers tested today by a decent margin. Definitely be aware however, that both these coolers are using significantly higher powered and significantly noisier fans than those found on the air coolers tested today so unless you’re prepared to bear the noise, prepared to purchase new fans, or prepared to just keep the fans running at a maximum of 1400 RPMs, the air coolers may be what you’re looking for.
 Speaking of air coolers then, let’s first talk about the Phanteks PH-TC14PE. Since the last year when I first tested it, Phanteks has released a new revision of the cooler, but there really hasn’t been much of a change other than the fans. Phanteks claims that the new fans are now quieter and they perform better, but I think they’re fairly on par with what came before it. In terms of build quality though, I think the fans are more sturdy and solid than before, which is still a plus in my book especially when the price of the cooler hasn’t changed. Performance wise, the PH-TC14PE performed on par with the other air coolers which were beat by the all in one water coolers, but again do remember that the all in one water coolers are using fans that spin at twice the speed of the fans on the PH-TC14PE. Build quality on the PH-TC14PE is still phenomenal, and I’m extremely happy Phanteks decided to release a black version of their cooler as it looks gorgeous when mounted on any high performance motherboard.
The Noctua NH-D14 SE2011 is simply a classic as the NH-D14 SE2011 is just a NH-D14 with LGA 2011 hardware. Personally, I’m not too happy about this as it decreases its versatility in case you wanted to mount the cooler on something other than a socket LGA 2011 motherboard. That said, mounting kits are available for purchase if you want to mount the cooler on something other than a LGA 2011 socket motherboard. In terms of performance, the NH-D14 is still head to head with all the other flagship air coolers we’ve tested today, so there’s no change here. One thing about Noctua products though is the fact that every hardware bag is individually labeled and the construction of the cooler is simply top notch. It looks and feels like a top quality product, which is probably why it’s still so good despite being released some time ago. That said, the Phanteks PH-TC14PE does have an edge in that there are different colors to choose from while you’re going to have to take the tan and brown on the NH-D14.
 The final air cooler tested is the Zalman CNPS 12X and if I had an unique product award somewhere, this’ll be the product that’ll get it. After testing a number of coolers on the market, most cooler companies are fairly set on the square shaped tower coolers, but Zalman breaks the mold to create a round shaped cooler that actually performs very comparably to the best Noctua and the best Phanteks has to offer. Build quality is top notch on the CNPS 12X as well, but Zalman definitely didn’t think much about mounting the cooler as it had one of the most difficult installation processes of all the coolers tested today. Additionally, the CNPS 12X has fixed fans on the cooler itself, which is probably why it’s so quiet as there isn’t a frame to produce turbulence, but this also means that the fans are not replaceable should they fail.
| Type | Fans | Price | Purchase Link | |
|---|---|---|---|---|
| Intel BXRTS2011AC (Reference Only) | Air | 1x100mm (3,000 RPM) | $21.80 | Click Here |
| Corsair H100i | Water (240mm Radiator) | 2x120mm (2,700 RPM) | $109.99 | Click Here |
| Cooler Master Seidon 240M | Water (240mm Radiator) | 2x120mm (2,400 RPM) | $97.50 | Click Here |
| Phanteks PH-TC14PE (Black) | Air (5x8mm Heatpipes) | 2x140mm (1,300 RPM) | $89.99 | Click Here |
| Noctua NH-D14 | Air (6x6mm Heatpipes) | 1x120mm (1,200 RPM)1x 140mm (1,300 RPM) | $79.95 | Click Here |
| Zalman CNPS 12X | Air (6x6mm Heatpipes) | 3x120mm (1,200 RPM) | $79.54 | Click Here |
Taking a look at pricing, all the coolers tested today range between ~$80 and ~$110, a difference of a ~$30 between the most expensive and least expensive cooler. As a product reviewer, I don’t say this often, but I think every product tested today brought something to the table in terms of features and performance which I think is a good step in general for the industry as a whole. No longer are we seeing ridiculously priced, poor performing coolers being sold on the market, which is a good thing. Natural selection at its best.
Had I reviewed each of these coolers individually, each would’ve netted either a gold or silver award as they’ve all performed very well and were able to do as advertised – keep temperatures down despite a fairly significant overclock on the processor. However, since it’s a roundup, I’ll only be awarding the coolers which I think stand out from the rest. Believe me, this was a tough choice to make.
For maximum performance, the Corsair H100i or the Cooler Master Seidon 240M are both excellent choices. However, I feel like the Corsair H100i is a more refined product (build quality, presentation) than the Cooler Master Seidon 240M at this point. The Seidon 240M is still a strong contender though with the performance figures to back it up and is one helluva impressive first generation product.
For those who favor a more quiet computing experience or those who don’t necessarily like the all in one water cooling setups, the air coolers still performed great as well. Of the air coolers, you can’t really go wrong with any of them, but my choice cooler here is the Phanteks PH-TC14PE. Performance is fantastic, installation is as easy as it gets, it’s very quiet, it’s aesthetically pleasing with its different color options, and the product simply has a very strong, very premium feel to it.
Therefore, in our cooler roundup for today, I’m going to award both the Corsair H100i and the Phanteks PH-TC14PE with CPCR Certified Gold.

Samples provided by: Corsair, Cooler Master, Noctua, Phanteks, Zalman


Excellent review. Id still go with an air cooler over these AIO solutions. If I ever did water cooling again, Id do it properly (custom loop).
Ill Stick with my Phanteks PH-TC14PE out does the all in one coolers at
1/2 the noise mine never gets over 62c while gaming , folding,
benchmarking on a OCed 2500K@ 4.5ghz nice review Sam.
Good review. There aren’t many sites out there compaing the H100i to the NH-D14 (are they being paid not to?). This is one of few that does.
The “m” stands for Medium, just like on the 220XL the “xl” stands for extra large. The difference between them are the thickness of the radiator.
Why can’t Intel not be so friggin cheap and just add a decent Heatsink. My non K i5 3470 does fine at 3.8GHZ with the Stock heatsink never going to 60c under load, Ok that’s fine but could still be much better. Just good enough should never be acceptable for the price we pay for these chips.
got the phanteks and with delid , CLU i am able to clock at 4.8 ghz i7 4790k , with prime stable not seeing anything past 80 C
According to me, go for liquid CPU cooling and add a fan control, that way you can maximize airflow and cooling while adjusting fan speeds.
If your system is overclocking then liquid cpu cooling pad and a fan is best way to cool your CPU.