Warning: Undefined array key "width" in /var/www/vhosts/custompcreview.com/public_html/wp-includes/media.php on line 1429
Warning: Undefined array key "width" in /var/www/vhosts/custompcreview.com/public_html/wp-includes/media.php on line 1434
Warning: Undefined array key "height" in /var/www/vhosts/custompcreview.com/public_html/wp-includes/media.php on line 1434
[section label=1. Introduction]
CM Storm Trooper in White
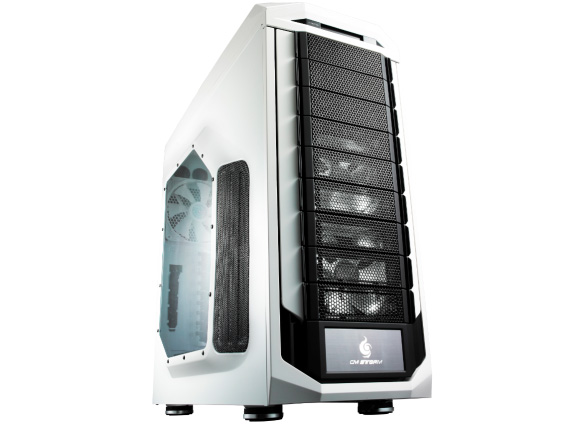 Truth be told, when I first laid eyes the CM Storm Trooper last year, I wasn’t quite sold. Not because it wasn’t a good case, no, on the contrary, it was a great case; possibly among the best Cooler Master has ever made. But, compared to some of the other stuff on the market (some even from Cooler Master themselves), it just seemed a bit dull – a bit boring even.
Why? Well, it’s a high end gaming case designed to house some of the most beautiful, most expensive computer components in the world, and Cooler Master forgot to give it a windowed sidepanel. Oops! In addition, the outward appearance of the case seemed kinda dull to me. Sure there were some vents here and there, and there was a handle, but to be honest it simply seemed like one of those cases that you hide in a corner rather than proudly display at the next LAN party. In terms of its appearance, I didn’t really feel it was much competition even against some of its cousins, the HAF 932 or the HAF X.
If only we could get the CM Storm Trooper with a windowed sidepanel and a more flashy paintjob…
Meet the CM Storm Stryker. When I got my first glimpse of the CM Storm Stryker, I thought it was a brand new case. While it looked near identical to the CM Storm Trooper, it had a white paintjob, some beautiful white LED fans lighting up the black mesh up front and, perhaps the biggest improvement, a windowed sidepanel. The combination of the name change along with the new aesthetics really got me thinking Cooler Master had unveiled a whole new case, but it really wasn’t. (Probably something to do with a certain solder unit of the Imperial Navy)
Fresh paintjob on a functionally awesome case… what could go wrong?
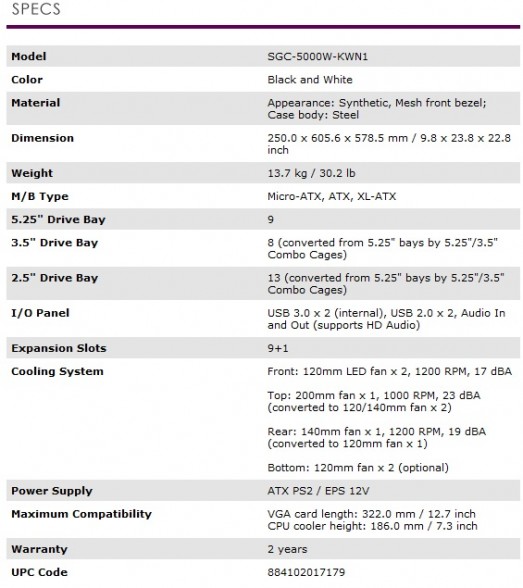
CM Storm Stryker Specifications
[section label=2. A Closer Look (Exterior)]
A Closer Look at the CM Storm Stryker
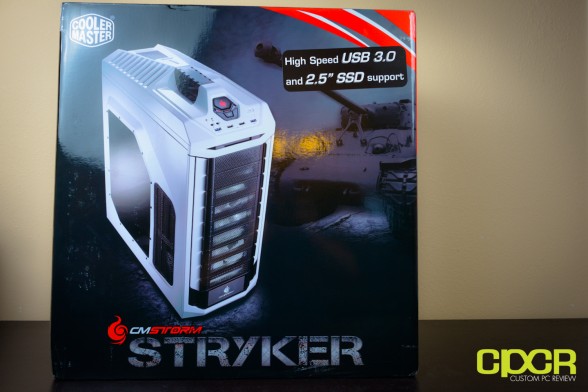
As usual, Cooler Master does a top job with their packaging. The box here is nice and shiny with an image of the CM Storm Stryker painted prominently across the front.
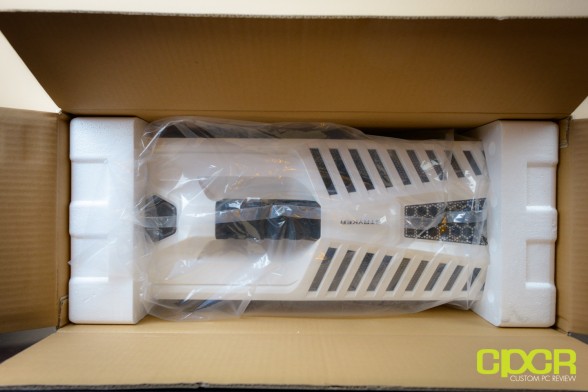
Cracking open the box, we get the beautiful white CM Storm Stryker case enclosed in some padding and a clear plastic bag. Not the best packaging in the world, but the case arrived without any damage.
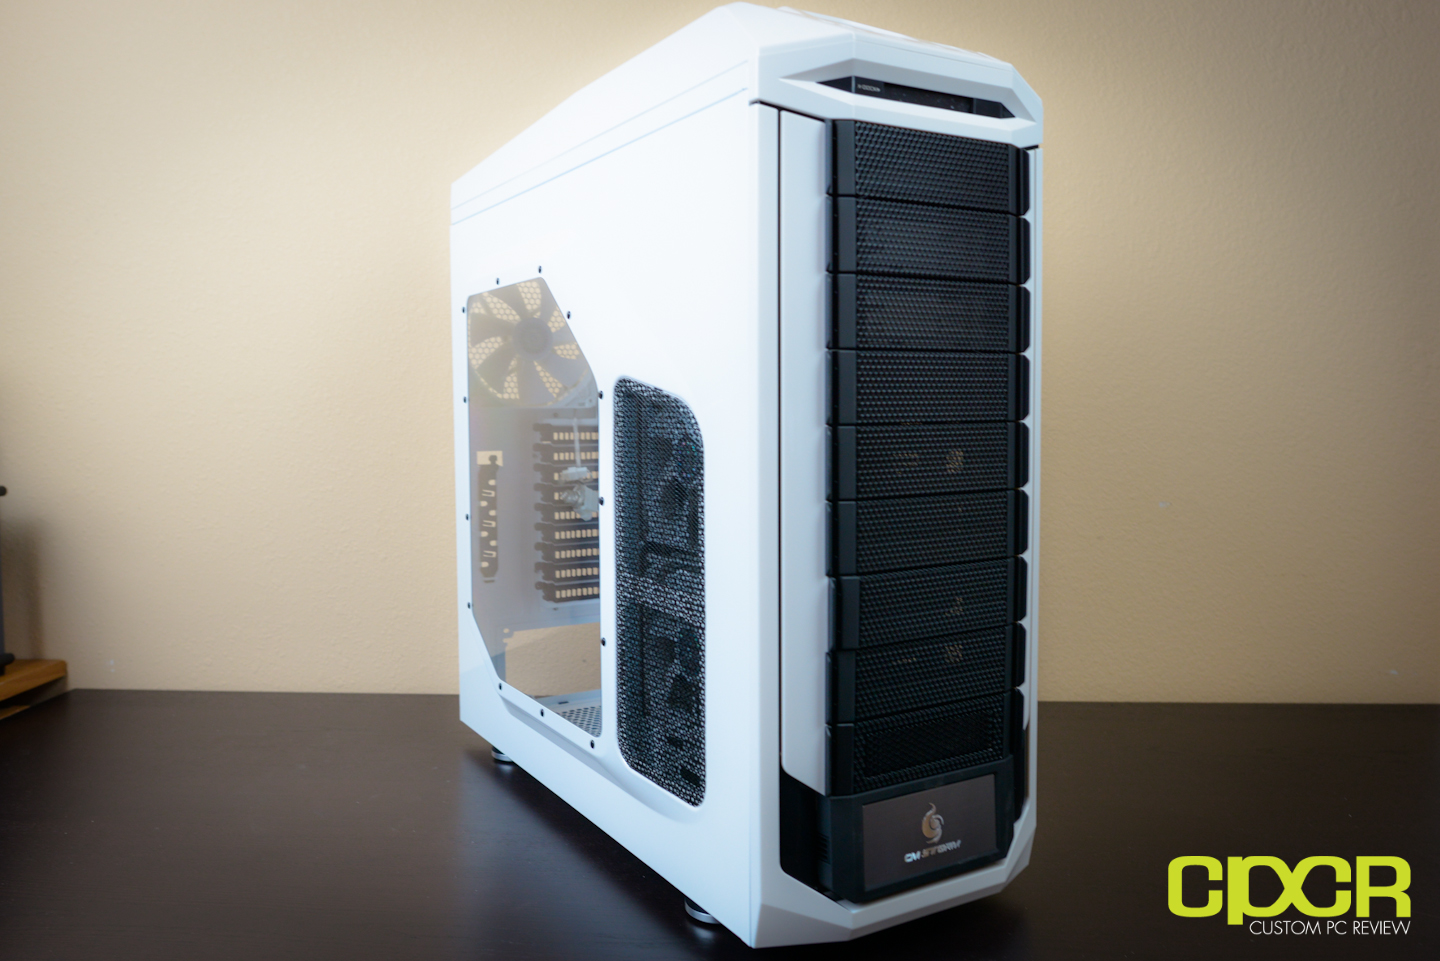
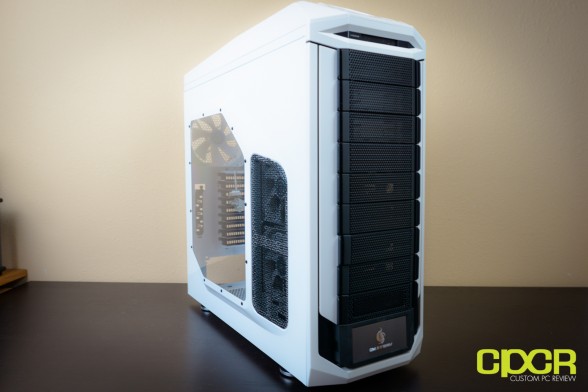
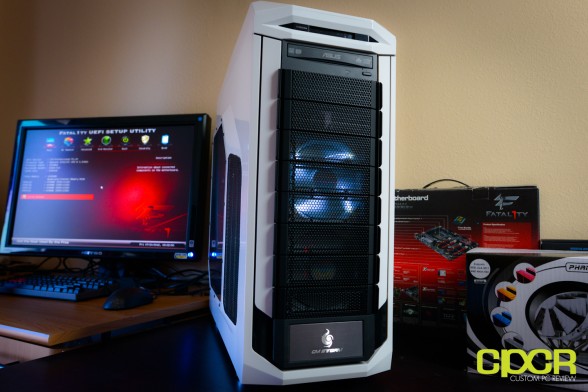
First impressions on the case are quite good. Cooler Master does a fantastic job creating contrast between black mesh and the white paint on the case. Speaking of the paint, the paint-job here is impeccable and despite the case utilizing a lot of plastic especially for the top, it’s very difficult to tell. To be honest, this has to be one of the highest quality paint-jobs I’ve seen on a mass produced case, period.
Compared to the CM Storm Trooper, the CM Storm Stryker has a pretty much identical design with the exception of the white paint-over. There is also a couple of subtle changes such as the windowed sidepanel and white LED fans.
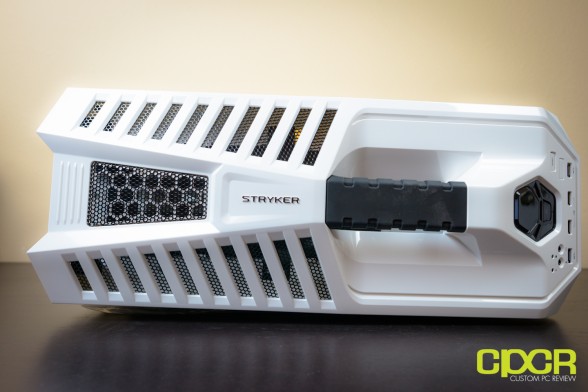
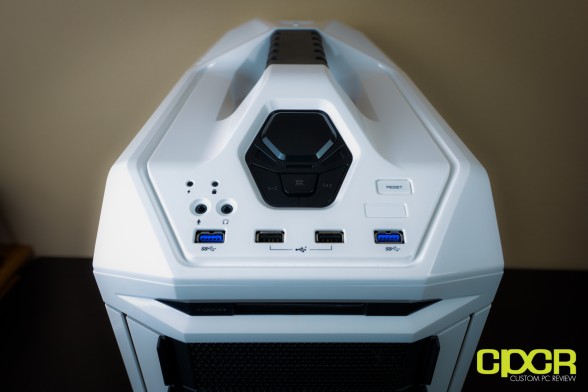
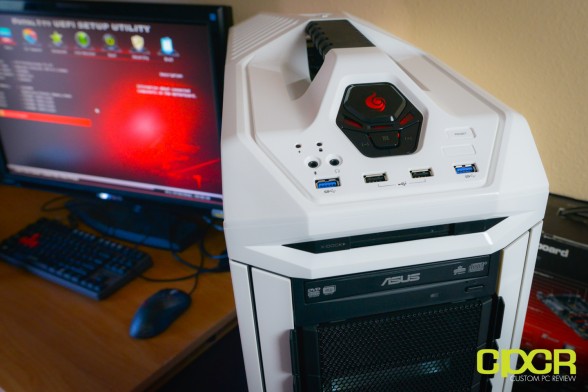
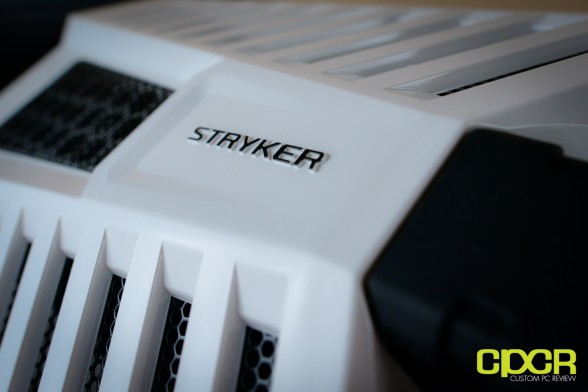
Starting with the top of the case, we can see that it still has the exact same design as the Trooper except we get CM Storm Stryker branding up top and a white paintjob. Like I said previously, the white paint is very thick and almost looks a bit milky white. There’s a small amount of gloss to it, but it really does help makes the case pop.
At the front of the top, we get the front panel connectors which we’ll get into later and an extremely heavy duty rubberized handle. Having the handle here is very useful as this case is quite heavy (30.2lbs empty). Not sure what the handle’s rated at, but you’ll see later that it’s a chunk of metal connected directly to the chassis. The back of the top side we get some vents which kinda give the case an alien or futuristic-like look.
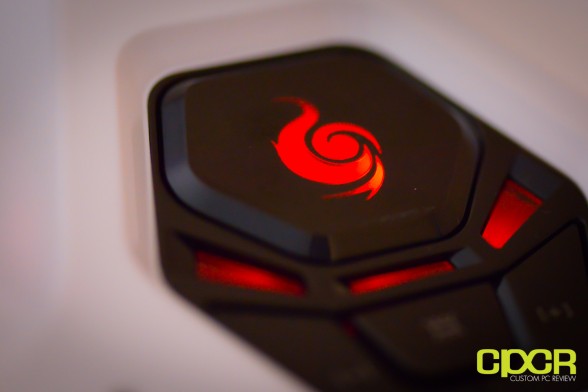
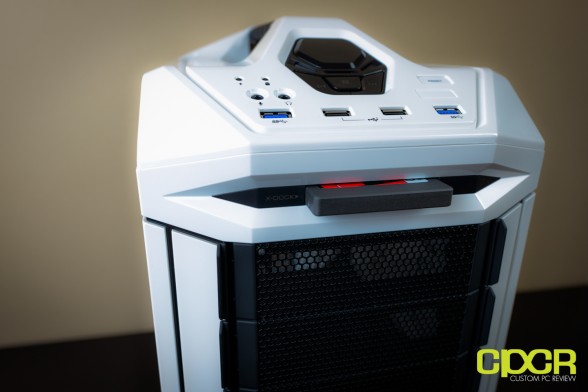
Moving around to the front panel connectors here we get a very unusual layout. Starting at the bottom we get two USB 3.0 ports, two USB 2.0 ports, 3.5mm microphone/headphone jacks, power/HDD LED indicators, a reset button and a recessed area with a fan controller, LED on/off switch and a large power button.
Right below the front panel connectors on the front of the case is what Cooler Master calls an “X-Dock” which is a hot swappable bay for a 2.5″ drive such as a SSD.
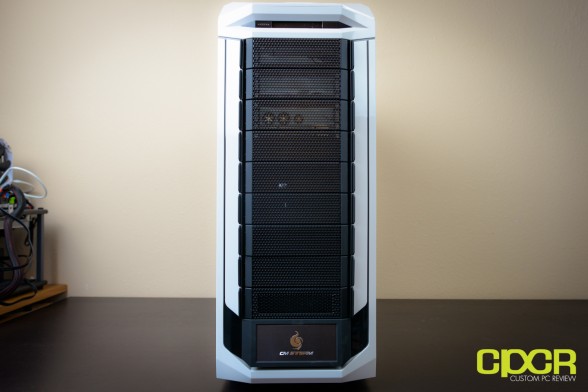
Below the “X-Dock” we get a full nine 5.25″ drive bay covers. Below the nine drive bay covers we get another bay cover at the bottom with a CM Storm logo.
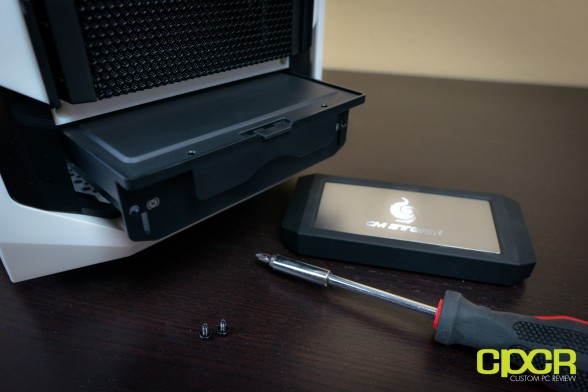
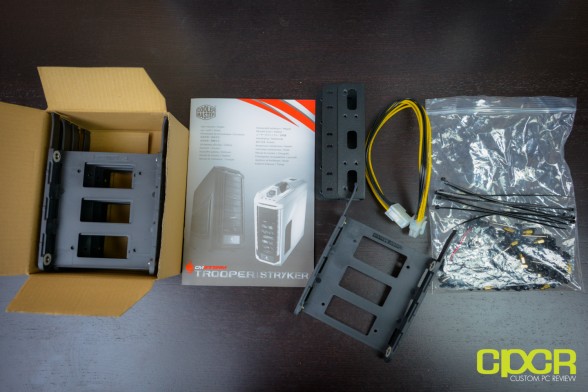
Removing the final bay cover we get a small accessory box with all the case accessories included. This small accessory box is secured via two small screws.
Before moving on, let’s take a quick look at the accessories. Instead of leaving all the tool-less hard drive trays in the case, Cooler Master has opted to ship them inside a small brown box. This is actually quite beneficial as having all the drive trays installed even if empty will cause some disruption in airflow. That said, if you’re the type who’ll likely lose the box in a week, you have the option of installing the drive trays empty as well. The drive trays will fit both 3.5″ and 2.5″ drives. 2.5″ drives will need to be secured via screws.
Additionally included is a users manual, an adapter for installing 3.5″ drives, an 8 pin extension cable and a bag full of cable ties/mounting hardware.
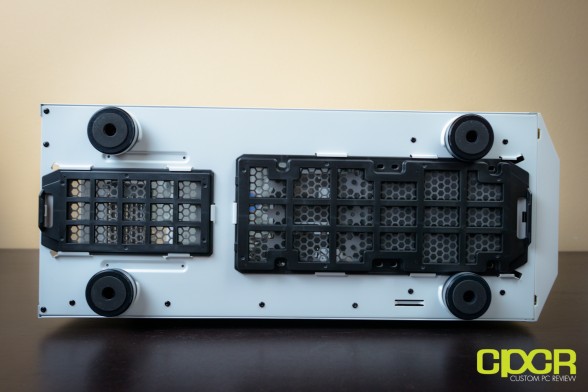
Moving to the bottom of the CM Storm Stryker, Cooler Master has included four very high quality feet which really lift the case off the surface. This will allow the power supply at the rear and any fans installed up front to breathe. Notice that the entire length of the bottom is dust filtered via two large dust filters.
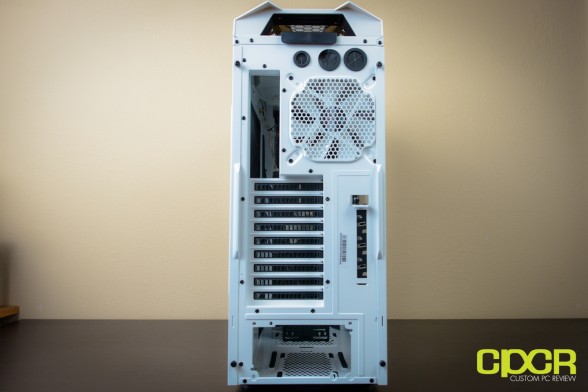
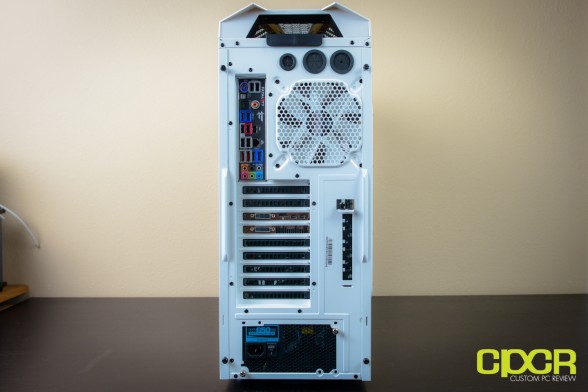
The rear of the CM Storm Stryker is surprisingly standard. From the top we get three differently sized water cooling holes, the rear I/O punchout, mounting area for either a 120mm or 140mm fan (140mm white fan included), nine expansion slots plus an extra expansion slot with an anti-theft slot cover installed. This is useful for those who frequent LAN parties and don’t want the possibility of someone stealing your precious hardware. Interestingly, the anti-theft bracket is mounted with a thumbscrew, but it’s quite easy to switch this over to a more difficult to unscrew traditional screw. Below that we also get a standard ATX power supply mount. Also notice each sidepanel is secured via two thumbscrews.
At the top rear we get an additional easy to remove dust filter, which is a great addition as well. This makes the top and the bottom of the case fully dust filtered.
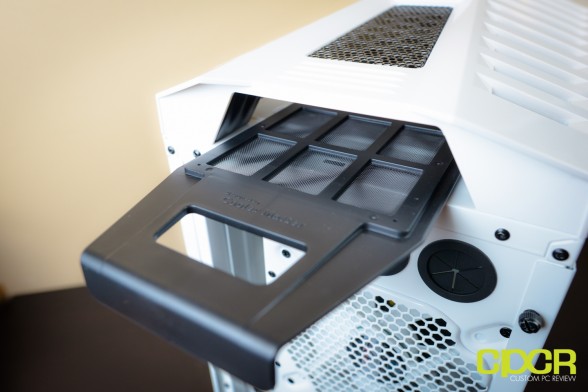
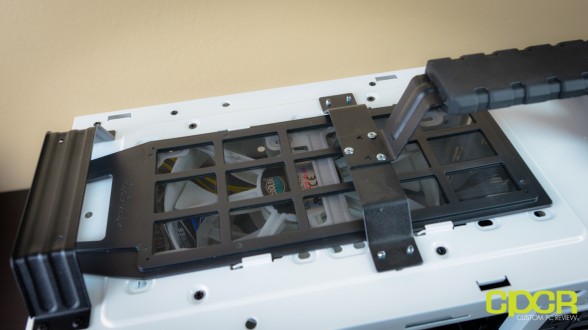
Ripping open the top cover on the case, we can see that the handle is fully reinforced. The dust filter is large sized and covers the entire rear/top of the case.
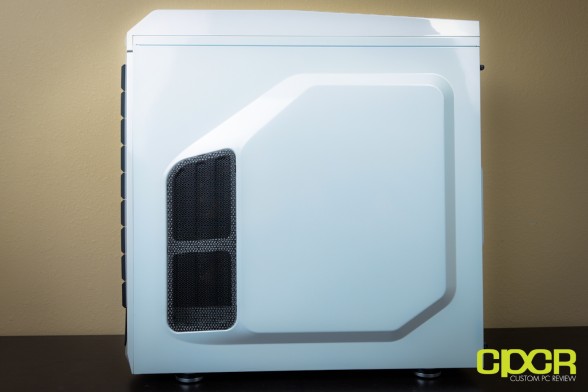
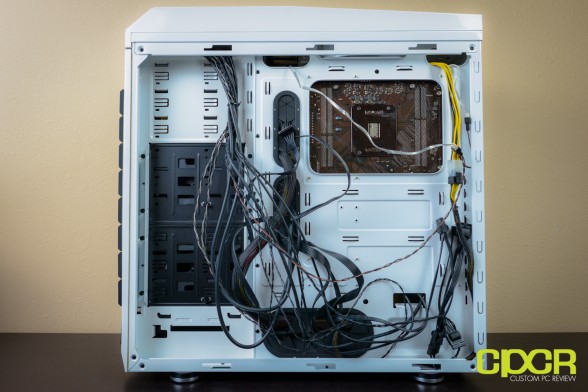
Here’s a look at the non-windowed side of the sidepanel. Compared to the CM Storm Trooper, this sidepanel design is quite different with a mesh piece at the front. Notice how the middle of the sidepanel pops out a bit. This allows for very easy cable management.
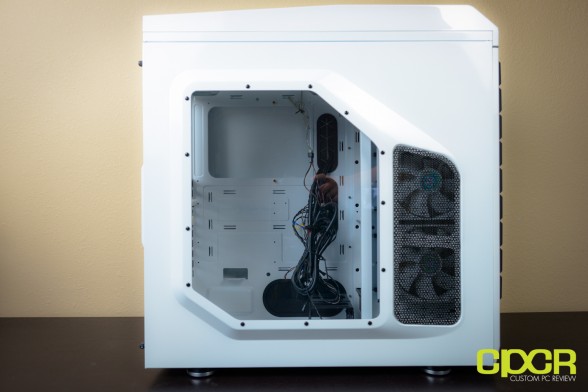
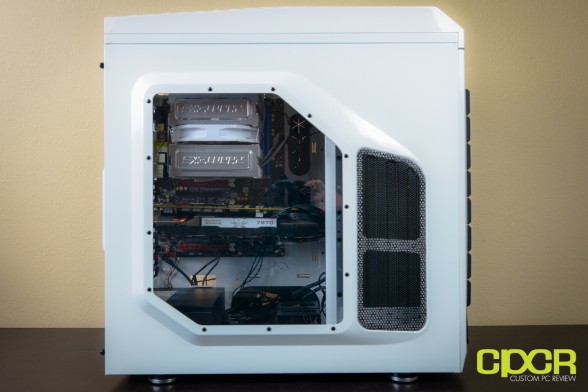
Moving over to the business side of the sidepanel, it’s pretty much the same design as the other side except there’s a large window. Beautiful…
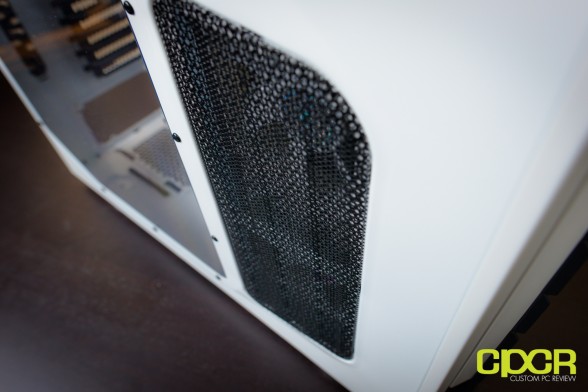
What’s interesting about the mesh area on the case is that it’s double meshed. This is probably done either for aesthetics or to trap as much dust as possible… or both. Either way, it won’t be anywhere near as superior as a real dust filter. That said, if the fans are oriented to the front (more on that later), there is a cheap, removable dust filter on each 5.25″ drive bay cover. You’ll have to individually remove six 5.25″ drive bay covers and their respective dust filters though.
[section label=3. A Closer Look (Interior)]
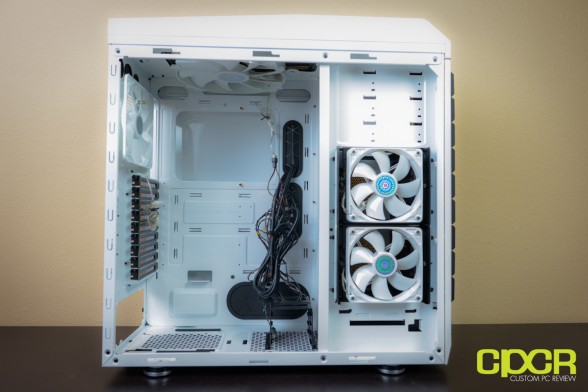
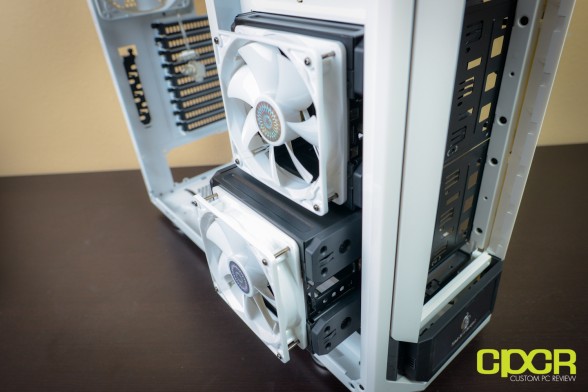
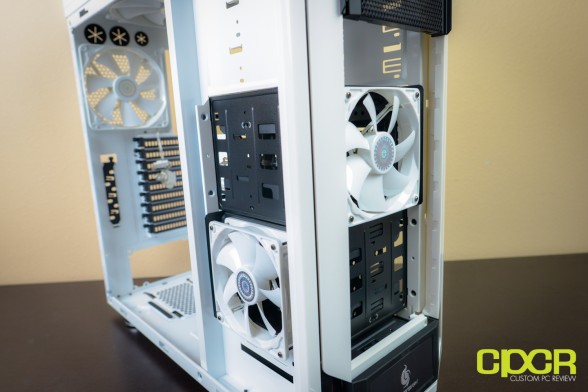
Removing the sidepanels, we can take a look at the inside of the case. On the right side, there’s two 120mm white LED lit fans mounted to what Cooler Master calls the “4-in-3 HDD cages”. As you can see, the entire inside structure of the case is painted in white.
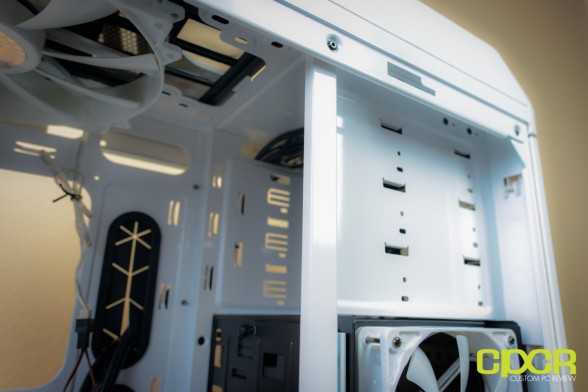
Moving around to the top of the right side, we get two 5.25″ drive bays. For some reason, Cooler Master decided not to include their tool-less mounting mechanism here. Fortunately, they’ve included thumbscrews in the bag to lessen the inconvenience.
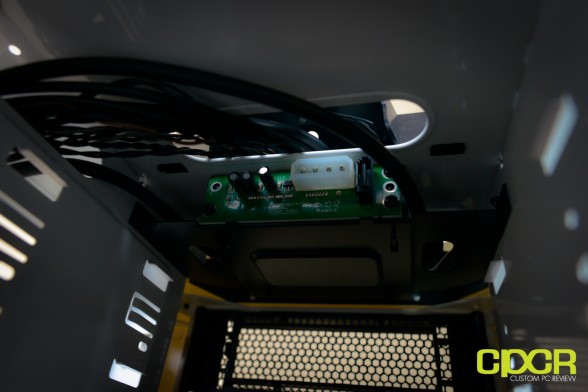
Peering into the 5.25″ drive area, we get a 4 pin molex and SATA connector for the X-Dock. It kinda sucks that Cooler Master has included an older molex style connector for the X-Dock since it would make cabling a lot easier to include a SATA connector here – especially for those who’re planning to install an optical drive here.
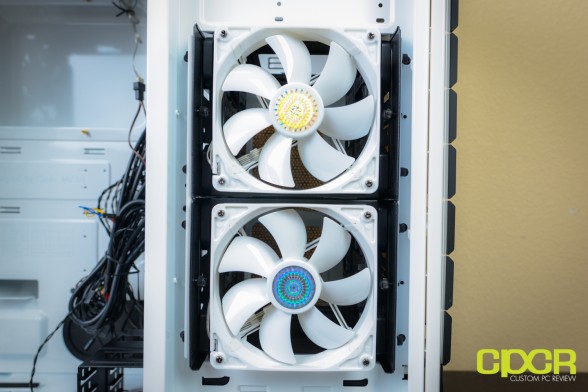
Below the optical drive bays, we get two 4-in-3 HDD cages with two very special LED lit white fans up front.
After removing a couple thumbscrews, these 4-in-3 HDD cages may be removed, and unless you’re planning on installing fans on the bottom of the case, this is highly recommended. The reason for my recommendation is that the left and the right side of the cages are blocked off so your graphics card will have no room to breathe if the cages aren’t rotated. Cooler Master should’ve designed the cages with one of the sides open to prevent this issue, similar to what we saw from the SilverStone TJ04-E.
The 4-in-3 cages can either both be facing left, both be facing forward, or alternating. That said, these fans will be seen through the mesh as they are LED lit so I’d recommend having them both oriented in the same direction – facing forward.
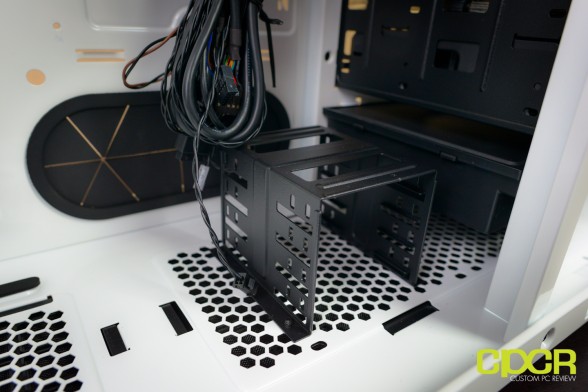
Cooler Master has also included a removable 2.5″ drive cage at the bottom which can fit up to four 2.5″ drives. This may be removed to make way for two 120mm fans.
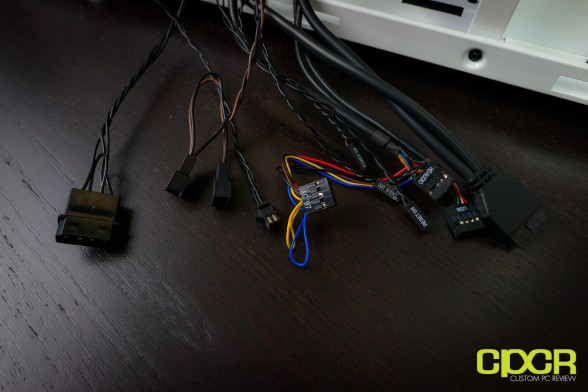
Here we get the usual front panel connectors, a dual 3 pin fan power connector controlled by the onboard fan controller, a two pin LED power connector controlled by the front panel header, and a 4 pin molex connector to power the fan controller, fans attached, and LEDs.
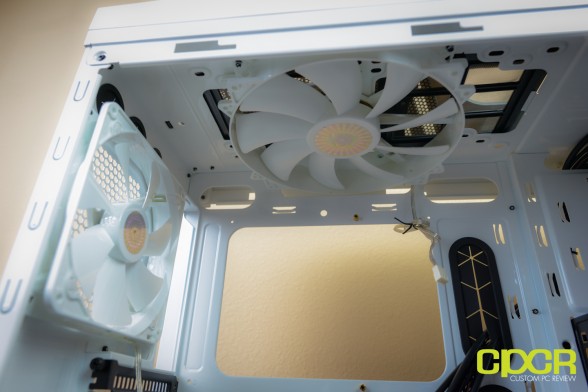
At the rear of the case, we get a 140mm exhaust fan. At the top, we get that nice, large 200mm fan Cooler Master is so famous for.
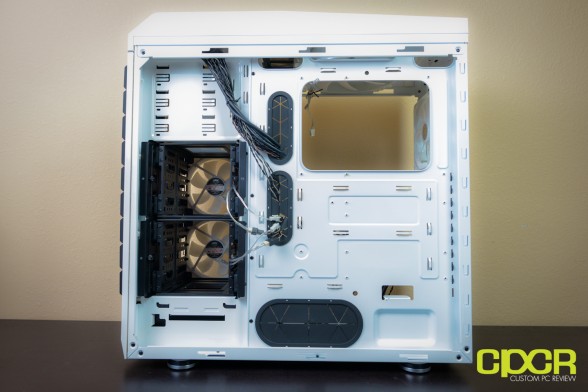
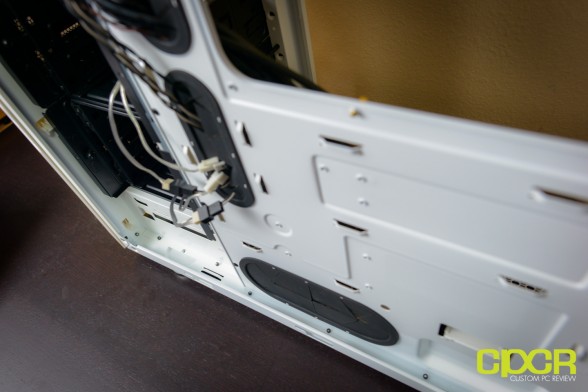
Finally, here’s a look at the back of the case. Here we can also see a giant hole around the CPU socket area for easy CPU cooler installation and the extra large grommets for cable management.
As usual, Cooler Master gives us plenty of space for cable management. In addition to half inch or so back here, the sidepanels also pop out another half an inch or so. This gives you plenty of room for even the thickest cables.
[section label=4. Installation]
Test System
CPU: Intel Core i7 3960X & Phanteks PH-TC14PE Cooler
Motherboard: Asrock X79 Fatal1ty Professional
Graphics: MSI Radeon HD6970 + ARCTIC Accelero Xtreme 7970
Memory: 16GB Kingston HyperX Genesis DDR3 2133MHz
Boot Drive: Kingston V+200 120GB
Storage Drive: Western Digital 1TB Caviar Blue
Power Supply: Corsair HX650
DVD Drive – ASUS OEM DVD Drive
Installation into the CM Storm Stryker
Installation into the CM Storm Styker was among the easiest installs I’ve done. Cooler Master should definitely ship their 4-in-3 cages with the fans oriented toward the front though since that’ll be the optimal fan configuration for the majority of people out there. It does take an additional 5 mins or so to unscrew everything and switch the orientation of the 4-in-3 drive trays. Problem with this orientation though is that there’s a giant, ugly black area near the front since the 4-in-3 cages aren’t painted. DOH! Luckily once the sidepanel is on, it won’t really be that noticeable.
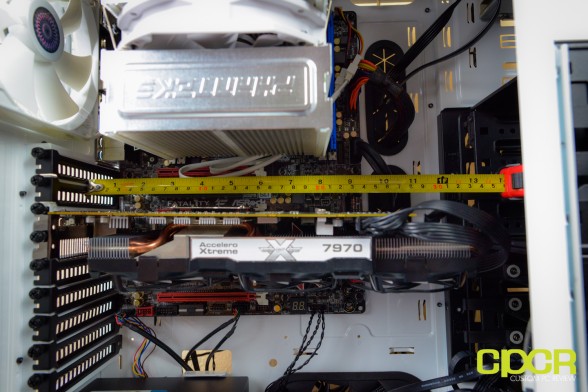
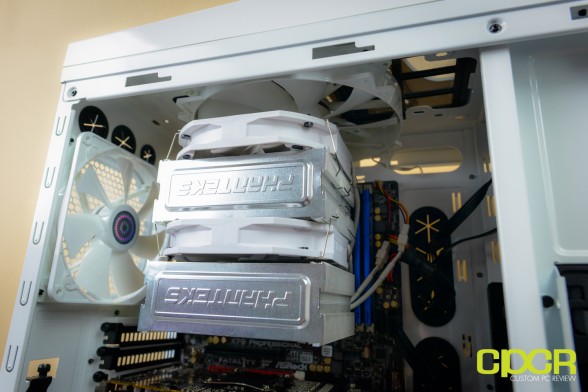
Otherwise, our massive Phanteks PH-TC14PE, one of the largest air coolers on the market today, fit into the case with plenty of room to spare. Additionally, our MSI Radeon HD6970 with the ARCTIC Accelero Xtreme 7970 cooler which stretches nearly 13″ fit into the case with room to spare as well.
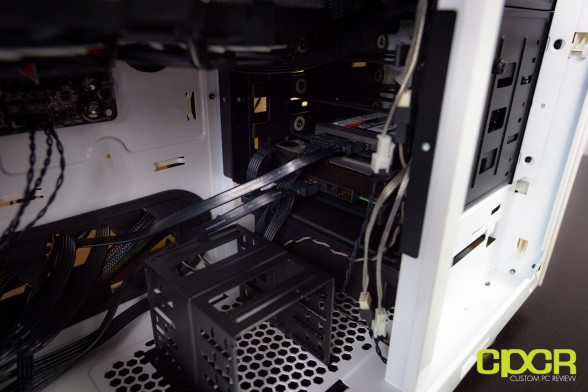
Instead of utilizing the 2.5″ drive cage, I simply installed the 2.5″ drive into the 4-in-3 cage using the drive brackets. Below that is a 3.5″ WD Caviar Blue, which installed quite easily as well.
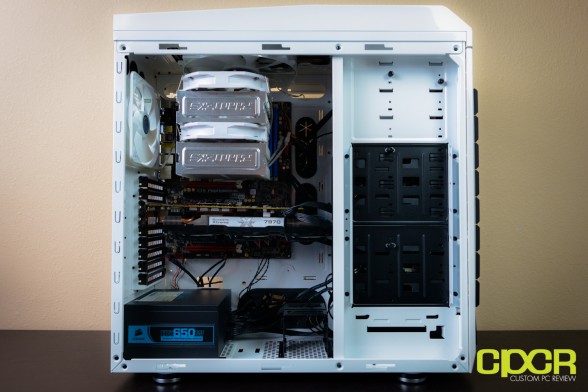
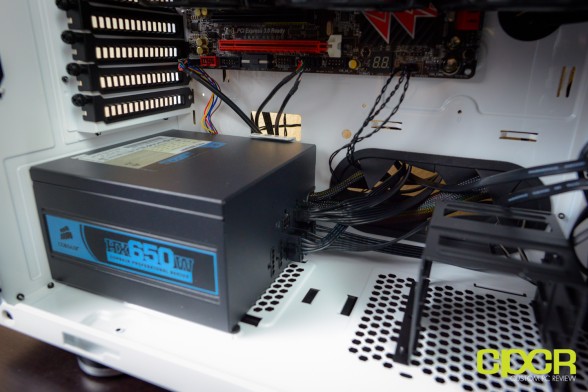
Our puny Corsair HX650 fit into the case with ease. All the cables are routed through a massive cable management grommet here. Clean and efficient.
There’s plenty of space here for even the largest graphics cards on the market as well as motherboards up to XL-ATX in length.
Again, the massive Phanteks PH-TC14PE fits into the case perfectly with plenty of room to spare. Phanteks, it’s time to go even bigger!
Time to put the side panel cover back on… I should definitely do a better job managing cables. Remember kids, do as I say not as I do.
Before closing it all up, here’s a look at the total mess in the back. I should definitely go use some cable ties, but there’s so much space back here it really isn’t all that necessary. Still closes up like a charm.
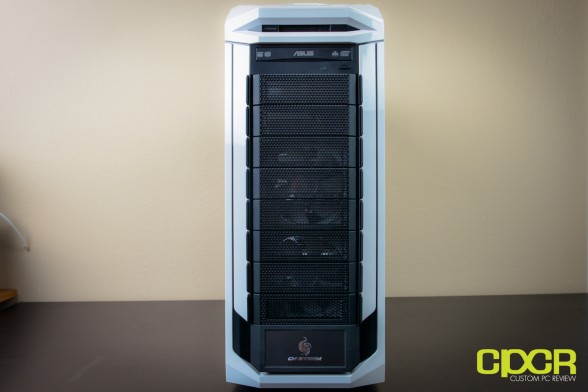
Here’s a quick look at the front of the case with a standard ASUS OEM DVD drive installed. Nothing too special, but the drive is a bit recessed and looks a bit different compared to all the drive bay covers. It’d be nice if the drive could be hidden behind a drive bay cover though. There’s definitely enough space for that.
Finally, spinning around the back here for one final look before testing.
[section label=5. Testing and Performance]
Testing the CM Storm Stryker
Once fired up, the CM Storm Stryker’s front panel connectors instantly light up with the power button itself displaying the CM Storm logo. Additionally, the fan controller also lights up as well as you can see above. With the fan controller, Cooler Master has included audible feedback when the fan speed is increased or decreased, and if the LEDs are turned on or off which is a nice touch. Unfortunately, the beep is pretty loud and, as far as I can tell, you can’t really turn it off so it may not be so great for those who have roommates who sleep way too early.
Here’s a look at the front of the case once the entire system is put together and ready to go. Notice that I oriented the fans toward the front instead of the original side fan configuration. This allows for much better airflow to the graphics card.
Also, the sample I got had a messed up fan at the bottom. That said, this case is so new that Cooler Master didn’t have any spare fans available (and I didn’t want to wait to get the review out for you guys), so we’ll just go with a picture of the single LED lit fan for now. The fan itself works fine so functionally it wasn’t an issue. Cooler Master is pretty good about RMA’s so if this happens to you, just drop them an e-mail and they’ll take care of it.
Performance
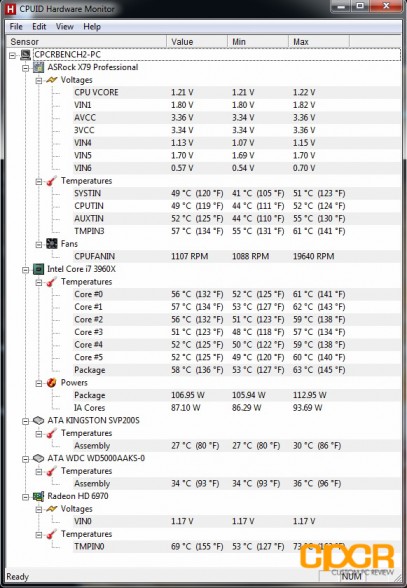
As usual of all my case testing, I ran a full 30 mins of AIDA 64 and Furmark simultaneously (Ambient 24°C) to try to produce the highest amount of heat possible. Overall, the CM Storm Stryker produced excellent results with max average core temperature on the six-core Intel Core i7 3960X at 59.7°C. Additionally, the graphics card stayed under 73°C as well under full load.
These results are comparable to the NZXT Switch 810, which was actually able to maintain a lower GPU temperature (71°C vs 73°C), but had a slightly higher average CPU temperature (62.7°C vs 59.7°C). This is most likely because the NZXT Switch 810 has an excellent push/pull 140mm fan configuration on the front intakes to cool the GPU while the CM Storm Stryker has a powerful 200mm and 140mm exhaust setup near the CPU.
Additionally, ambient temperature while testing the NZXT Switch 810 was 1°C lower than testing temperature of the CM Storm Stryker at 23°C.
[section label=6. Conclusion]
Conclusion
 Like I said earlier, when the CM Storm Trooper was introduced last year, I wasn’t quite at the stage of being overly impressed with its design, but with the addition of the contrasty white/black paintjob in addition to the windowed sidepanel, I’m sold. In addition to the improvements they’ve made with the CM Storm Stryker, Cooler Master has still kept up with their impeccable build quality, using the highest end materials and giving the CM Storm Stryker a top notch paint job. Don’t believe me? How about some stats? The case itself while empty weighs a full 30.2lbs!
Overall performance was definitely up to Cooler Master standards as well. I would recommend rotating the 4-in-3 drive cages with the fans facing the front of the case to allow the graphics card to breathe though. With the sides of the 4-in-3 drive cages blocked off and the top/back fans acting as exhausts only, I have no idea how Cooler Master expected the graphics cards to breathe, at least in the stock case configuration. Noise performance was just alright. The fans were a tiny bit louder than I expected despite the fan controller, but Cooler Master did slap on some 120mm fans up front, which were the source of most of the noise. The top 200mm was fairly quiet and the rear 140mm was quiet as well. I’d definitely like to see Cooler Master return to the design phillosophy of the HAF X and HAF 932 with the multiple 200mm/230mm fans. I’d even take 140mm’s over the 120mm’s up front.
The install process into the CM Storm Stryker was a breeze as well, just like with most other high end Cooler Master cases. I didn’t have any issues getting everything installed (almost without using my screwdriver, too) and there’s plenty of space at the back for the cable management. Extra long graphics cards fit without issue, and there’s plenty of space for even an XL-ATX motherboard to fit into the case as well.
In terms of issues with the case, I think the biggest two are the lack of real dust filtration on the front intakes and the fact that the drive cages really can’t be oriented in its stock configuration without suffocating the graphics card(s). Also, I’d really like to see Cooler Master go back to the tried and true formula of including larger fans with their cases. The 230mm/200mm fans on the HAF 932/HAF X are silent and move a ton of air. Why Cooler Master is going back to including 120mm fans on any case is truly beyond me. Oh, and I just have to mention one of the front 120mm fans from my particular CM Storm Stryker sample had DOA LEDs. While this is probably quite rare, I had to mention it anyway. Reviewer’s integrity!
Pricing on the CM Storm Stryker is expected to be $159.99 MSRP and should available for purchase from your favorite retailers soon if not already. (Amazon, Newegg, etc.) Street prices tend to be a bit lower than MSRP, so $150 or so wouldn’t be unexpected. Competition includes the Cooler Master HAF X ($166.92), Corsair Graphite Series 600T ($168.27), NZXT Switch 810 ($169.99), and the Rosewill Thor v2 ($149.99). As you can see, this puts the CM Storm Stryker in a very competitive position in terms of pricing compared to similar cases on the market.
Bottom Line
I’ve always been a fan of Cooler Master cases. They’re crazy tough, they look good, they move a lot of air, and they’re usually designed by people who actually put a bit of thought into the design. The CM Storm Stryker is another one of those cases. Highly recommended!
Special thanks to Cooler Master for making this review possible!


Nice review. You said several times something about the graphics card not being able to breath in the stock configuration. You did not post the results of your temperature tests for that configuration though so I’m wondering if you were just making that part up? The design looks on the face of it to be negative pressure with plenty of filtered air entry surface available. If the box was positive pressure based then I would understand your point.
WARNING: This case if very loud. An aspect overlooked on every review site, including this one. Yes, it looks great and has great features but if you’re into sound design, audio recording then look elsewhere.