For network admins and network security professionals, one of the most important tools to learn to use is Wireshark (formerly Ethereal), a free and open source network analyzer/packet sniffer software for Windows, Mac and Linux that will allow network admins to quickly and easily capture frames, packets, segments/datagrams, and above in real time to monitor traffic going in and out of their networks.
Our tutorial today will guide you through some of the basics of using Wireshark to capture packets, filter them, and understand the data being presented. We also want to use this opportunity to educate our readers on why using encryption is so important, even when simply browsing the internet.
Caution: Before starting, ensure that you’ve been permitted to analyze the network you’re planning to run Wireshark on. Wireshark is a very powerful tool and because it captures any data going in and out of a certain network interface, it may raise red flags with network administrators if you run the tool at places such as workplaces, schools, businesses, etc.
With that said, let’s begin!
Wireshark Tutorial
Download and Install Wireshark
Wireshark can be downloaded at the Wireshark website here. Simply choose the edition you’d like to download. As mentioned previously, Wireshark is available for Windows, Mac, and Linux.
Once downloaded, launch the Wireshark installer which will guide you through the Wireshark installation process.
Launch Wireshark and Begin Capturing Packets
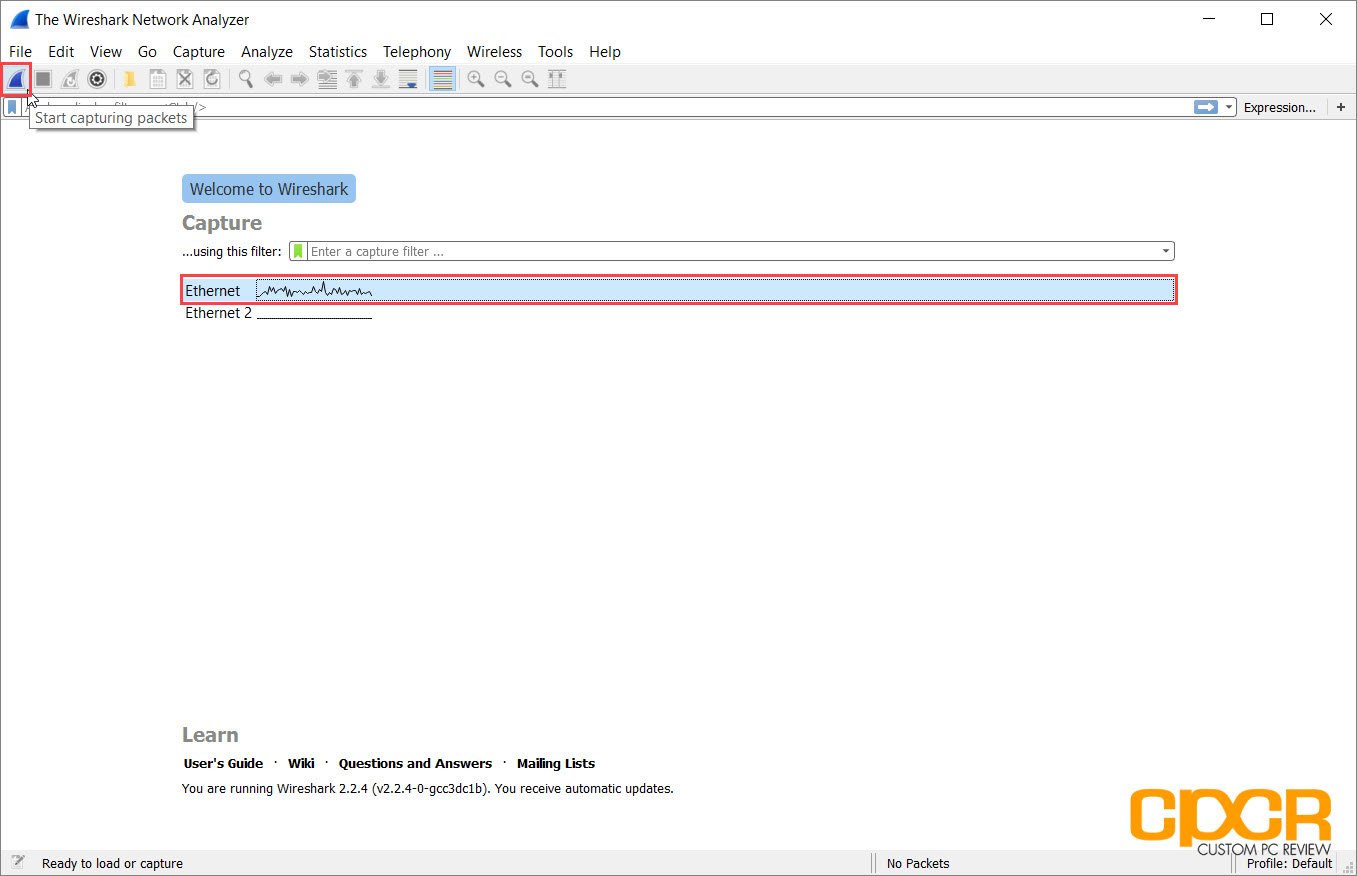
Once Wireshark is installed, launch the program to begin. Once the program is launched, select the network interface to capture and click on the sharkfin at the top left of the application right under the menu bar to begin capturing packets.
Explore the Wireshark Interface
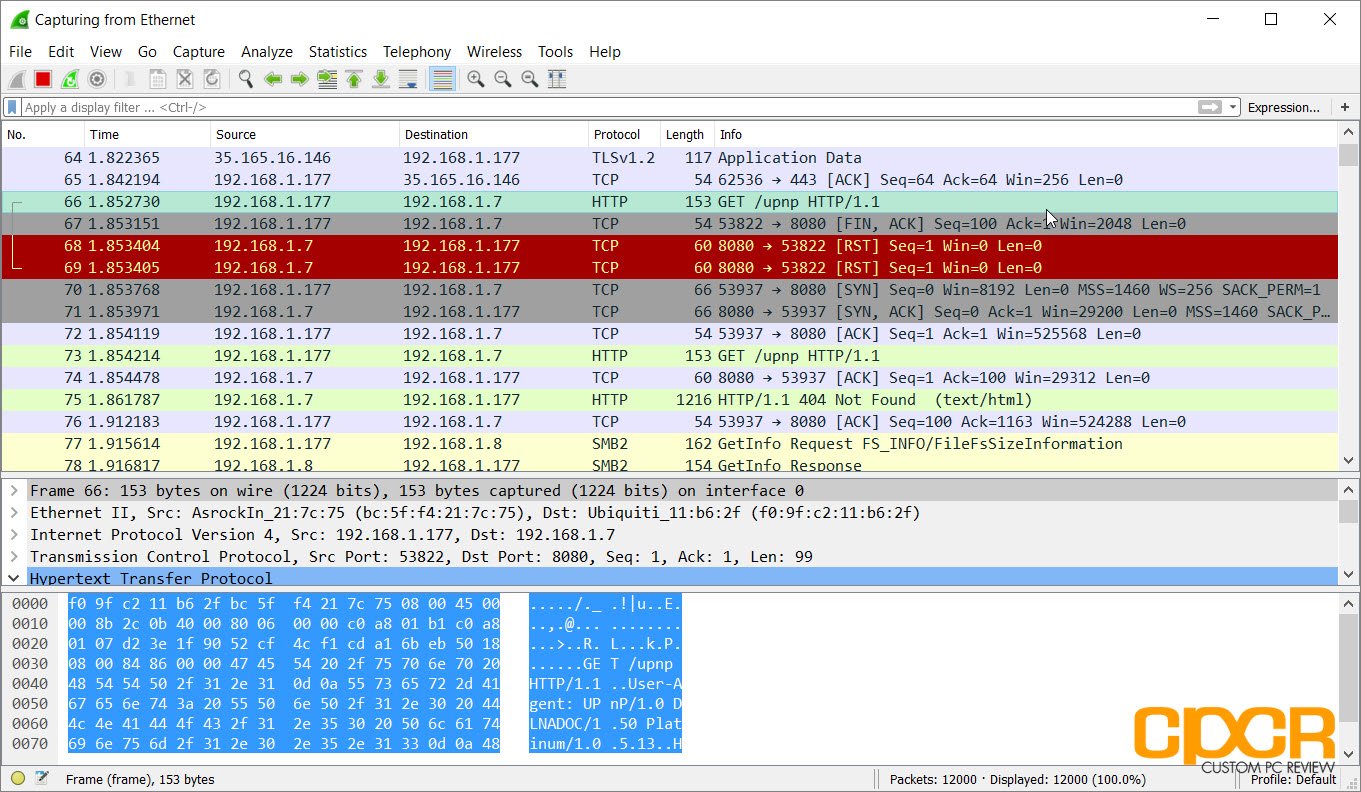
Once the capture button is pressed, Wireshark will begin capturing packets and displaying all the traffic going in and out of the previously selected interface in real time. Wireshark will provide you with a ton of information about each packet going through the network.
For those just starting out in learning about networks, this is a great opportunity to learn about the OSI Reference Model as well. As Wireshark captures at Layer 2 of the OSI Reference Model, we can see everything from the frame, packet, segment/datagram and above.
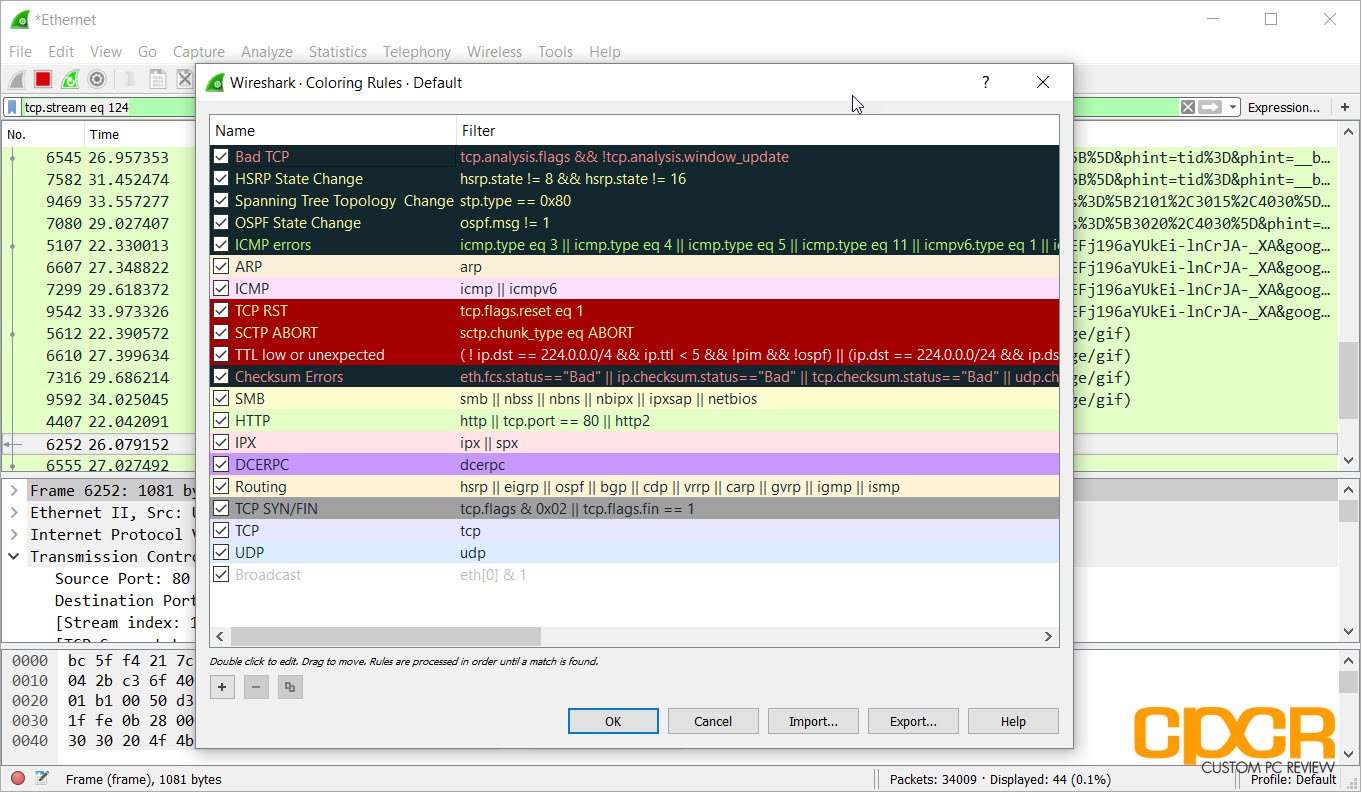
By default, Wireshark color codes the different packets based on a set of color rules. For example, here we can see that HTTP protocol traffic is green while ICMP (Ping) traffic is in pink.
Filtering Data
Although it may not seem like your computer is doing much at any given moment, hundreds or even thousands of packets may actually be going through the network. This includes everything from HTTP traffic to DNS traffic and much, much more. As such, it’s important to use filters to filter out information that we don’t need and search for information that we want.
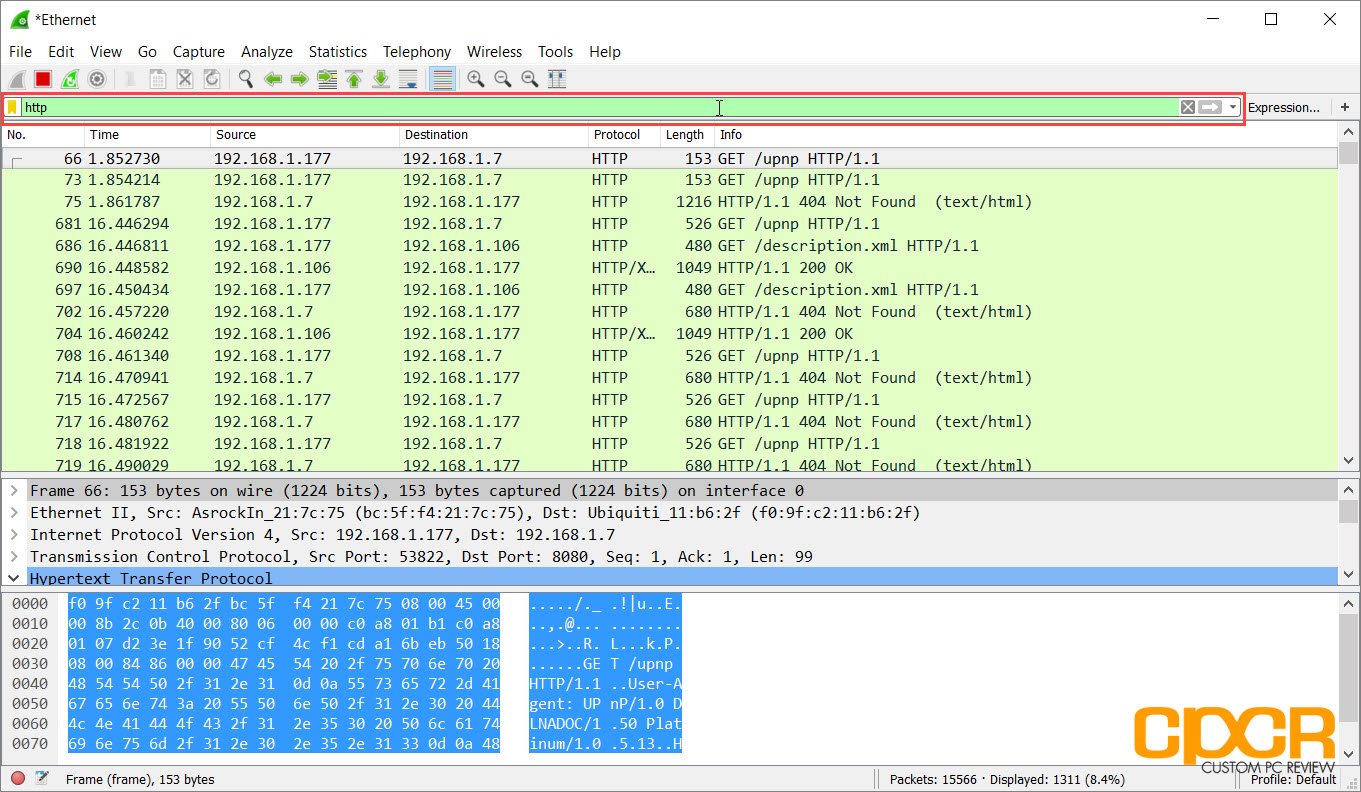
Say we want to find all packets that were sent or received using the HTTP protocol. Simply type HTTP at the filter box at the top and all captured HTTP packets will appear. Of course, there are literally thousands of different filters which can be applied to the captured packet data to pinpoint exactly what you’re looking for. A full list can be found in Wireshark’s documentation here.
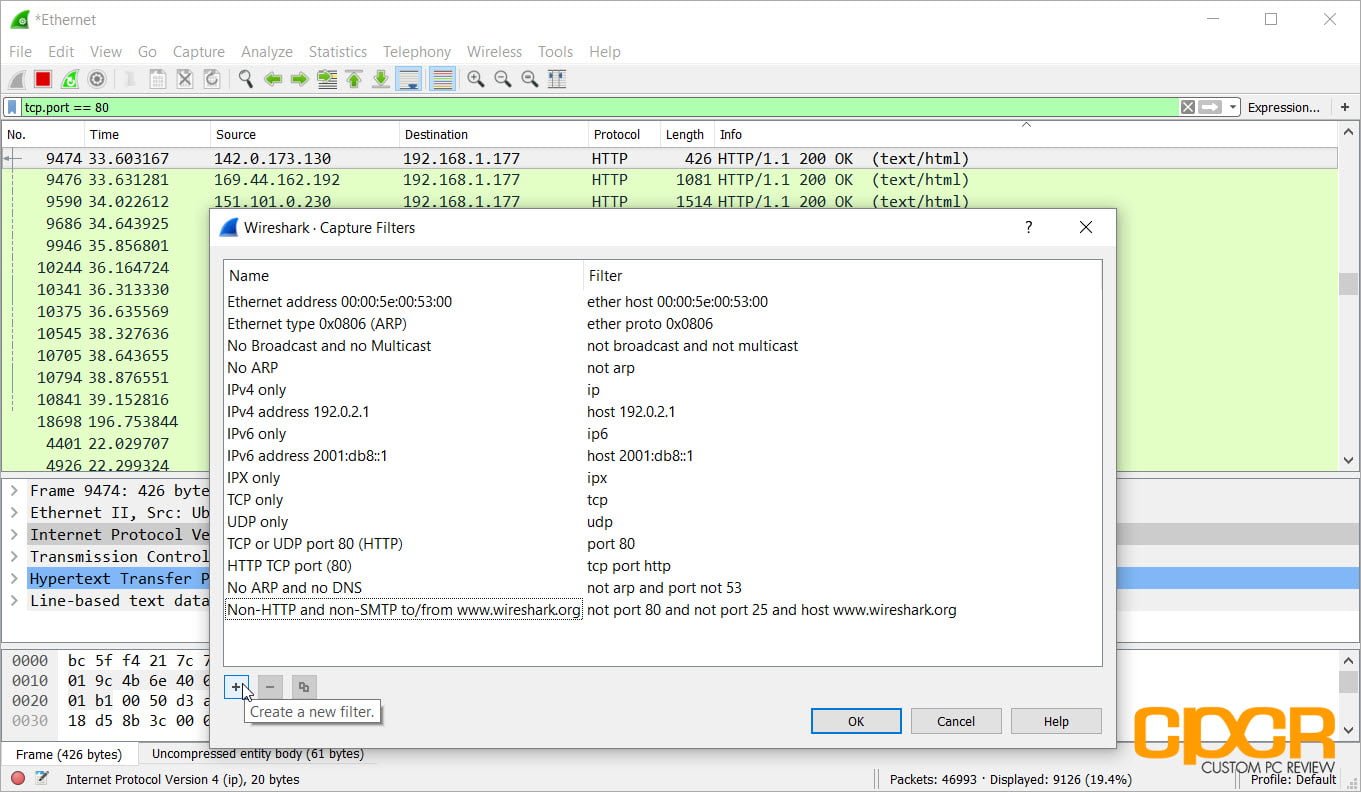
Of course, capture filters can also be set by clicking on the Capture tab and clicking on Capture Filters. This prevents capturing of packets that you don’t care about in the first place.
Analyzing Packets
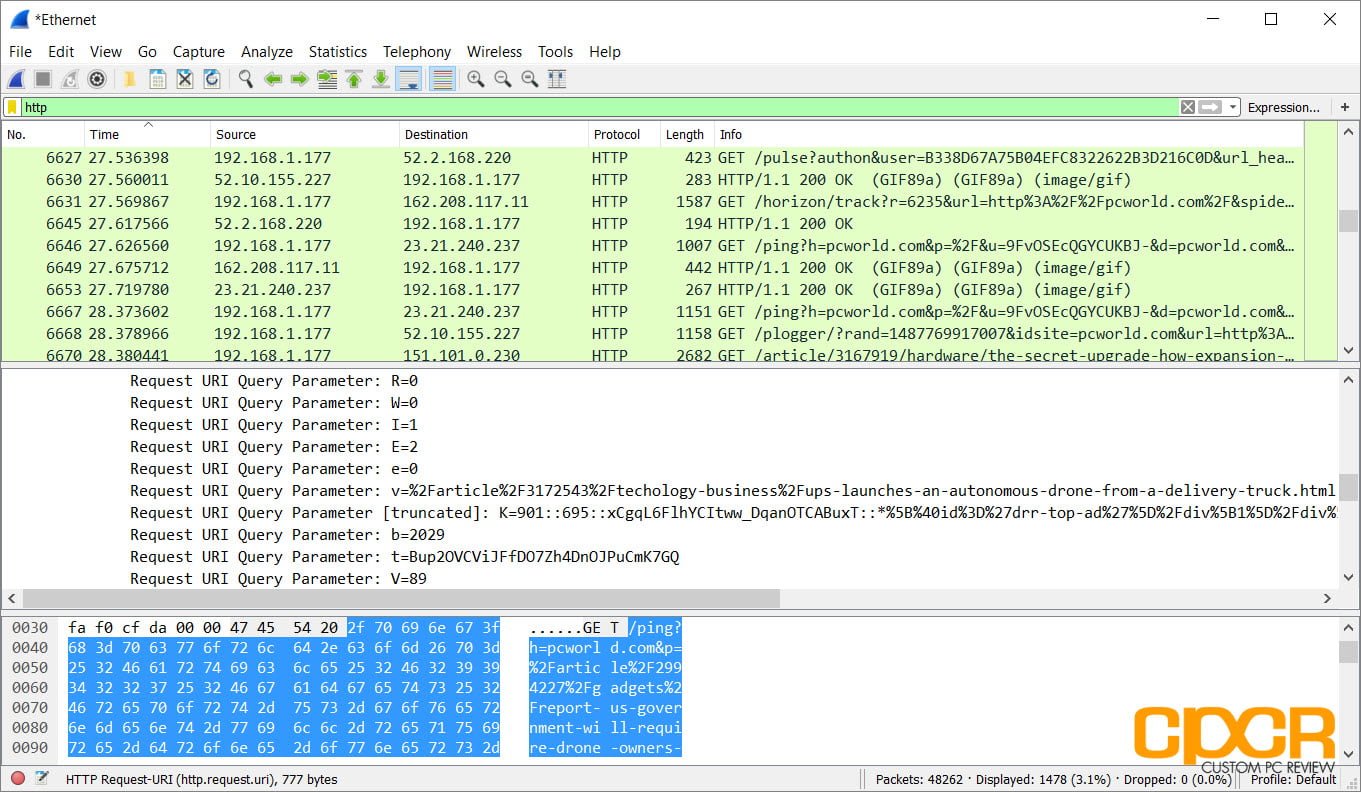
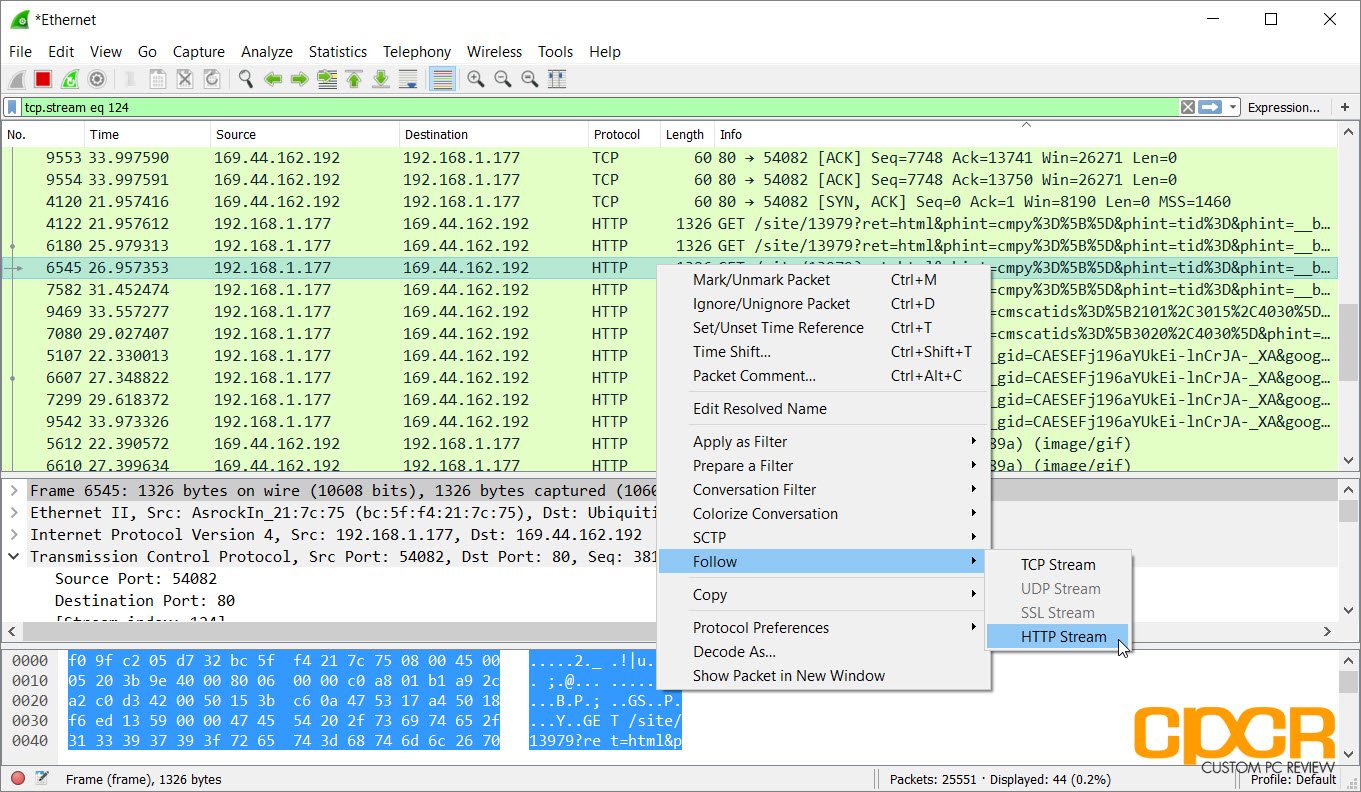
Once you’ve pinpointed a packet that you’re looking for, you can follow the stream of packets going in and out of the network interface that’s connected to that packet. Here we can see some unencrypted HTTP traffic going in and out of port 80 on the network. Let’s follow it.
Once we follow the HTTP stream, we can see a decoded version of everything in that stream of HTTP data going in and out of the interface. This will instantly tell us what type of website this particular system visited as well as other potentially private information.
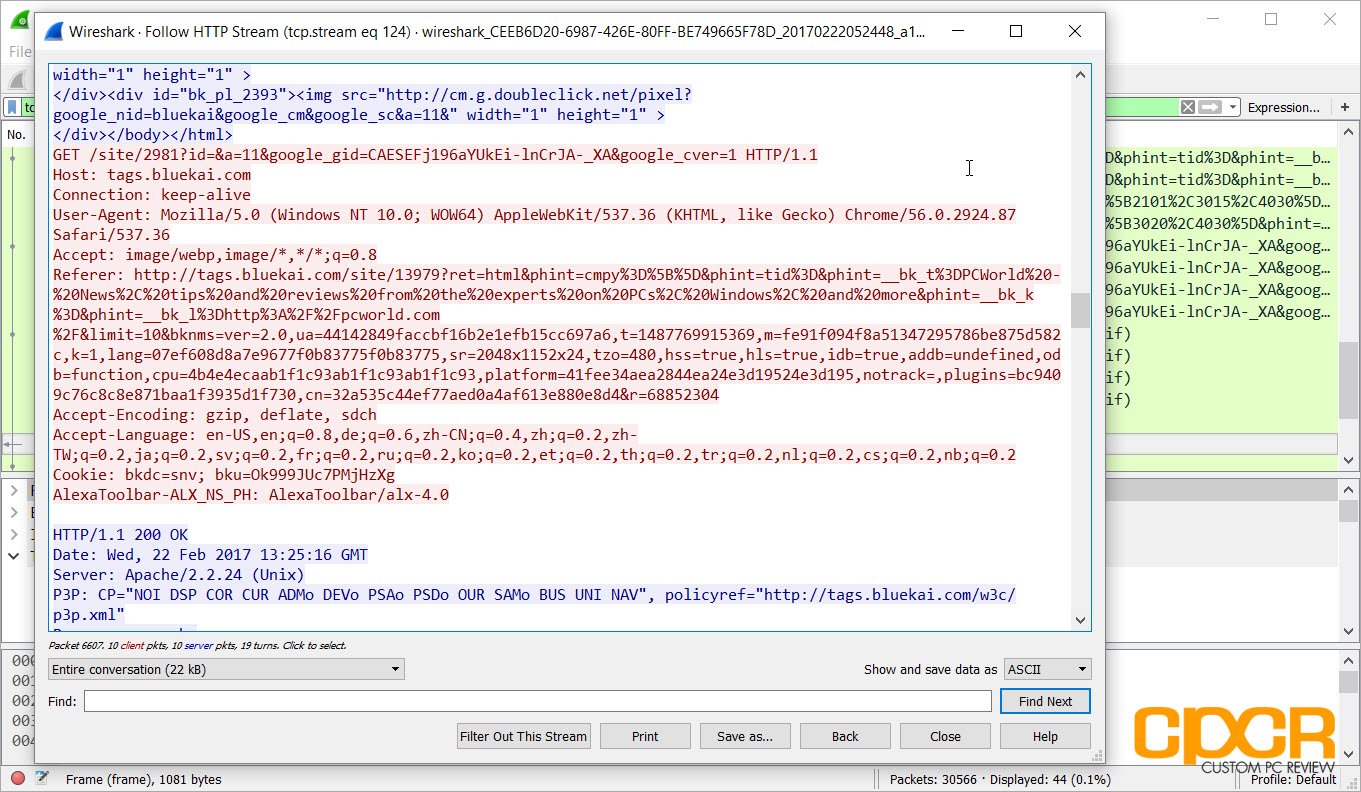
If for example you’re on a public WiFi system or are on an unknown network where someone is sniffing packets and passwords are transmitted through plaintext HTTP, they can easily decode your passwords. Similarly if you send files such as bank records, health information, or other sensitive information over standard FTP, this can easily be captured as well. This is why we run SSL both here at CPCR and the CPCR Forums as well.
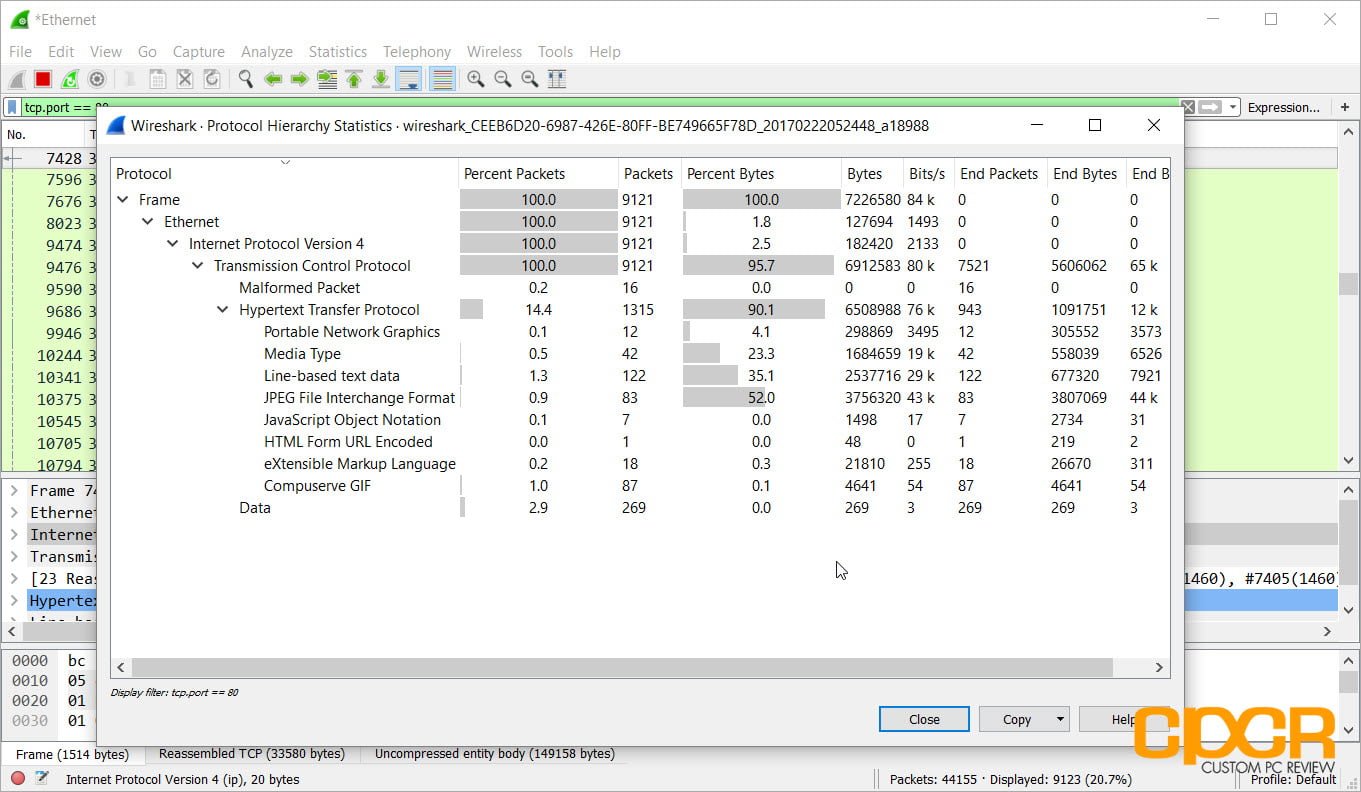
Other analysis of the data captured can also show how much of what type of data is going through the network. This will allow network admins to get a better understanding of the network to implement stuff like QoS rules and others to improve network efficiency.
Conclusion
Overall this is just a quick and dirty tutorial on just getting started on packet sniffing using Wireshark which highlights some of its capabilities as well as make a case as to why everyone should use encrypted communications whenever possible.
Of course, there’s still plenty more to learn. For those just getting into the networking field, Wireshark 101: Essential Skills for Network Analysis is a great read with plenty of practical exercises which helps teach you the basics of not only using Wireshark, but computer networks as well.

