If you’ve ever plugged a Windows 10 system into a network or joined a Wi-Fi connection with Windows 10, one of the first things you’ve probably seen is a prompt which pops out on the right hand side of the screen asking whether you’d like to allow your PC to be discoverable by other PCs and devices on the network. The prompt may look something like this.
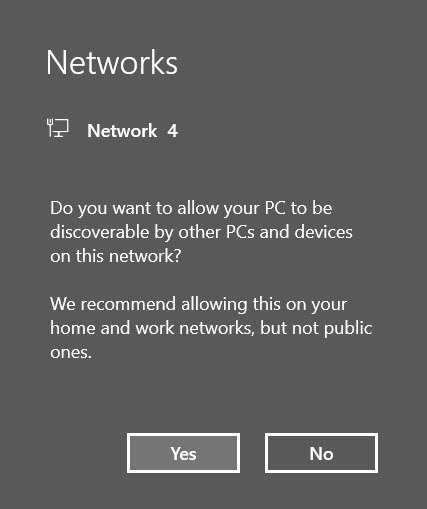
If you click yes, Windows 10 sets the network to a private network, which allows the system to be discoverable by other devices and allows the system to discover other devices as well. If you select no, or click anywhere else on the screen, the system will default to a public network so the system is not discoverable by other devices.
Setting a system to a public network is an important security feature in public networks such as schools, coffee shops, hotels, airports, shopping malls, etc. where you don’t want others to be able to discover your system and access your shared files however, in a home or business environment where important services such as file sharing, printer sharing, etc. are needed, this may be a source of quite a bit of frustration. Ever ran into the issue where you can’t find a NAS or a shared file or a network printer? This is probably the issue.
As such, today we’re going to give you a quick and easy tutorial on how to turn a public network into a private network, and a private network into a public network in Microsoft Windows 10.
Wired Ethernet Connection
Step 1
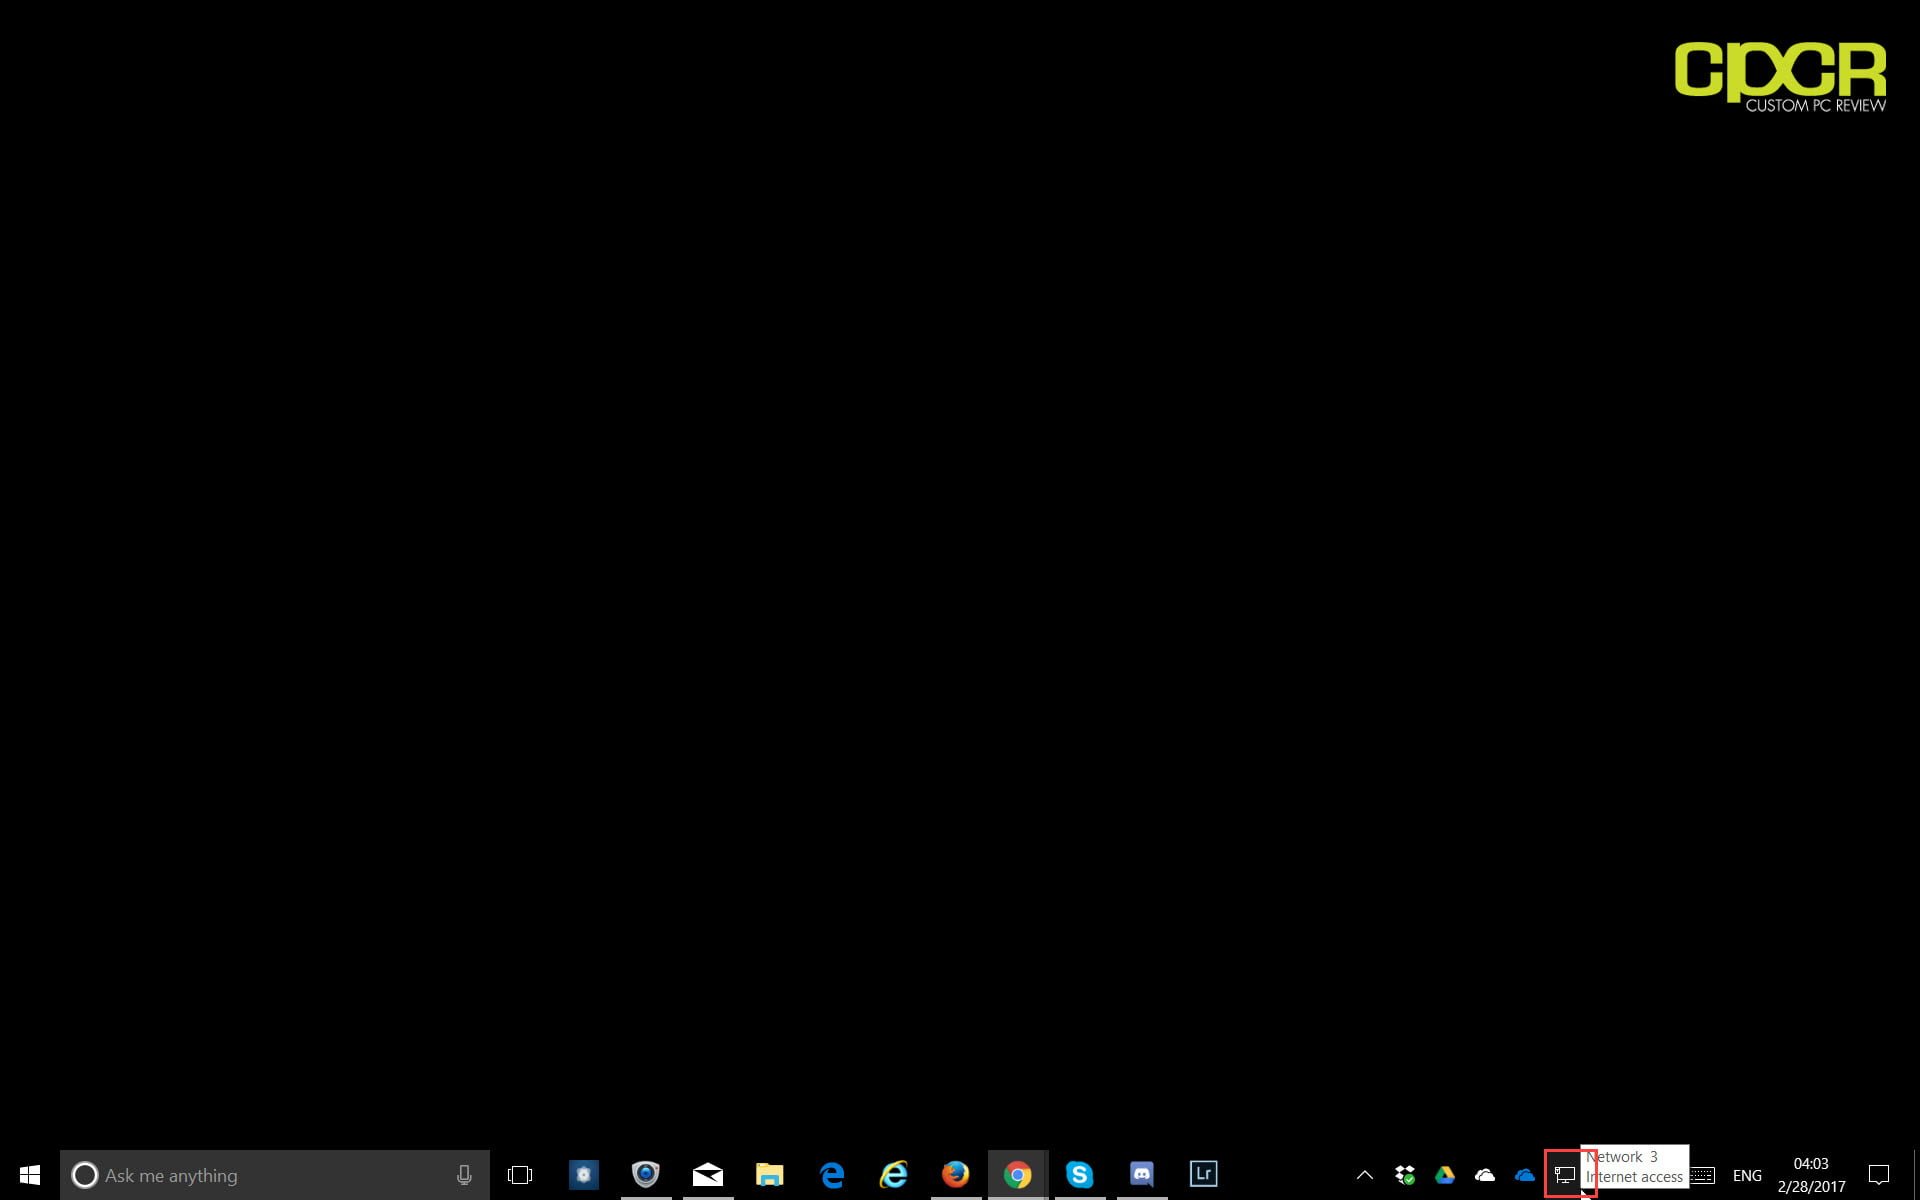
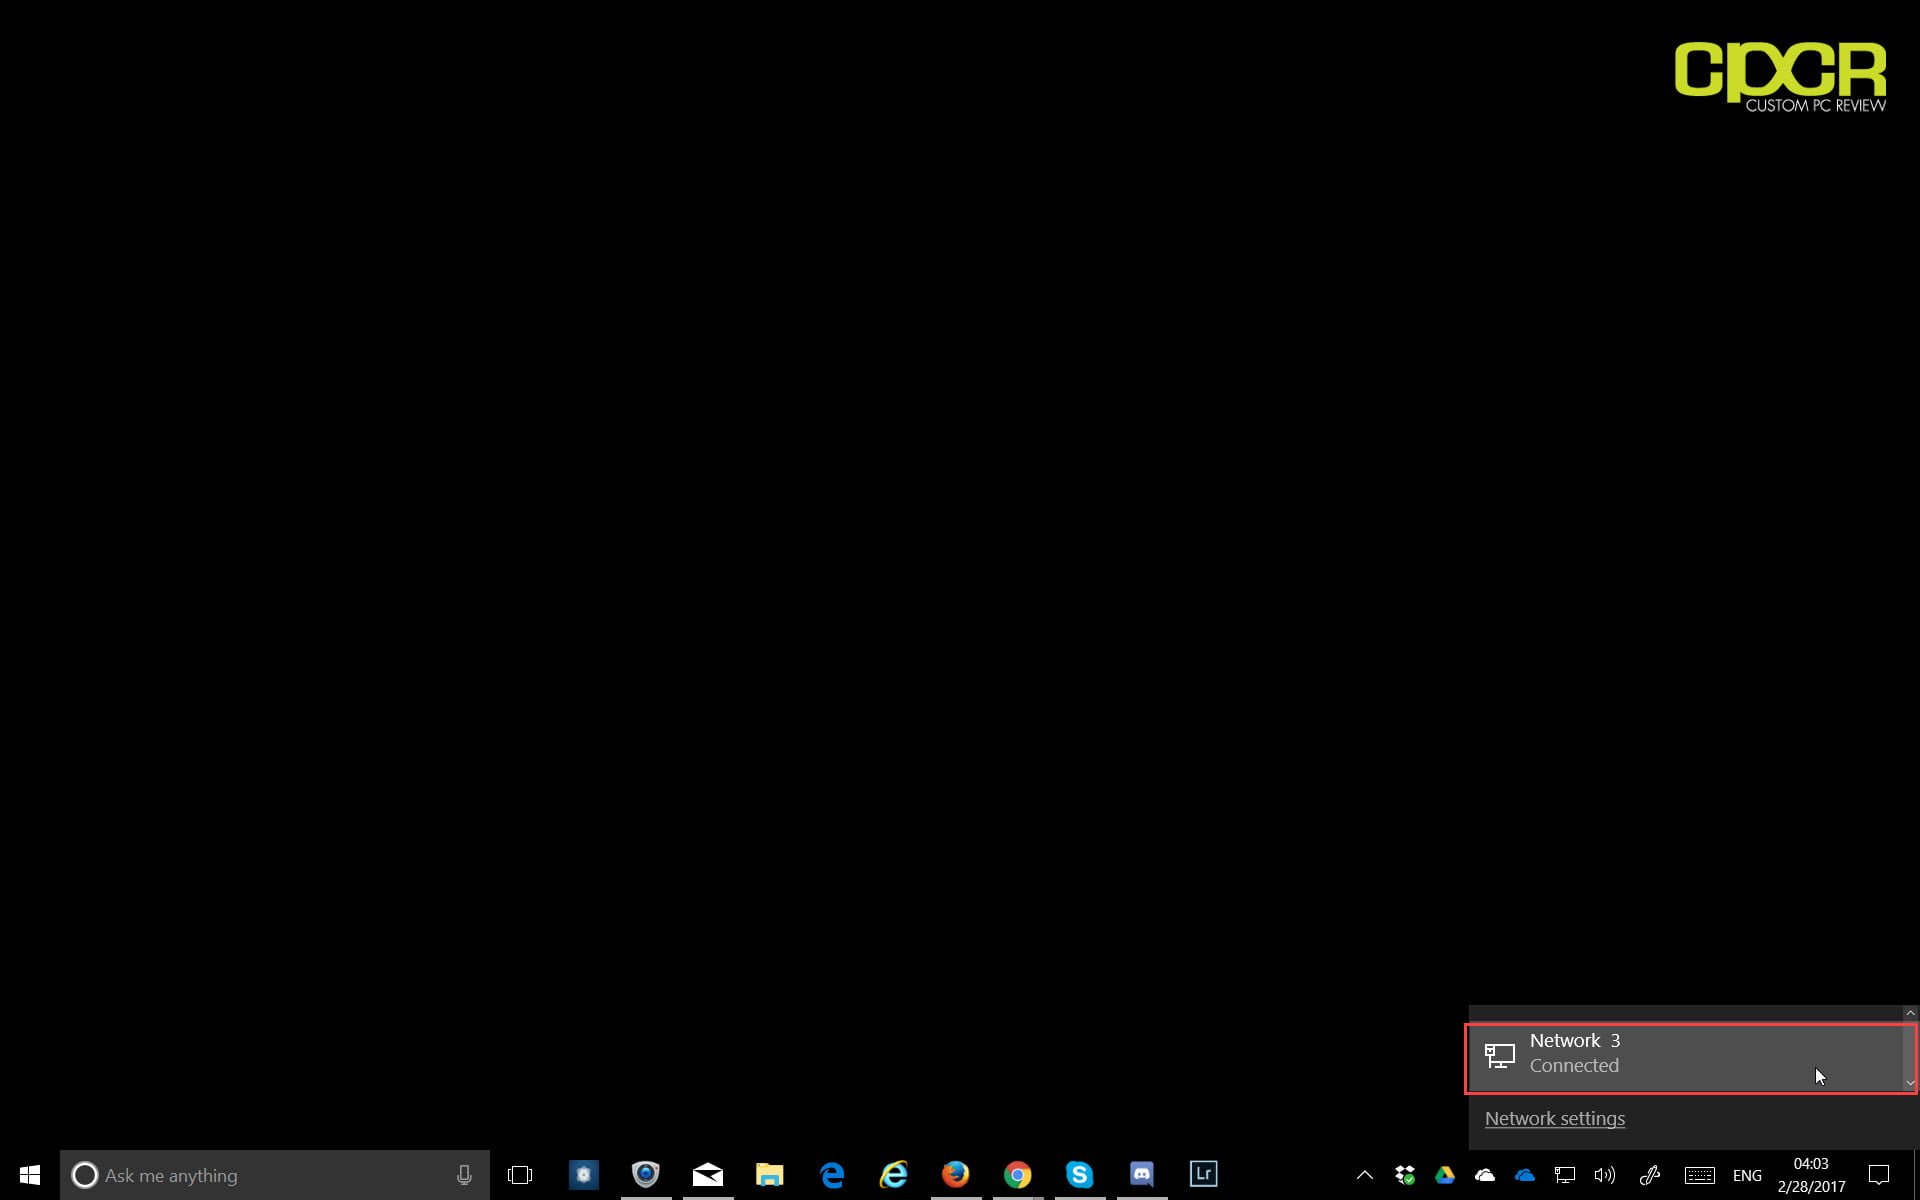
Click on the network icon in the system tray. This is usually located near the clock at the bottom right hand corner of the desktop.
Step 2
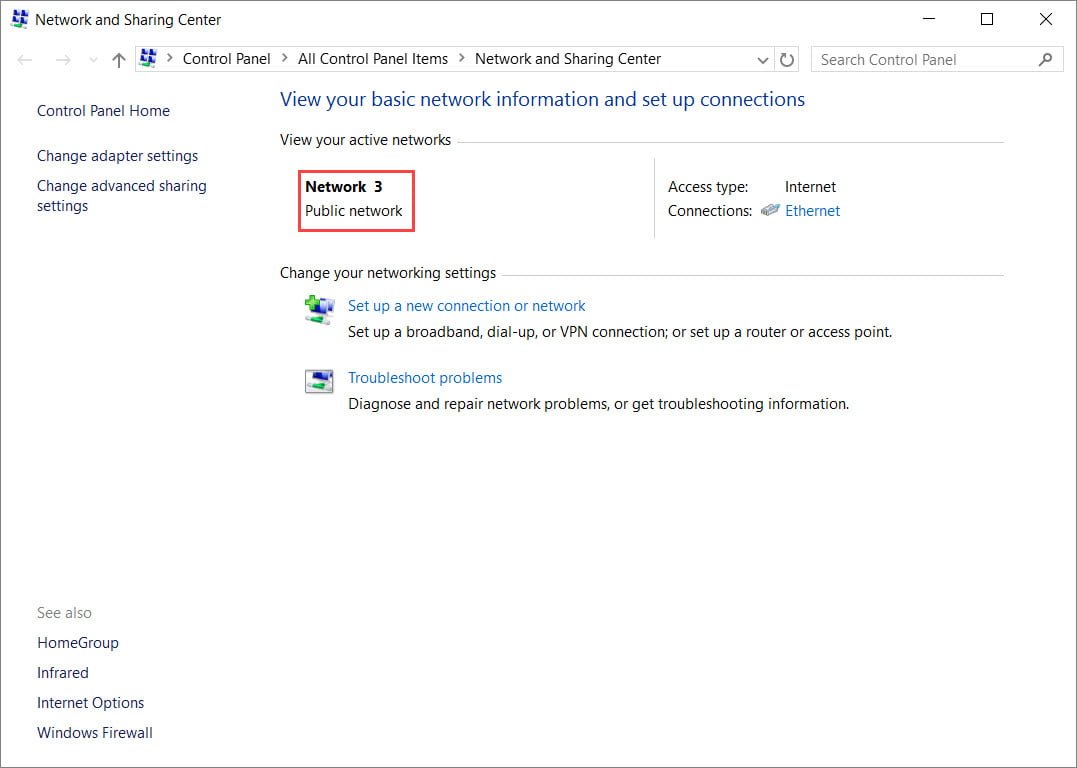
Click on the network you wish to change. In this example, we’re going to change the network type for Network 3.
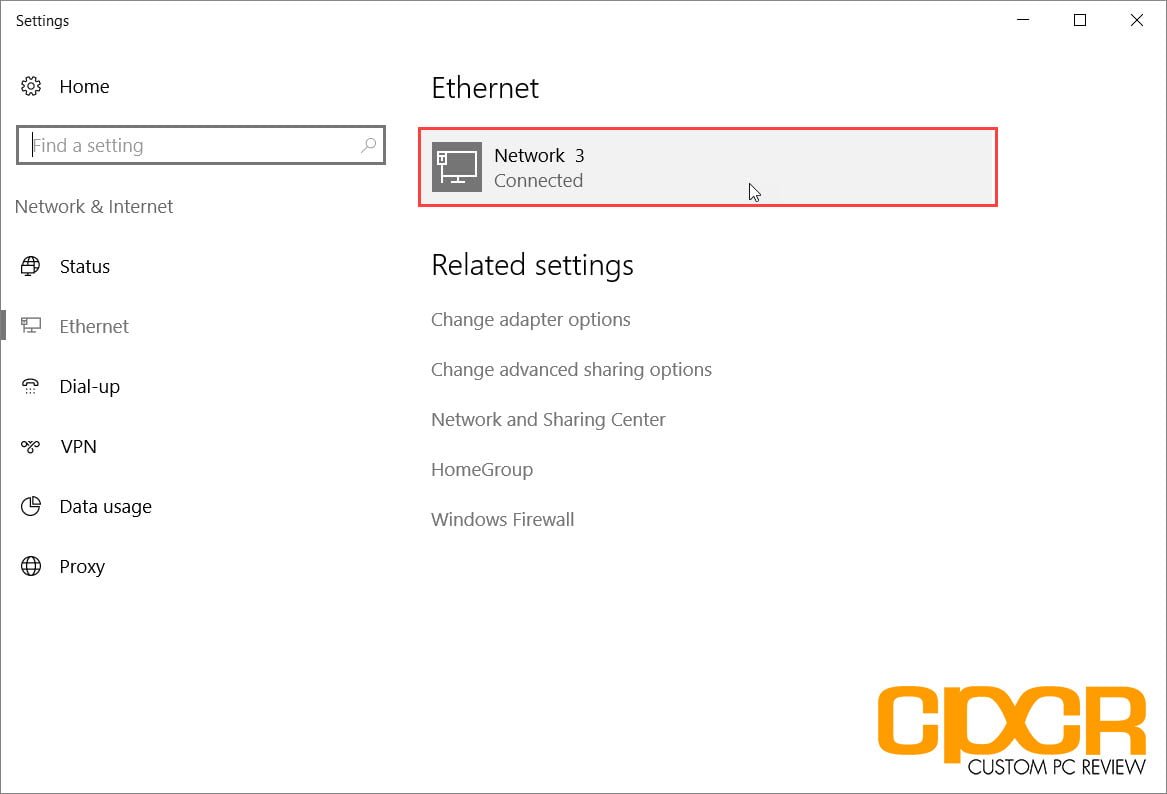
Step 3
Once the network is selected, a Settings window will appear which shows some options about the networks available. Once again, click on the network you’d like to change. In our example, we’ll be changing Network 3.
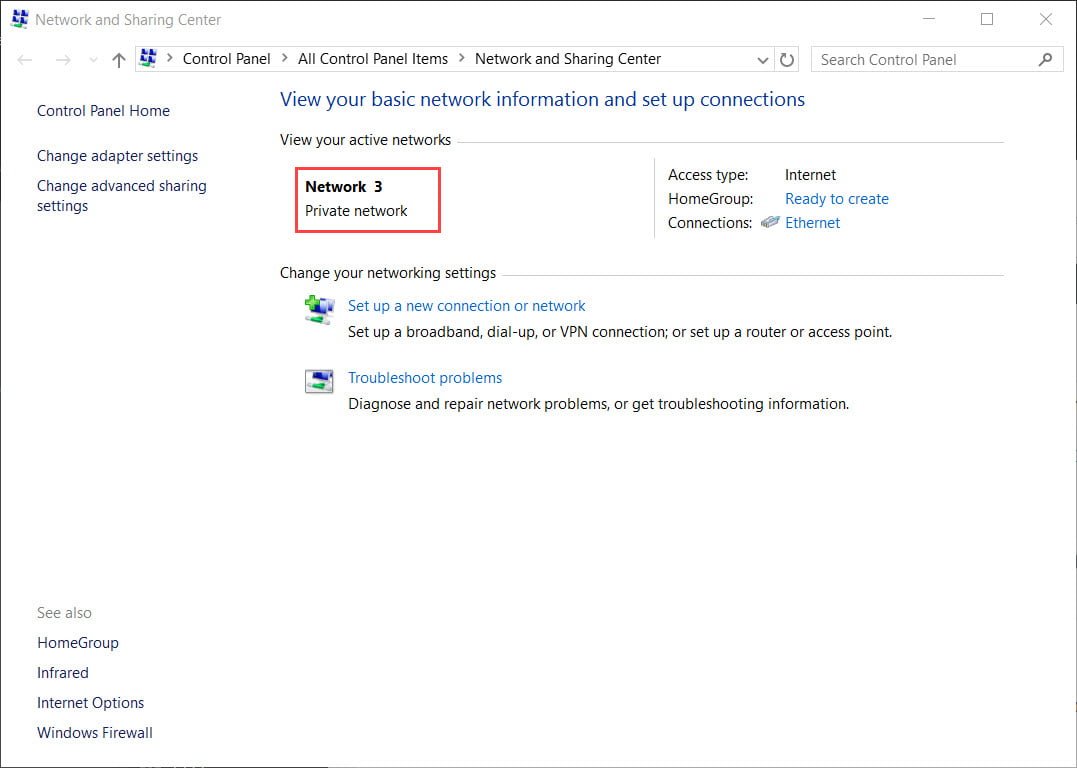
Step 4
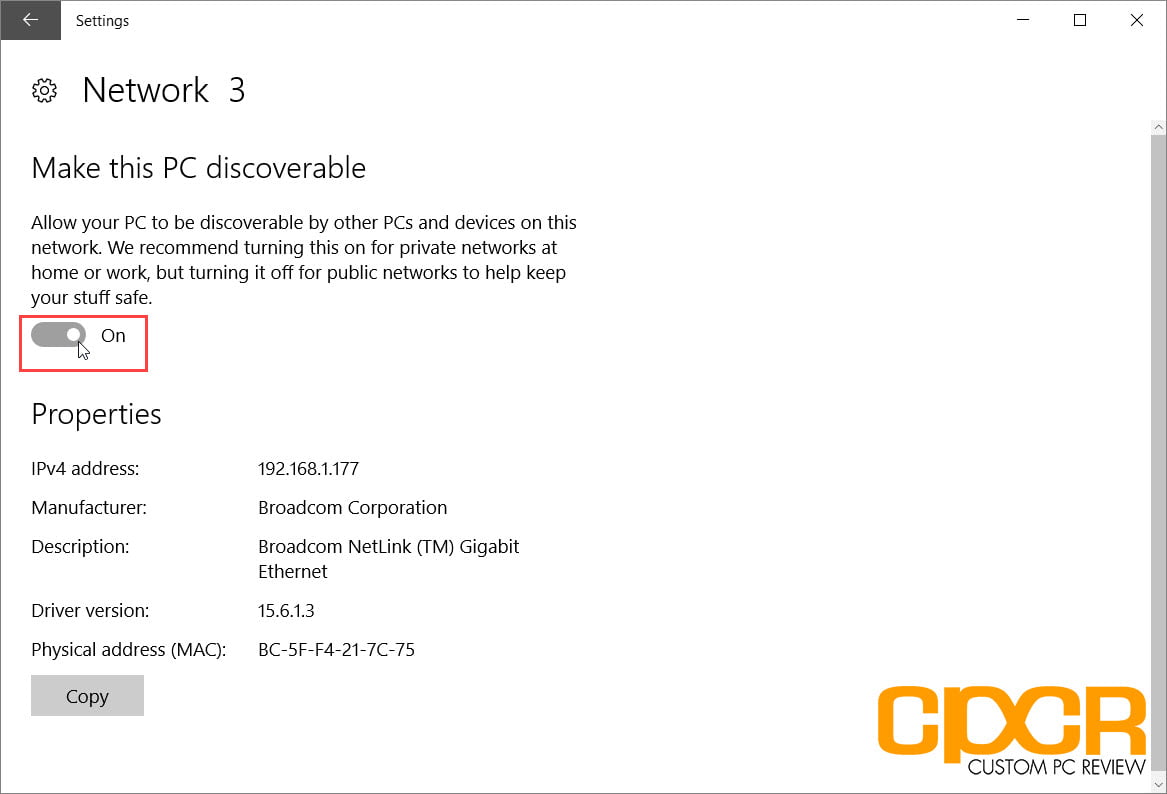
Once this is selected, you can simply toggle the switch under “Make this PC discoverable”. In the On mode, the PC will be set to a private network type which will allow sharing of files, sharing of printers, discovery of other systems, etc. In the Off mode, the PC will be set to the public network type which will block most of these sharing services.
Wireless Connection
Step 1
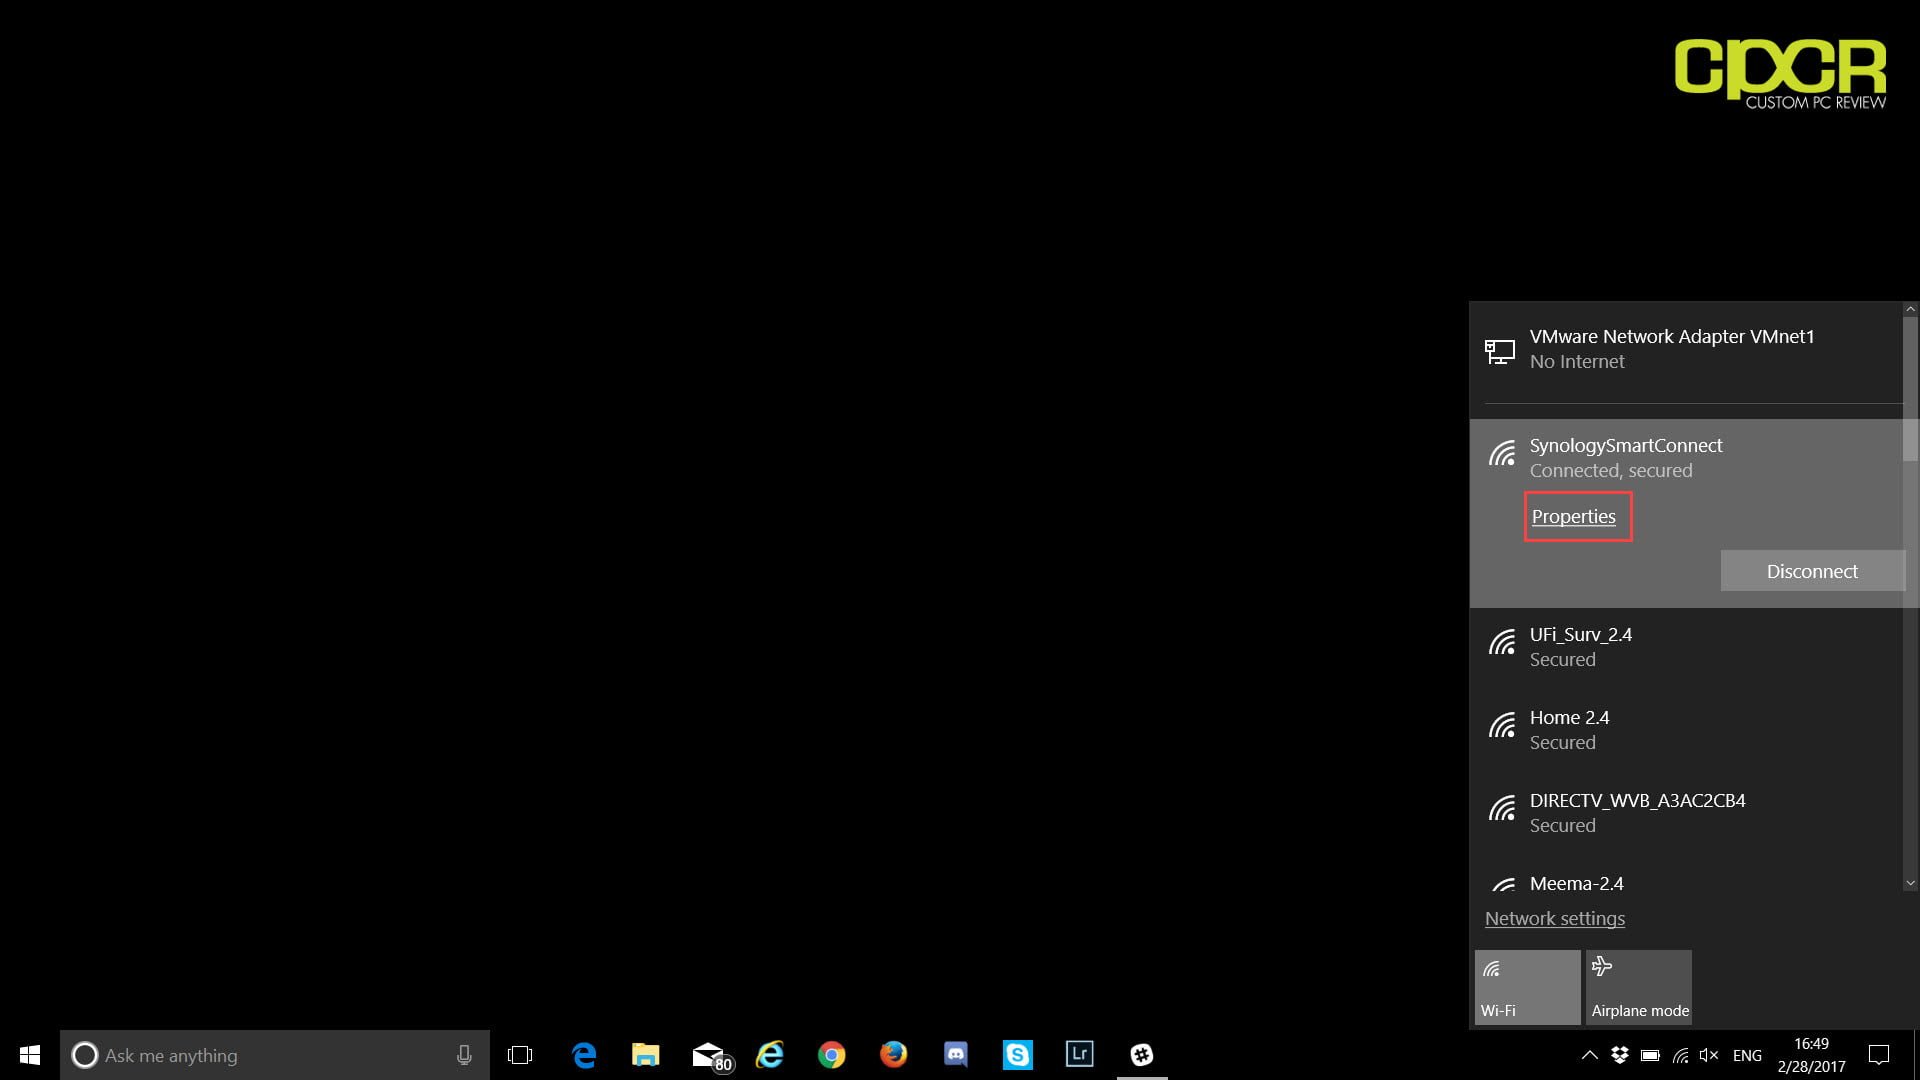
Click on the wireless network icon in the system tray. This is usually located near the clock at the bottom right hand corner of the desktop.
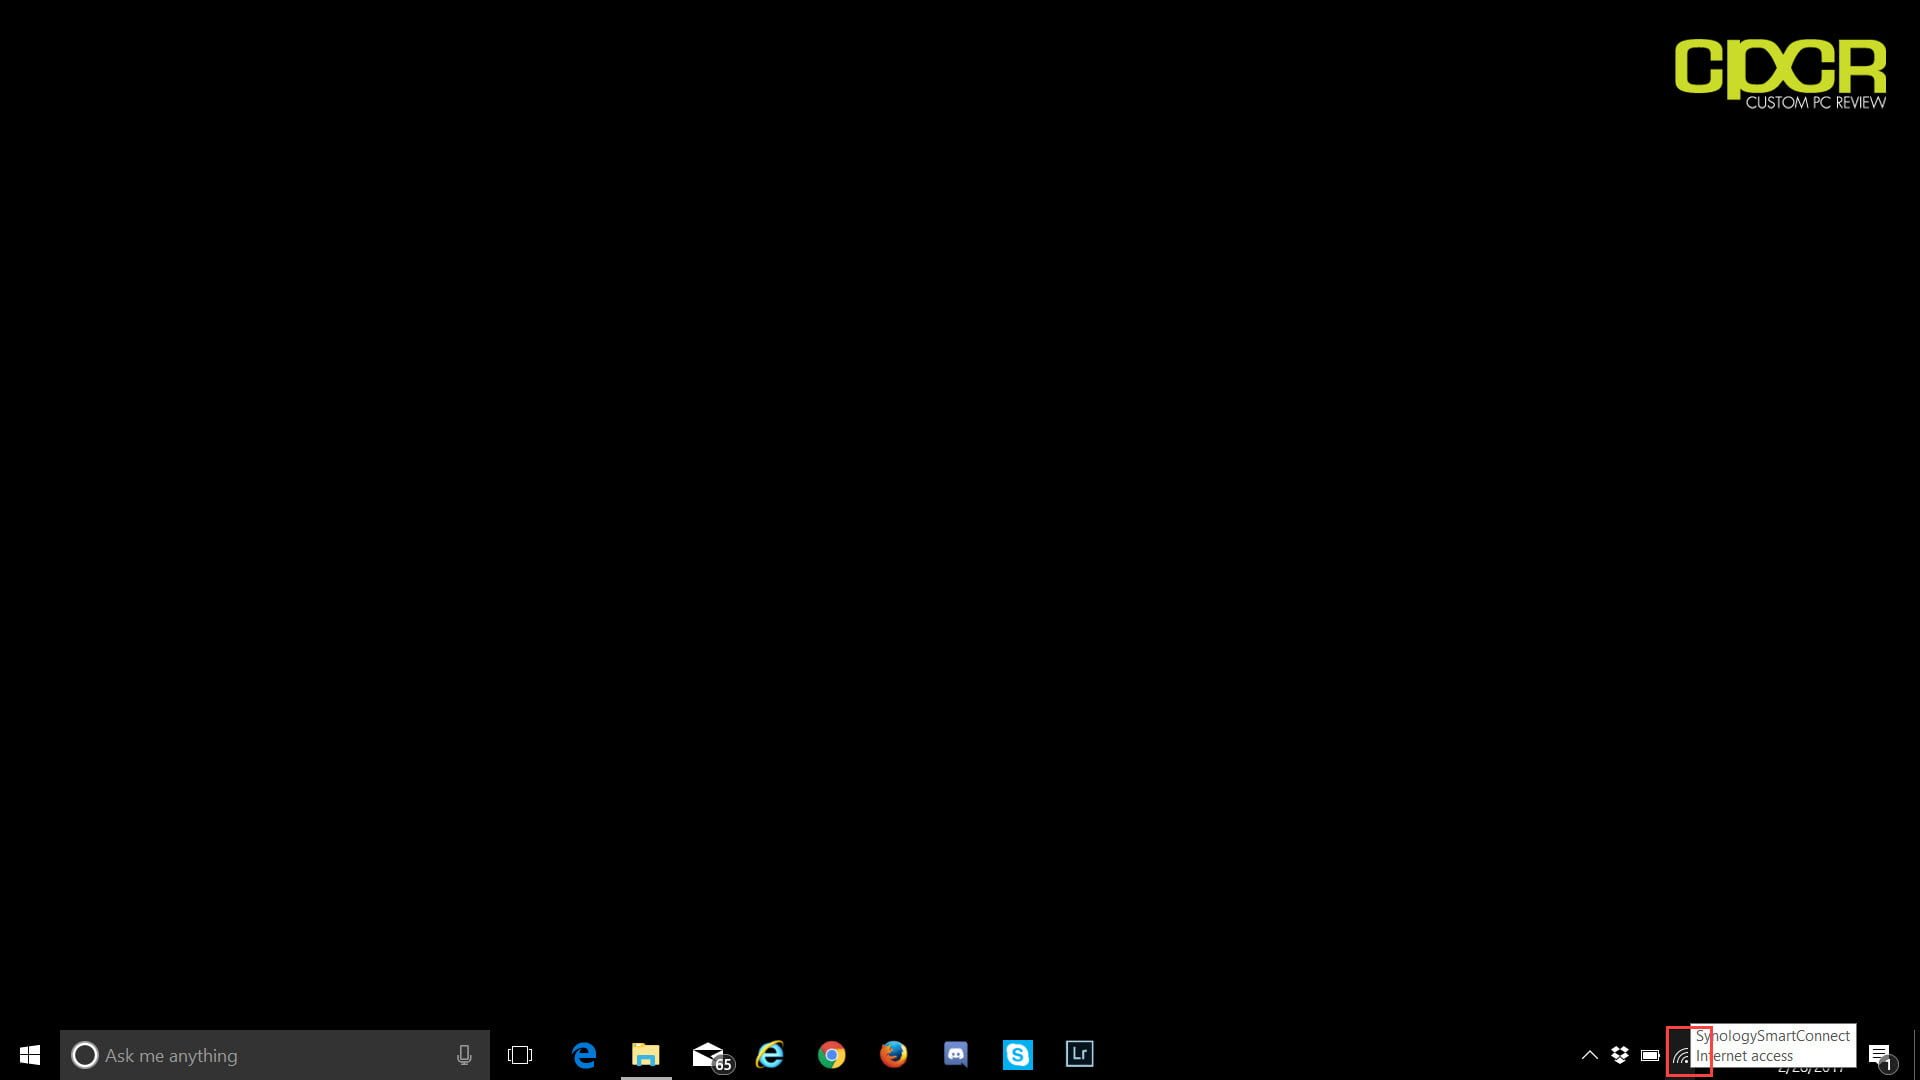
Step 2
Click on the network you wish to change and click on Properties for the network. In this example, we’re going to change the network type for the SynologySmartConnect network.
Step 3
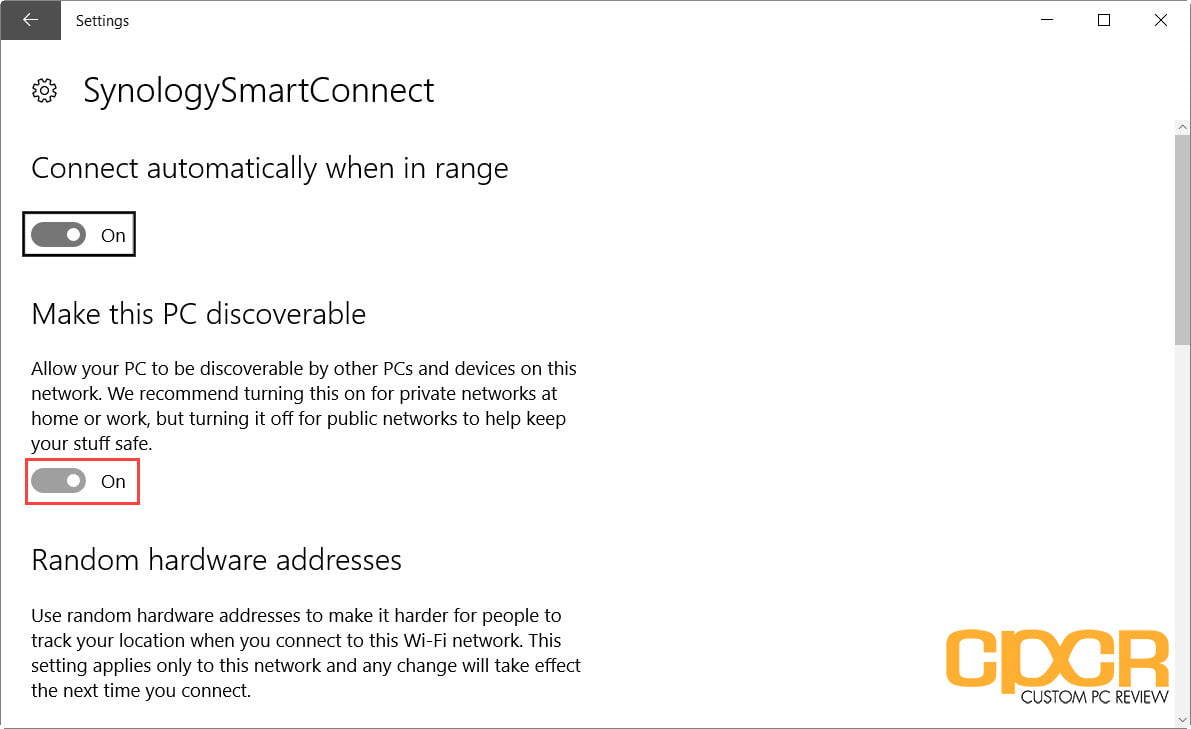
Finally, you can simply toggle the switch under “Make this PC discoverable” to turn the network type into either private or public. Toggling the switch on will turn the network type to a private network and toggling the switch to off will turn the network type into a public network.


The option “Make this PC discoverable” doesn’t show in the new 1703 update of Windows 10.