[section label=”Introduction”]
Introduction
Being an Editor here at Custom PC Review, I’m constantly in need of lots of mass storage. At CES 2017, I took over 1,000 14-bit RAW images using a Nikon D800 camera which generated files somewhere between 40MB-45MB each. After exporting them, another set of images are then created which take less, but still require quite a significant amount of storage space. Tack that onto 50Mbps 1080p video along with the thought of possibly doing 4K video down the road and the need for lots of reliable storage quickly adds up.
Of course, the easy solution is to throw a couple hard drives into your PC because that’s cheap and easy, but I also wanted the data to be accessible while I’m on my laptop or while I’m out of town on business. There’s literally nothing that sucks more than the feeling of having a day’s worth of pictures at a convention sitting on a memory card, a laptop or a external drive that can easily be lost, stolen, or broken in a series of unfortunate events.
As such, the easy solution to solve all those issues and potentially a lot more is to get a NAS, or Network Attached Storage.
[section label=”Hardware”]
Hardware
Now the easy solution to this is simply to pickup a NAS unit from a NAS vendor such as Synology, QNAP, ASUSTOR, or the many other NAS solutions providers out there. These are purpose designed systems that are built from the ground up to be used as a NAS and are generally easy to use and easy to setup. Of course, that would be too easy so I decided to go with a more custom approach.
As such, I decided to utilize FreeNAS for my NAS solution. For those unfamliar, FreeNAS is a free and open source NAS software which also happens to also be one of the most fully featured NAS solutions out on the market today. FreeNAS has a list of published system requirements, which can be found on this page here.
The Server
The system requirements for FreeNAS is pretty easy when it comes to the processor as it only needs to be 64-bit and multicore. As I didn’t need the compute capability of a full Xeon server processing chip, I decided to go with an Intel Atom Avoton platform based solution which would provide enough compute capability for encryption and some video encoding down the road.
Looking around at the options, the ASRock Rack C2550D4I quickly jumped out as a great motherboard which already includes the quad-core Intel Avoton C2550, four full-sized DIMM slots, dual NICs with teaming functionality, and a massive 12 SATA ports all in a mini-ITX sized form-factor. While this was initially perfect, further looking at the options I also discovered the ASRock Rack 1U12LW-C2750.
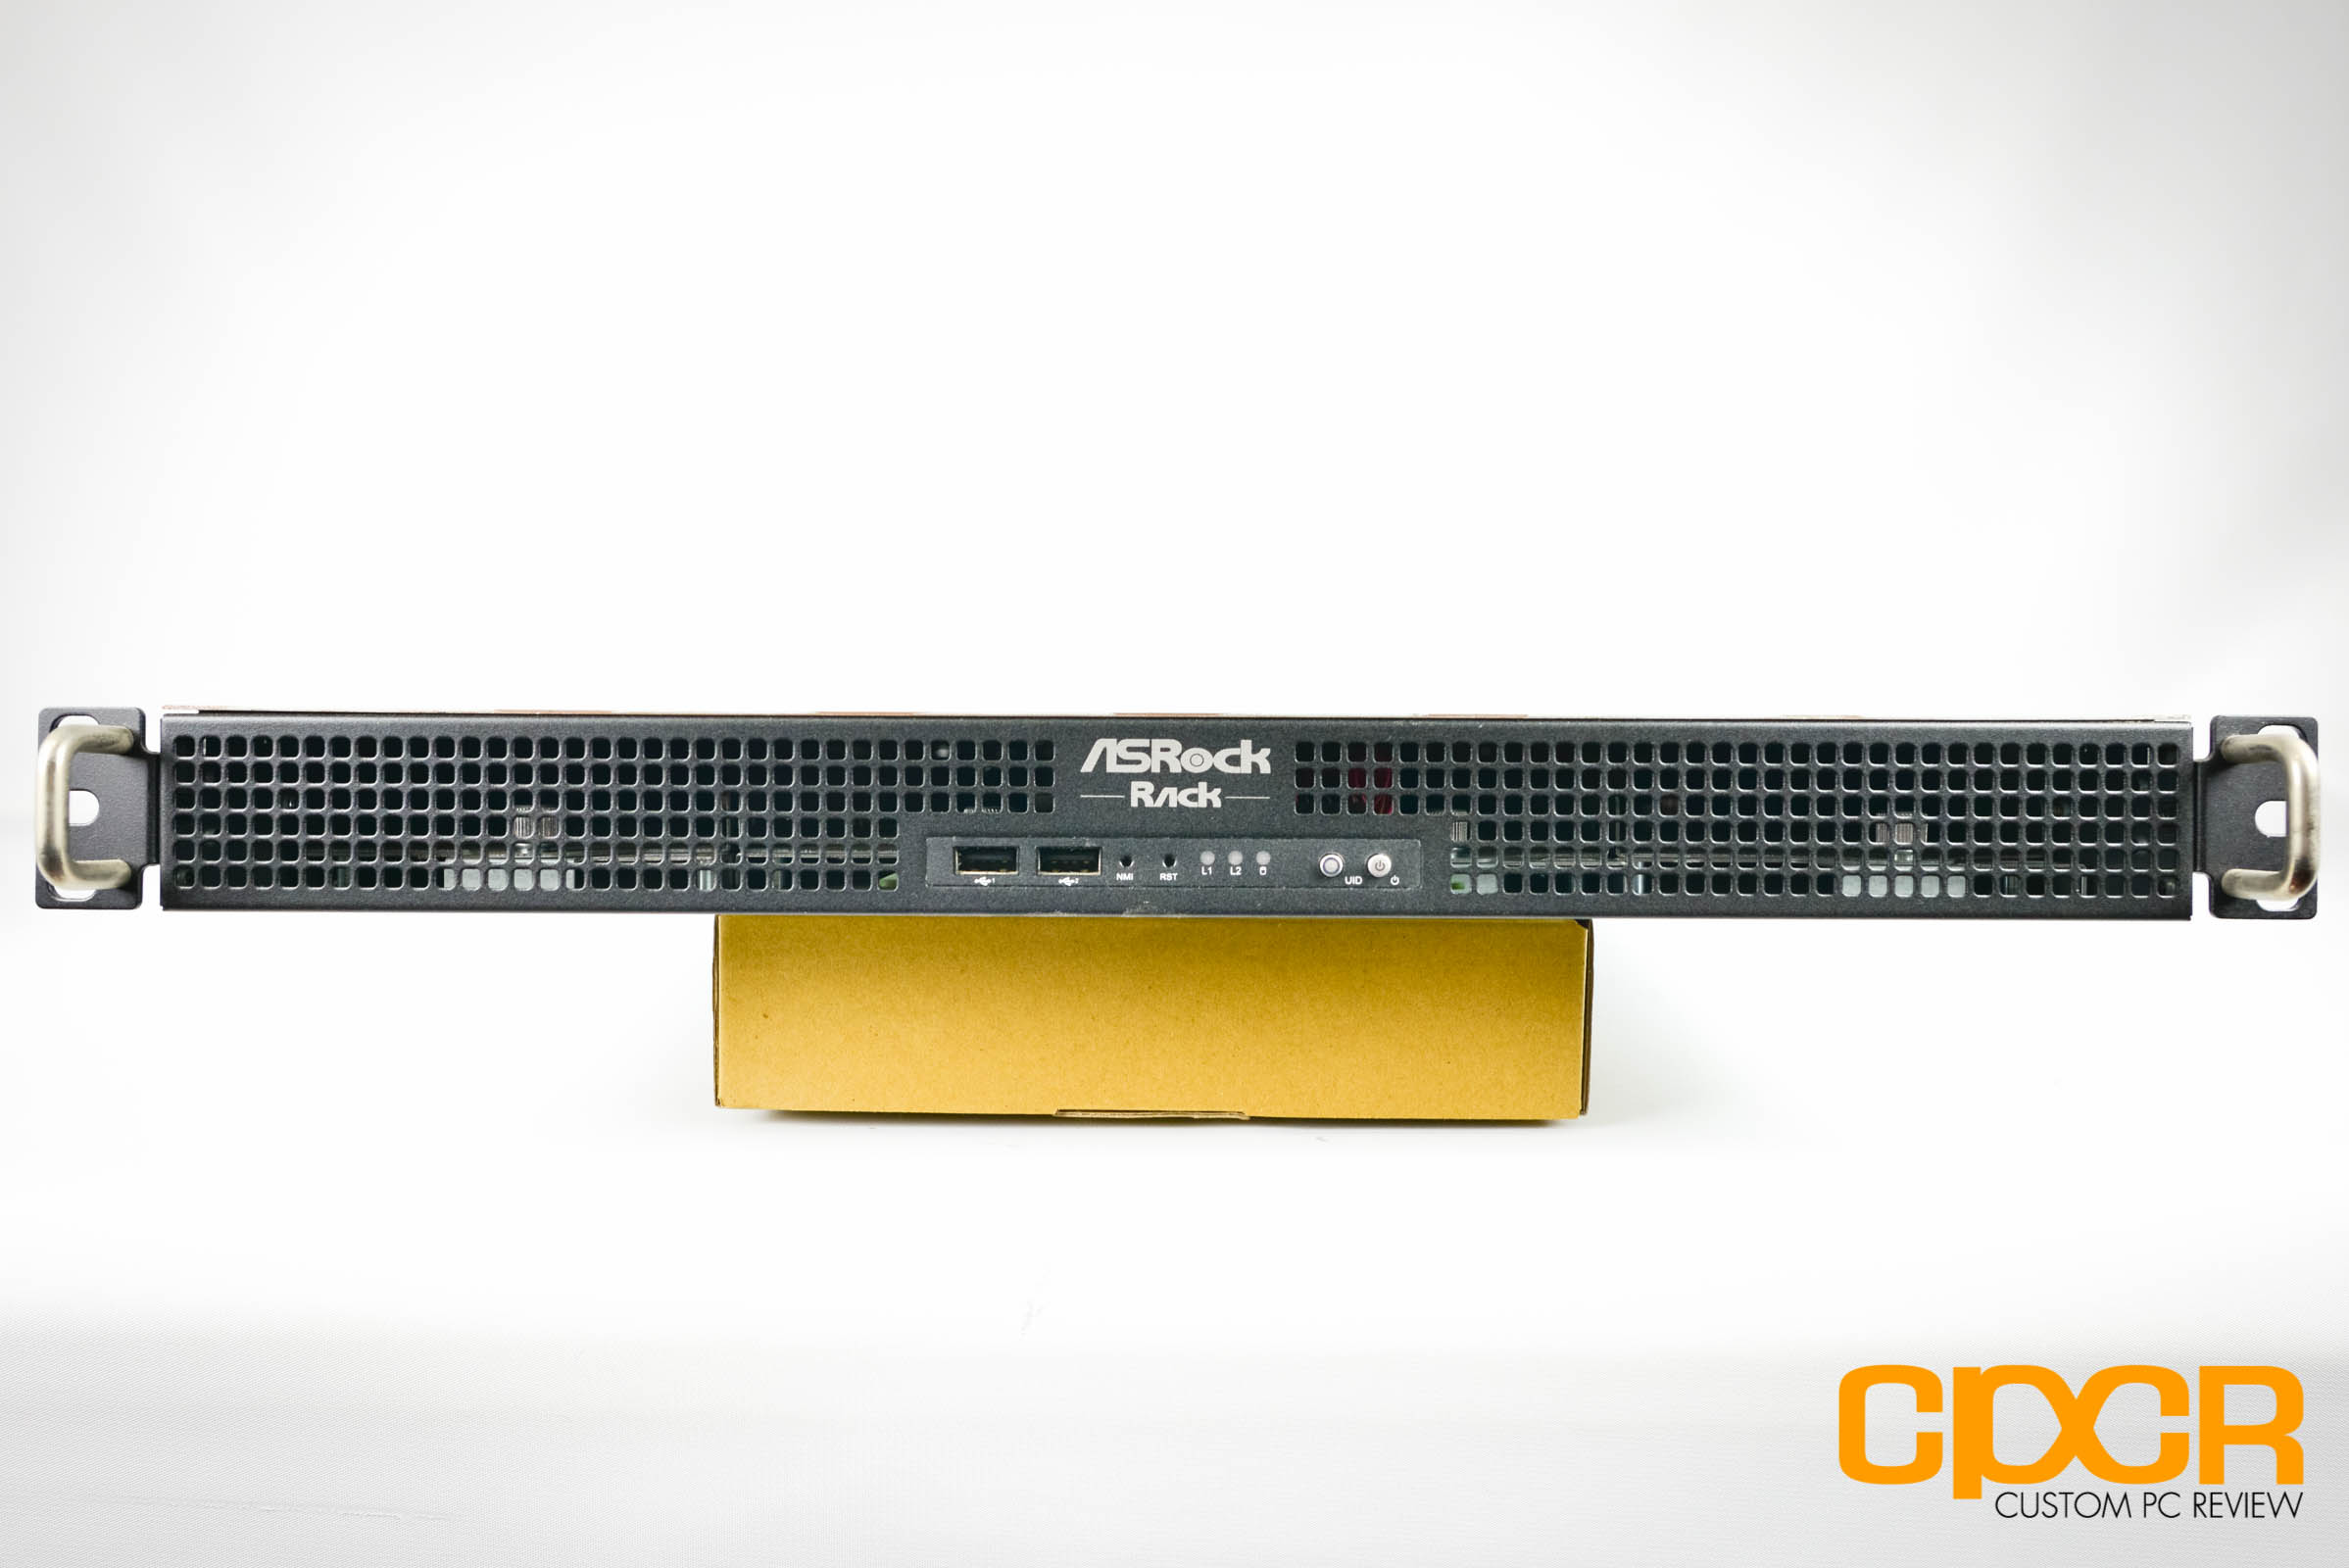
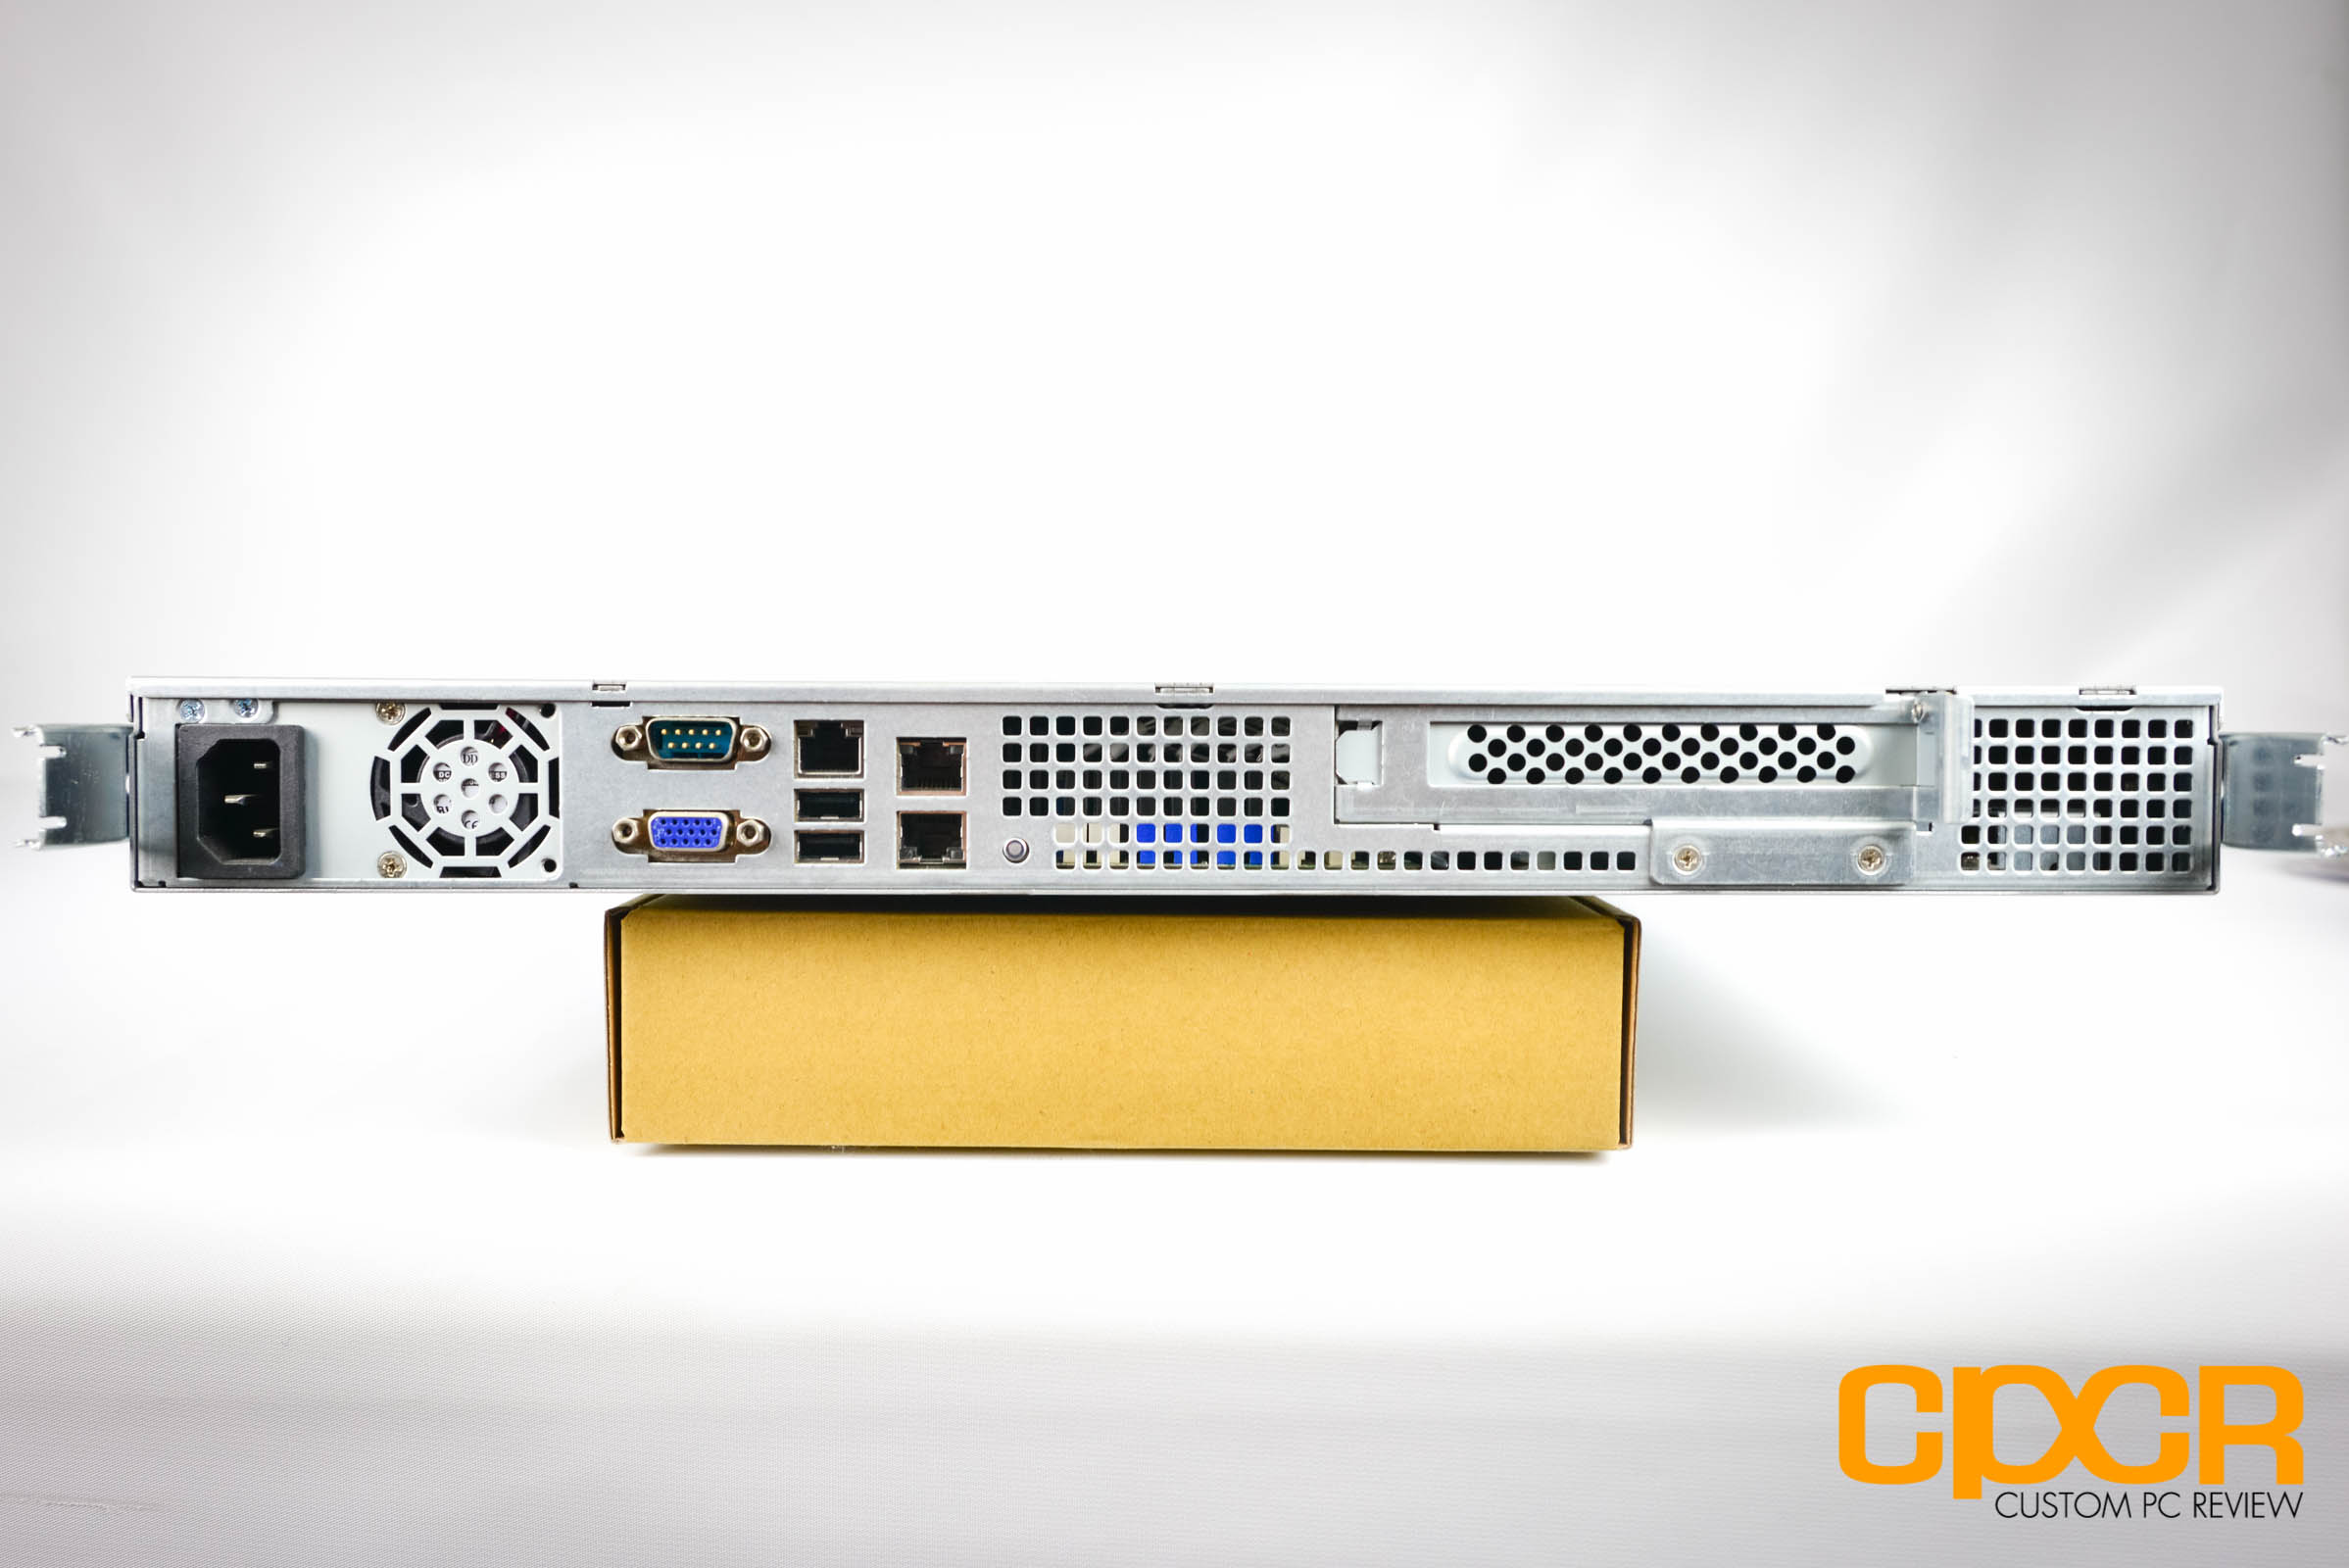
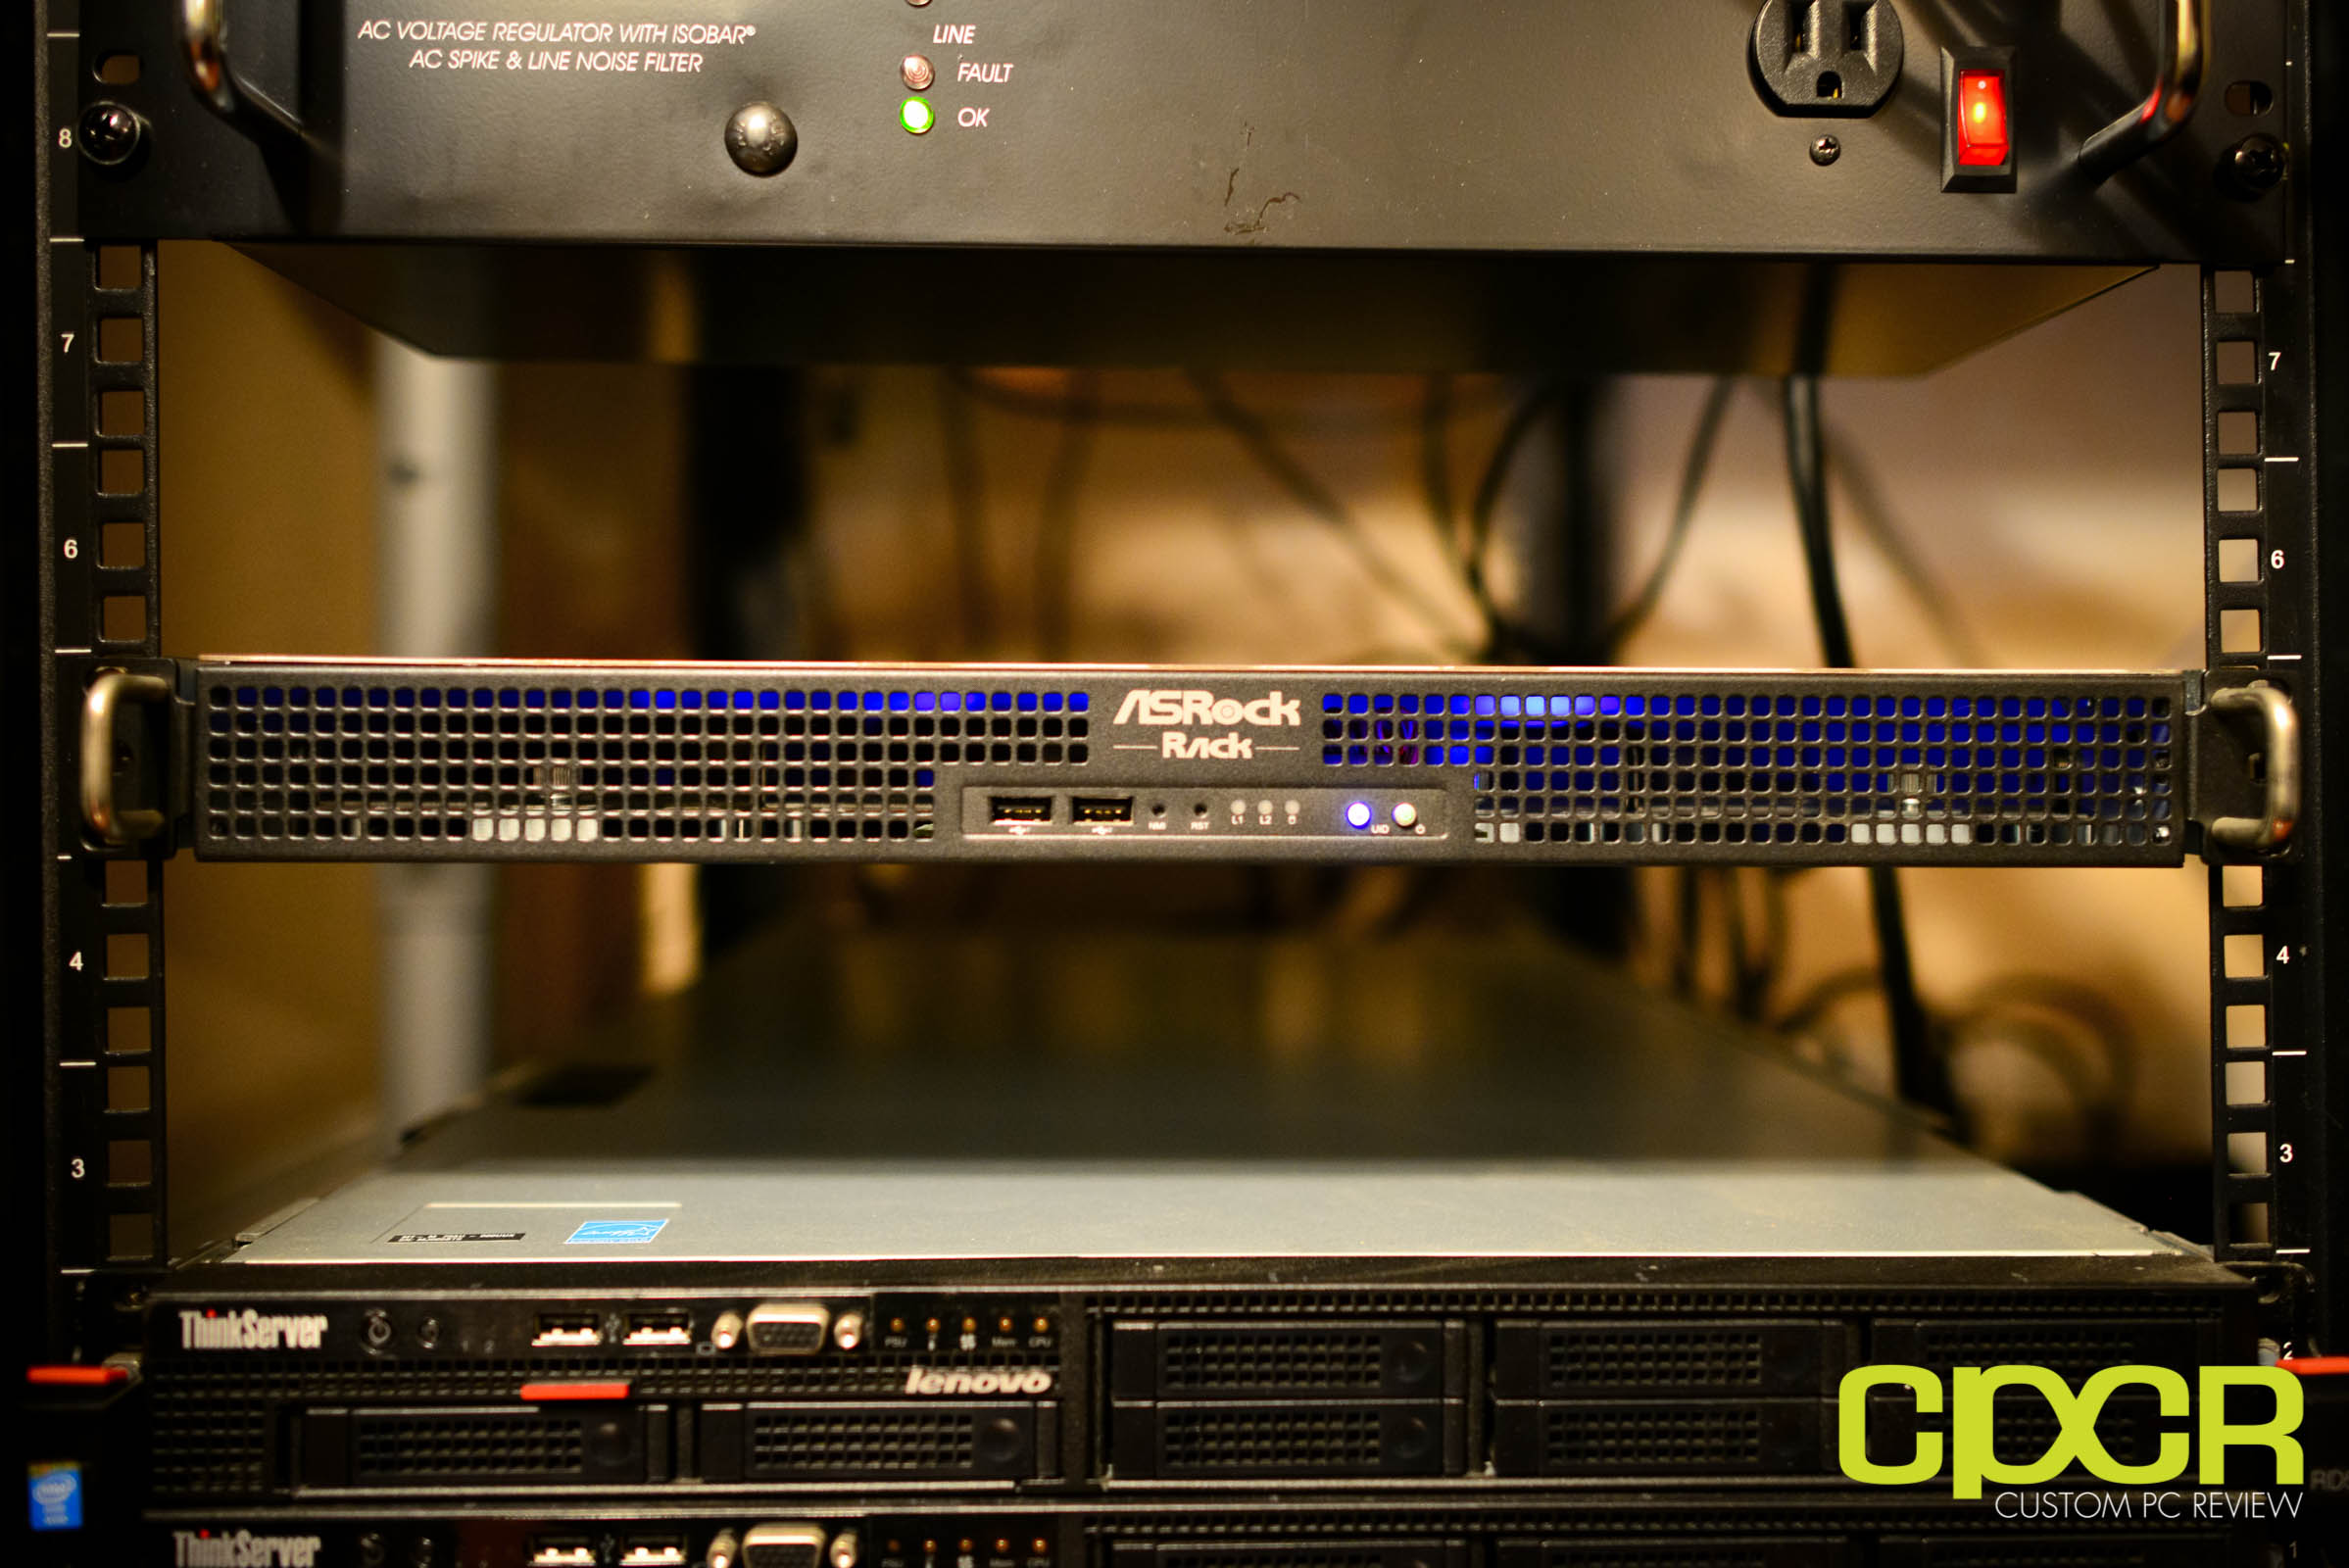
The ASRock Rack 1U12LW-C2750 is a barebones 1U rackmount server system which would already include an ASRock Rack C2750D4I motherboard, which is a higher end version of the ASRock Rack C2550D4I with an octa-core Intel Avoton C2750 processor, a 12 drive bay chassis designed to be rack-mounted and a server power supply. While it’s not exactly fully DIY since the system comes from the factory with the motherboard and power supply pre-installed, anything that saves me a minute especially wiring a bunch of SATA cables is very welcome.
As I already have a StarTech 12U Open Rack for all my networking and server equipment, the rackmount option was a better option than putting together a more custom solution.
The Memory
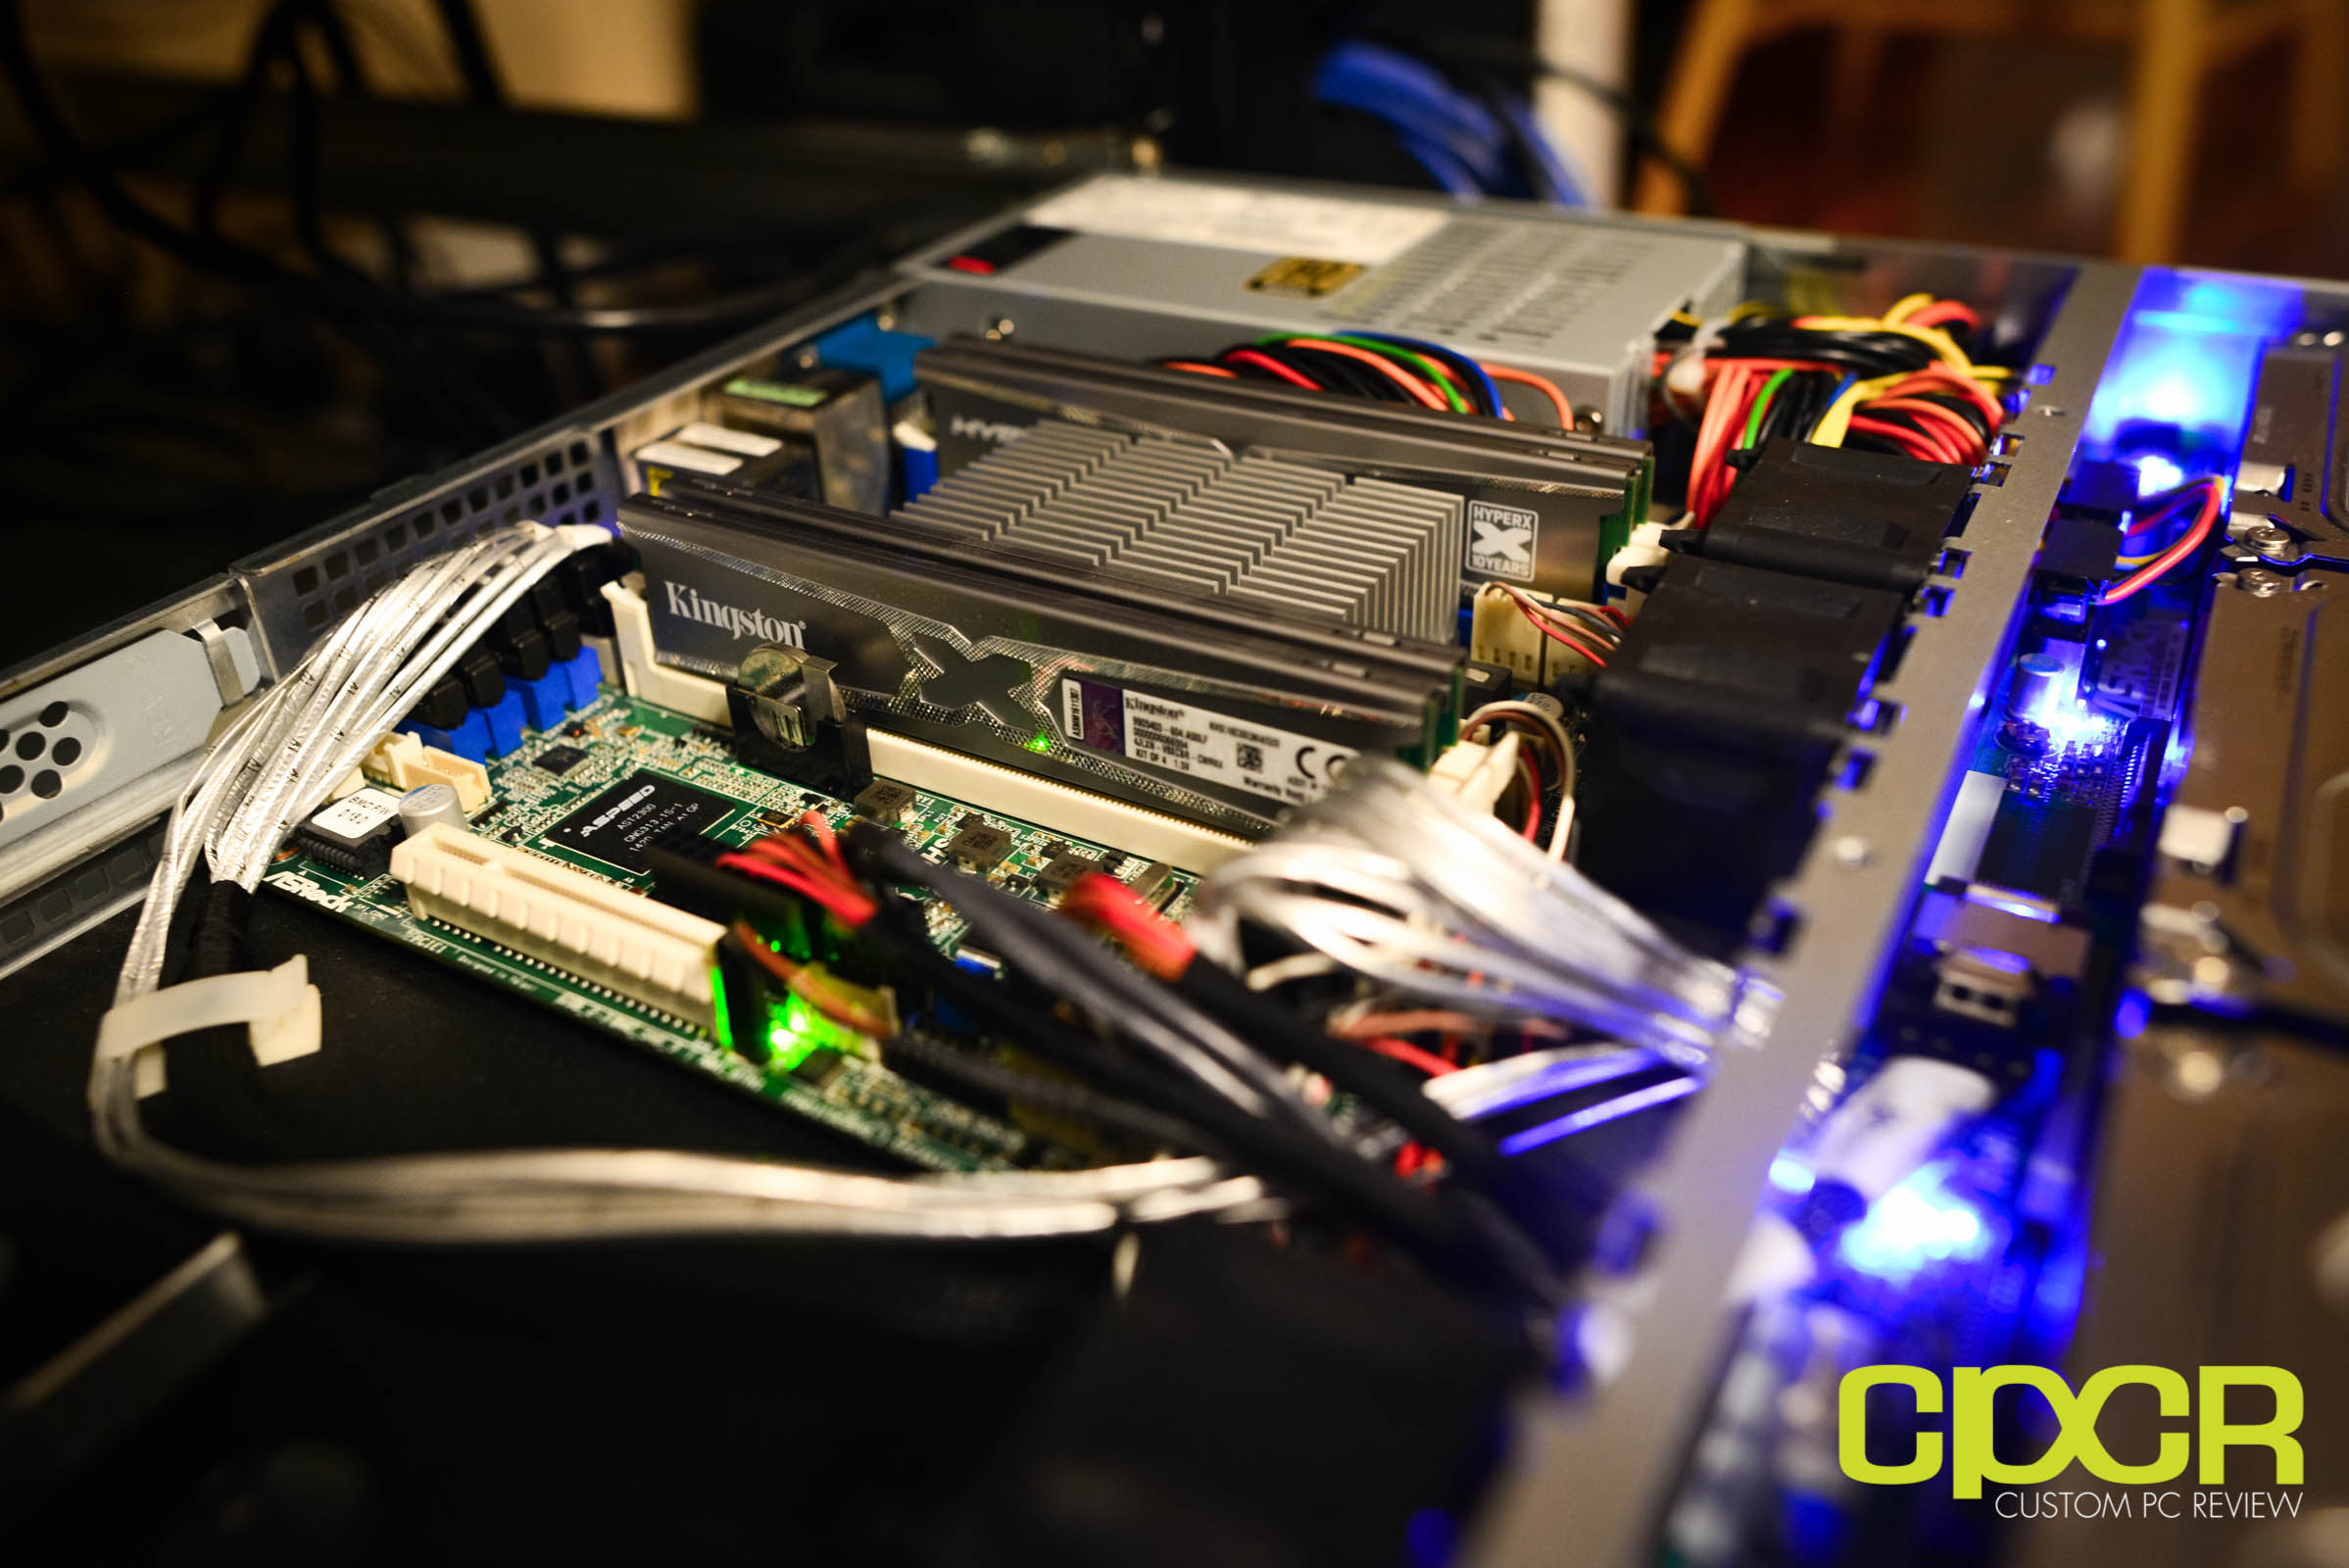
For the memory, FreeNAS recommends 16GB of ECC memory. Since I had some extra 8GB Samsung ECC DDR3 memory available from other servers, I initially used it however, it was unfortunately not supported. As I’m waiting to get some new Crucial ECC memory on ASRock’s QVL, I decided to utilize a 16GB Kingston HyperX DDR3 non-ECC kit which worked without any issues.
The Storage
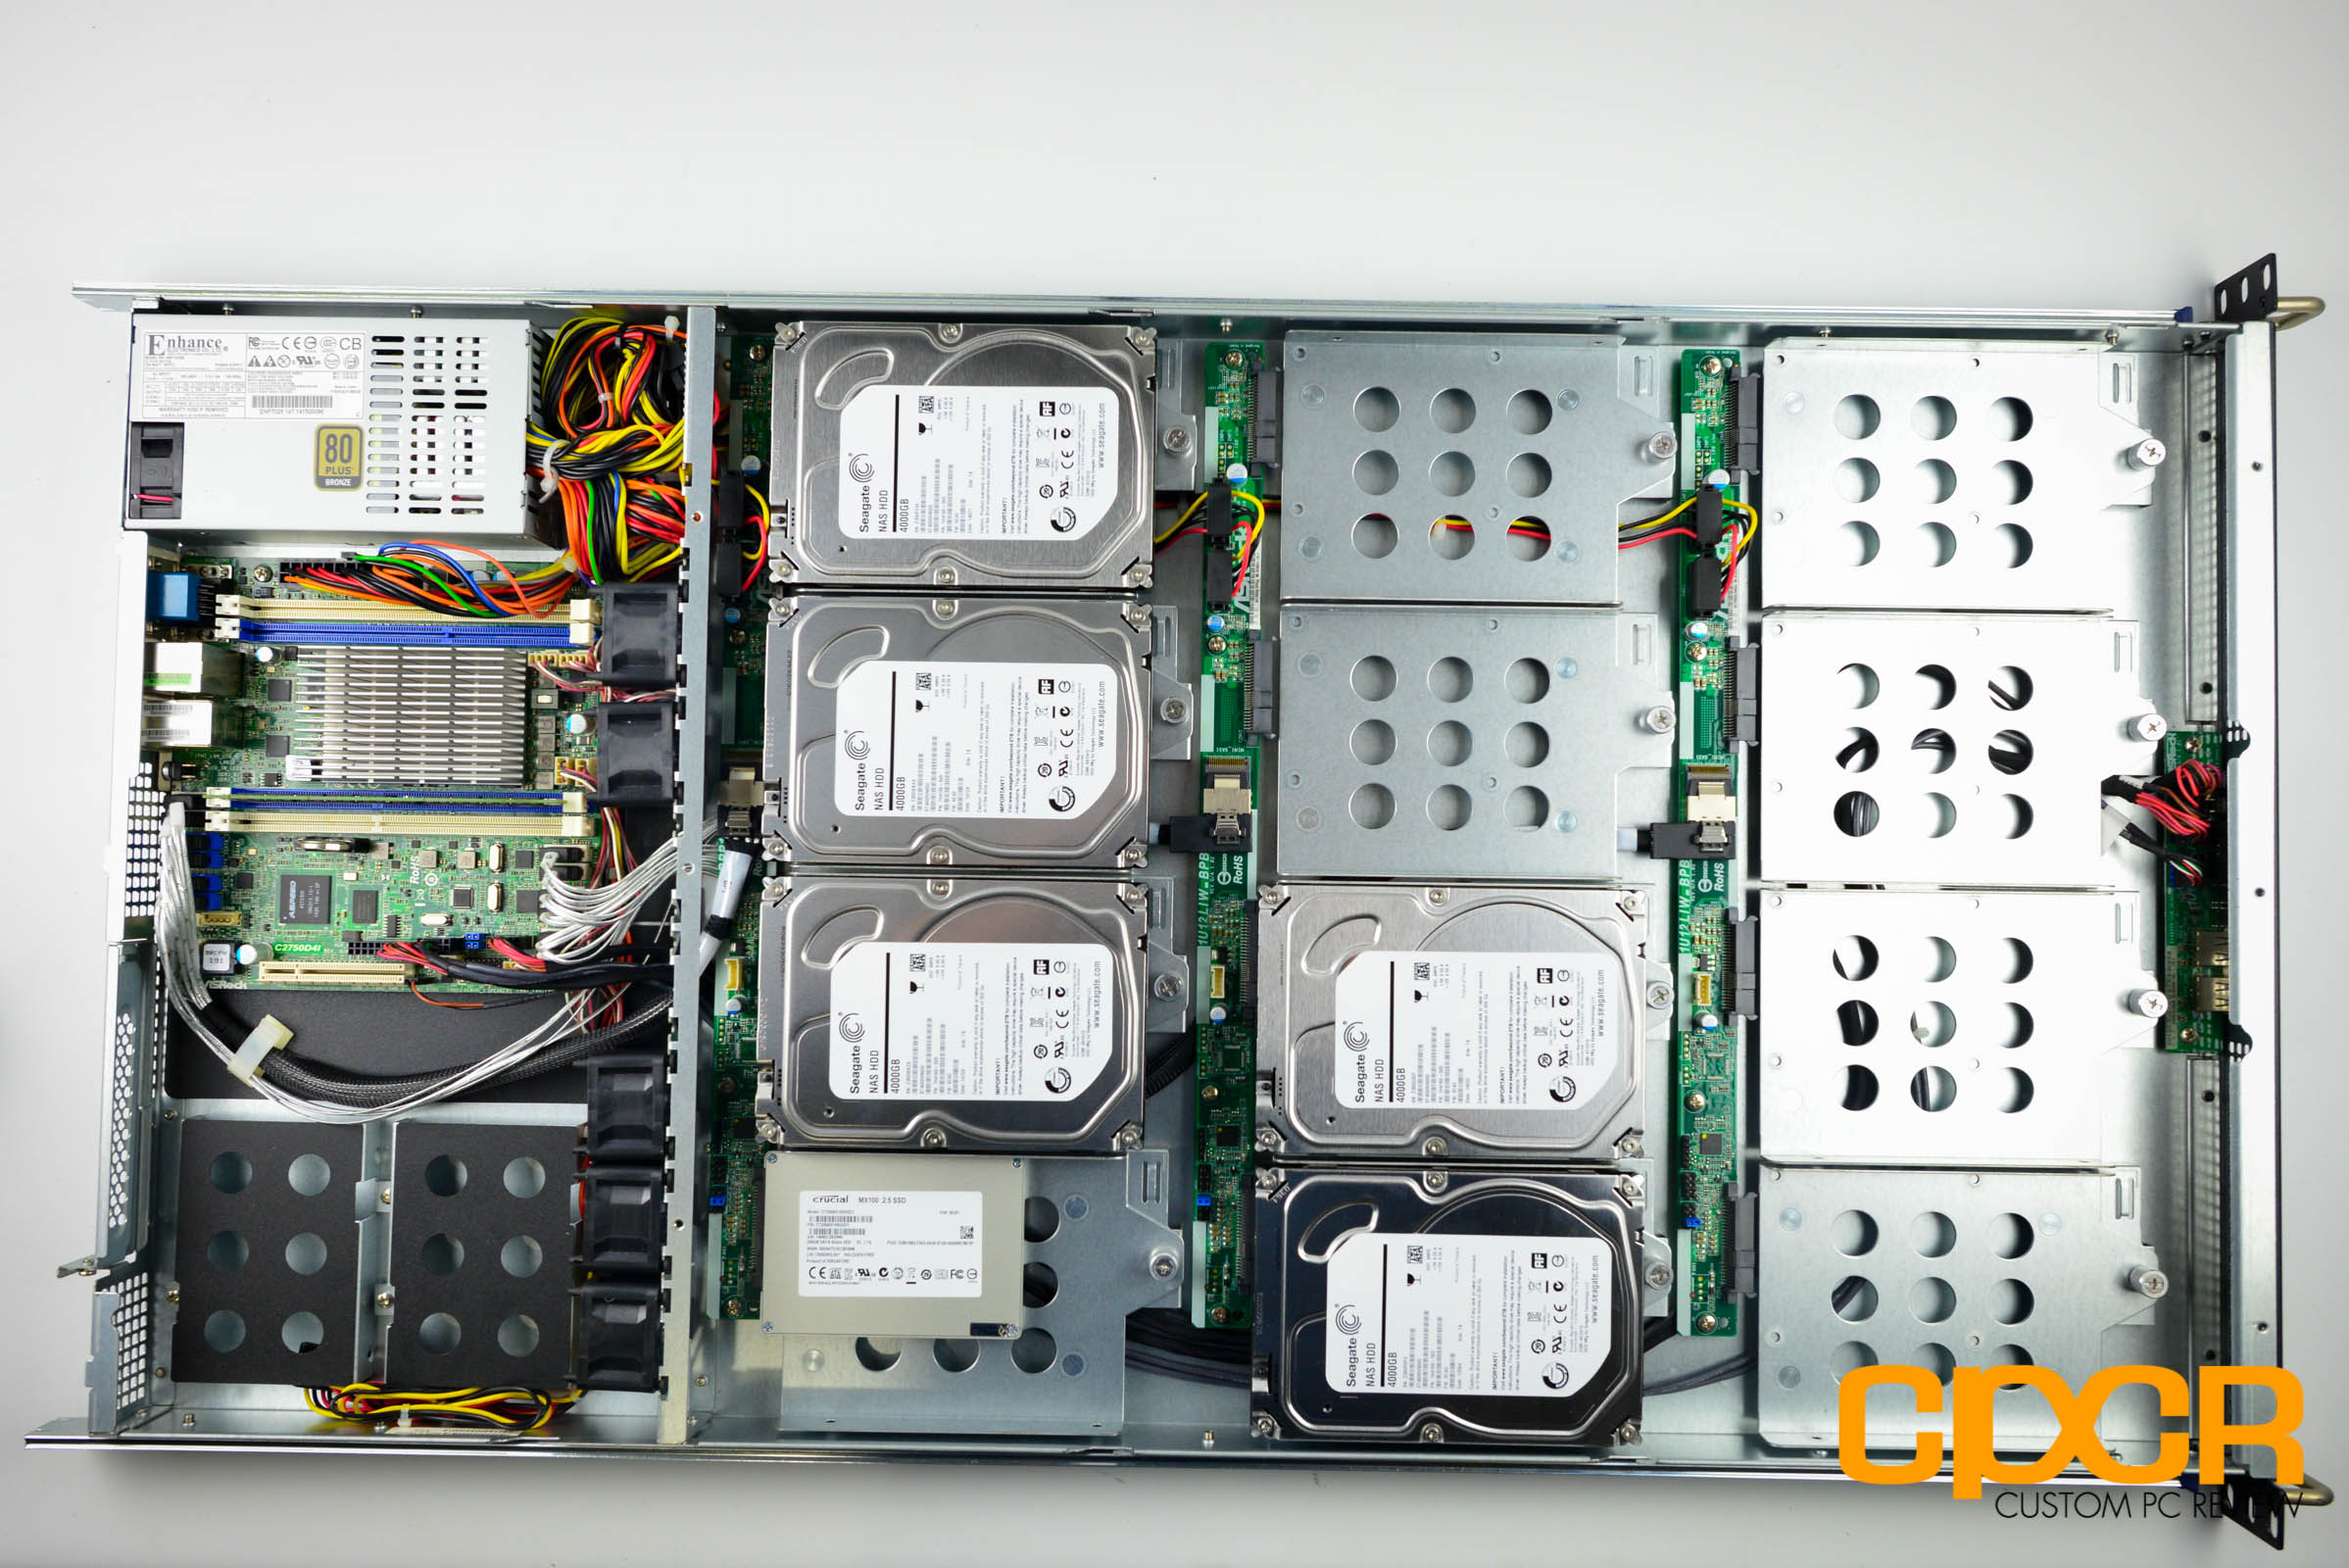
For storage I utilized five Seagate 4TB NAS HDDs that I already had on hand. NAS drives are important for a variety of reasons, but most importantly they support TLER (Time Limited Error Recovery) functionality, which ensures that the drive properly communicates with a RAID controller in the event there’s a bad block. More on why that’s important in our Selecting the Best Hard Drive for a Network Attached Storage article here.
Those interested in the Seagate’s NAS drives, they’ve recently been re-branded to IronWolf. WD also makes some stellar NAS drives in their WD Red NAS hard drive lineup. Enterprise HDDs can also be used for business users although they tend to be quite a bit more costly and unnecessary unless the server is going to be racked in a datacenter or operated under other extreme conditions.
For the boot drive, I had an older Crucial MX100 256GB so I used it. A 64GB SSD would probably suffice as well. I definitely recommend getting a SSD or using a faster flash drive to boot the FreeNAS OS.
[section label=”Installation”]
Installation
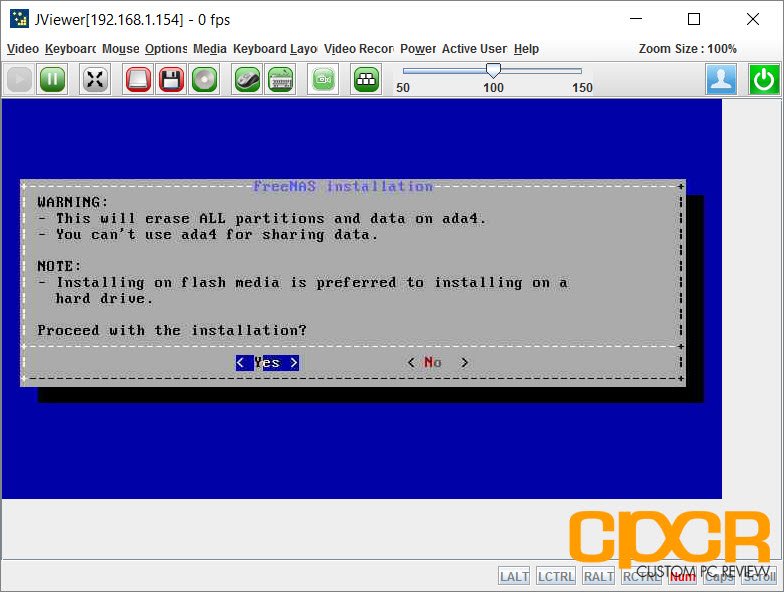
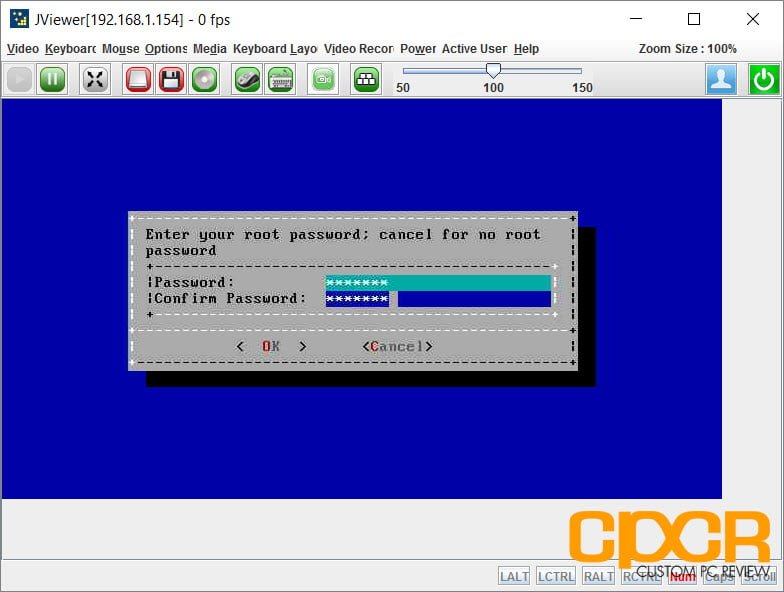
With hardware chosen, delivered, and ready to go the next step is simply to install FreeNAS on the system.
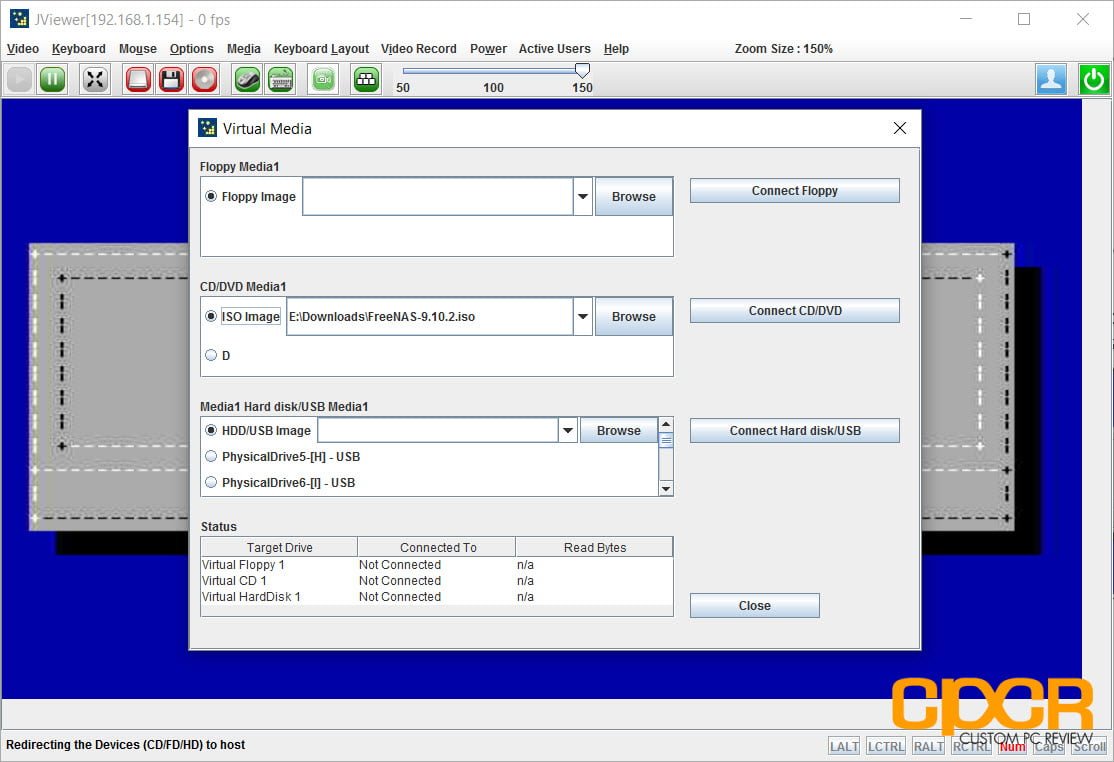
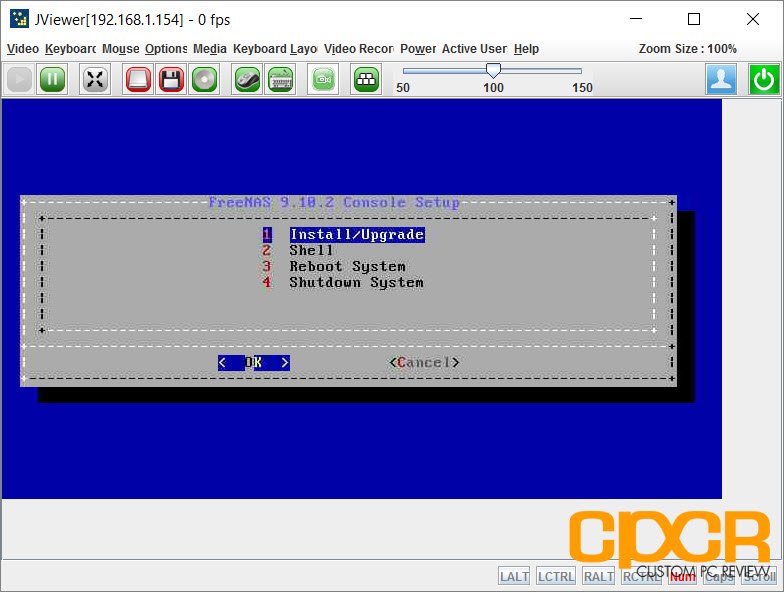
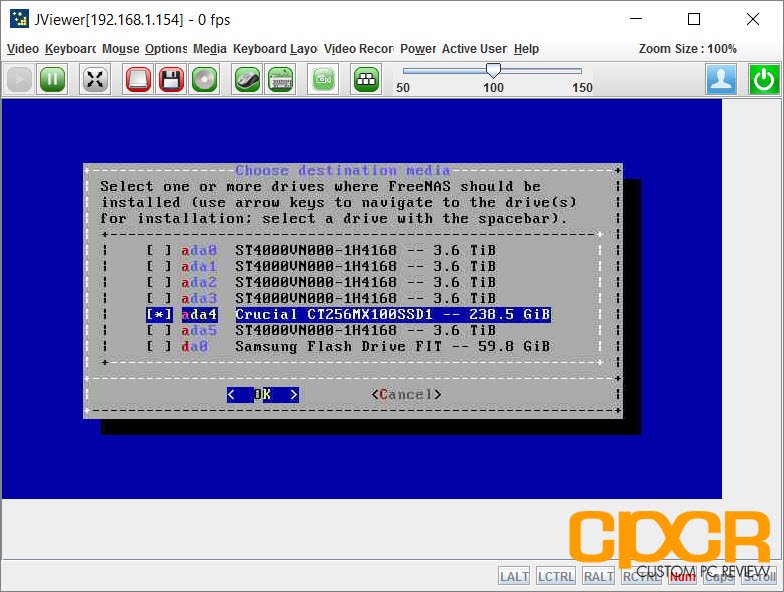
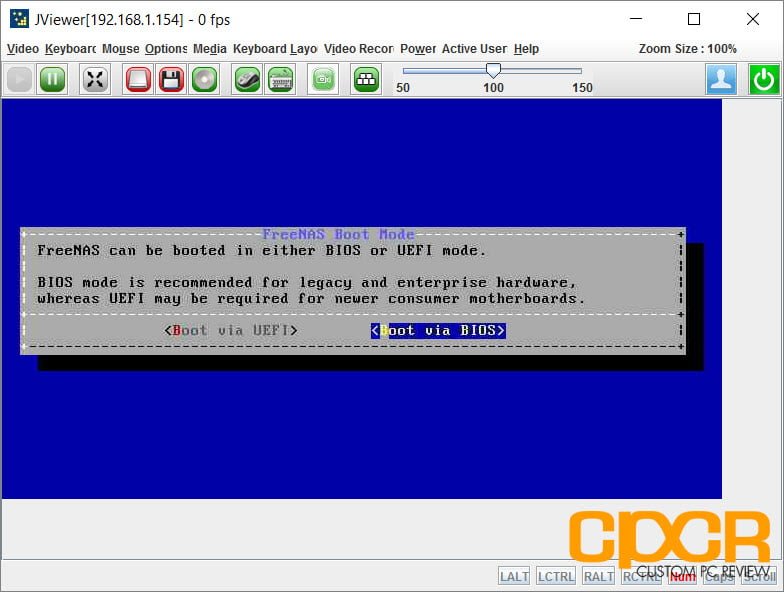
Thanks to the ASRock Rack motherboard’s IPMI management interface, installing FreeNAS is very easy. After downloading the image from the FreeNAS website here, simply go to the IPMI’s virtual terminal interface which will provide remote control to the server. Then simply load the virtual media and follow the on screen instructions. Those with a motherboard that doesn’t support this functionality can also create a boot disk or a bootable drive.

That’s it!
[section label=”Initial Setup”]
Initial Setup
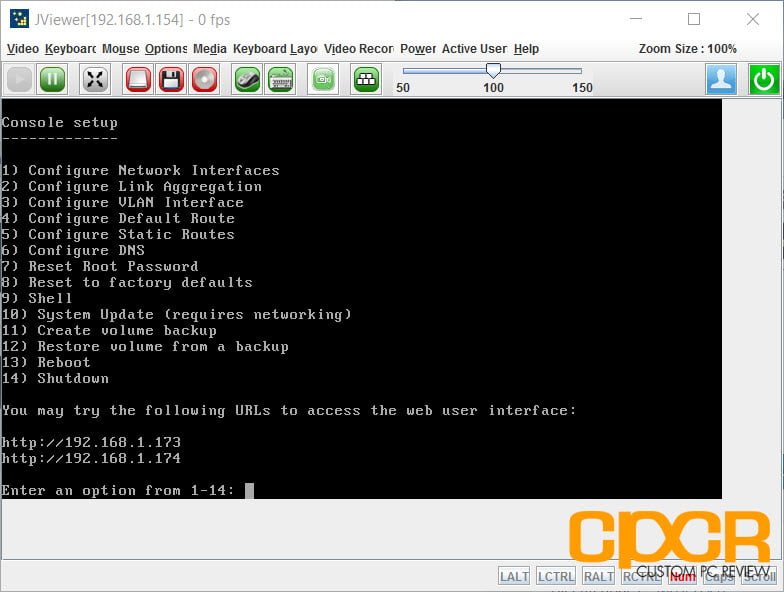
Once FreeNAS is installed, you’ll be greeted to this screen on the system. It’ll tell you what URLs to enter to access the web interface. You can also configure the network interface, VLANs, DNS, etc. on this screen.
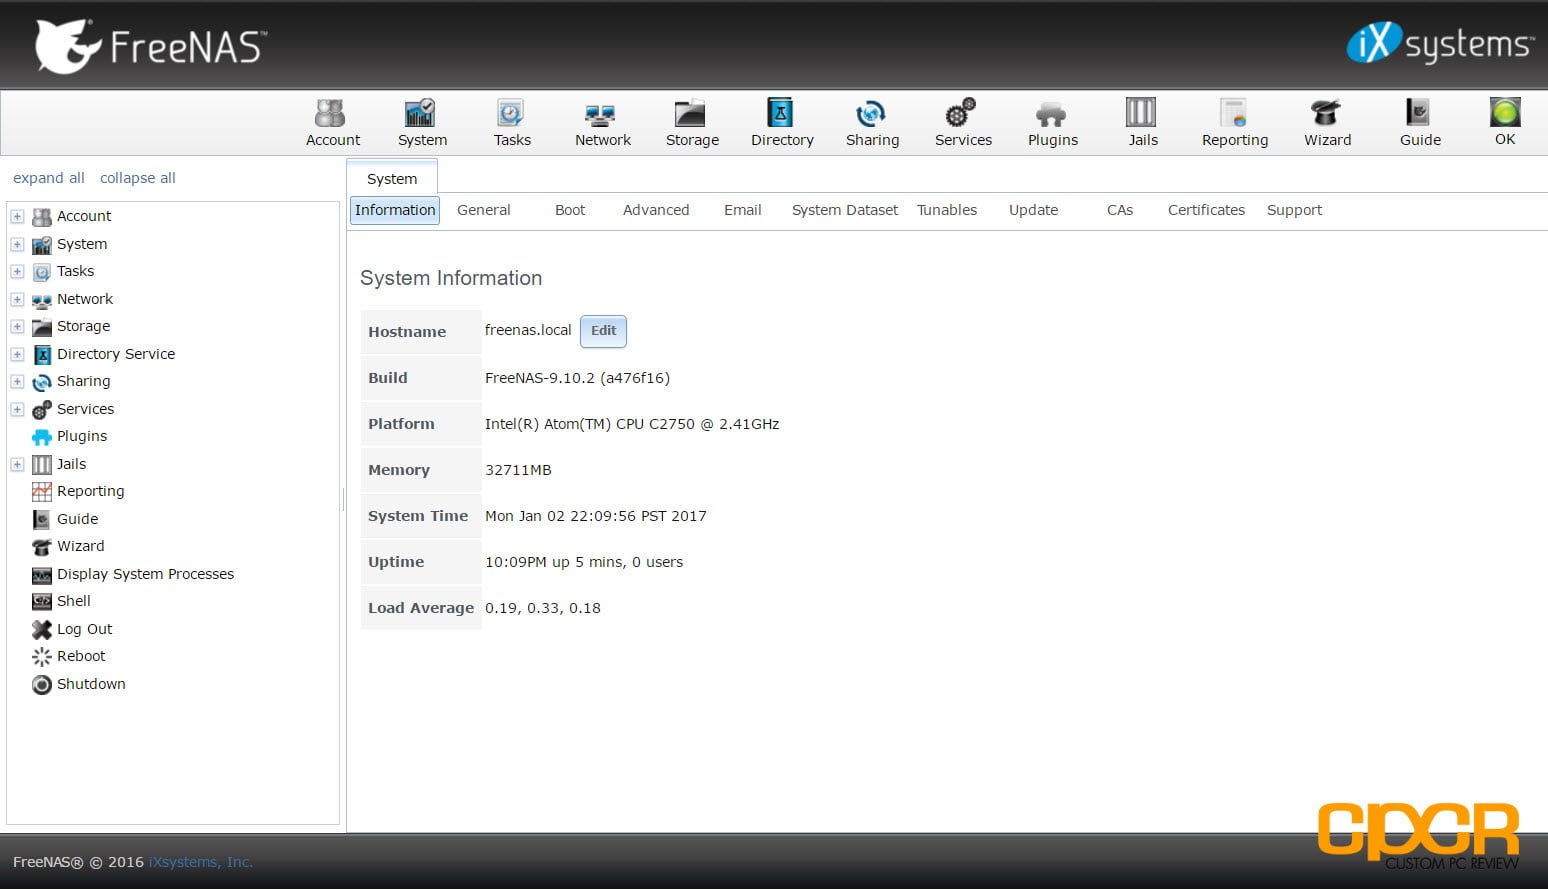
Once the URL (typically just an IP address) is found, simply go to another system and input the IP address into the internet browser of your choice. After logging in with credentials set-up during install, this is what the FreeNAS configuration will look like.
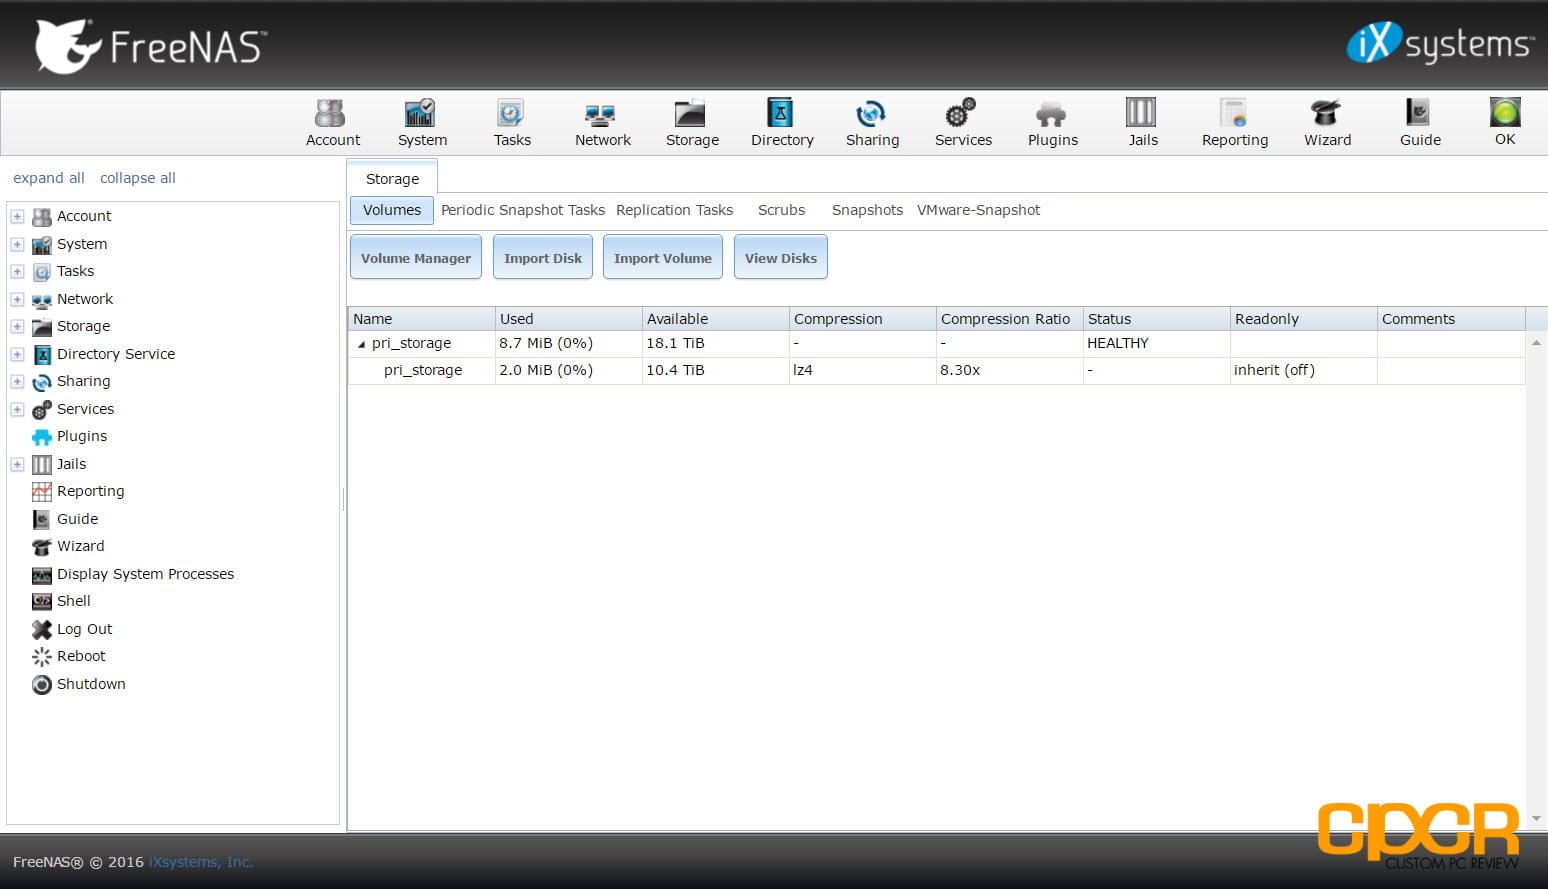
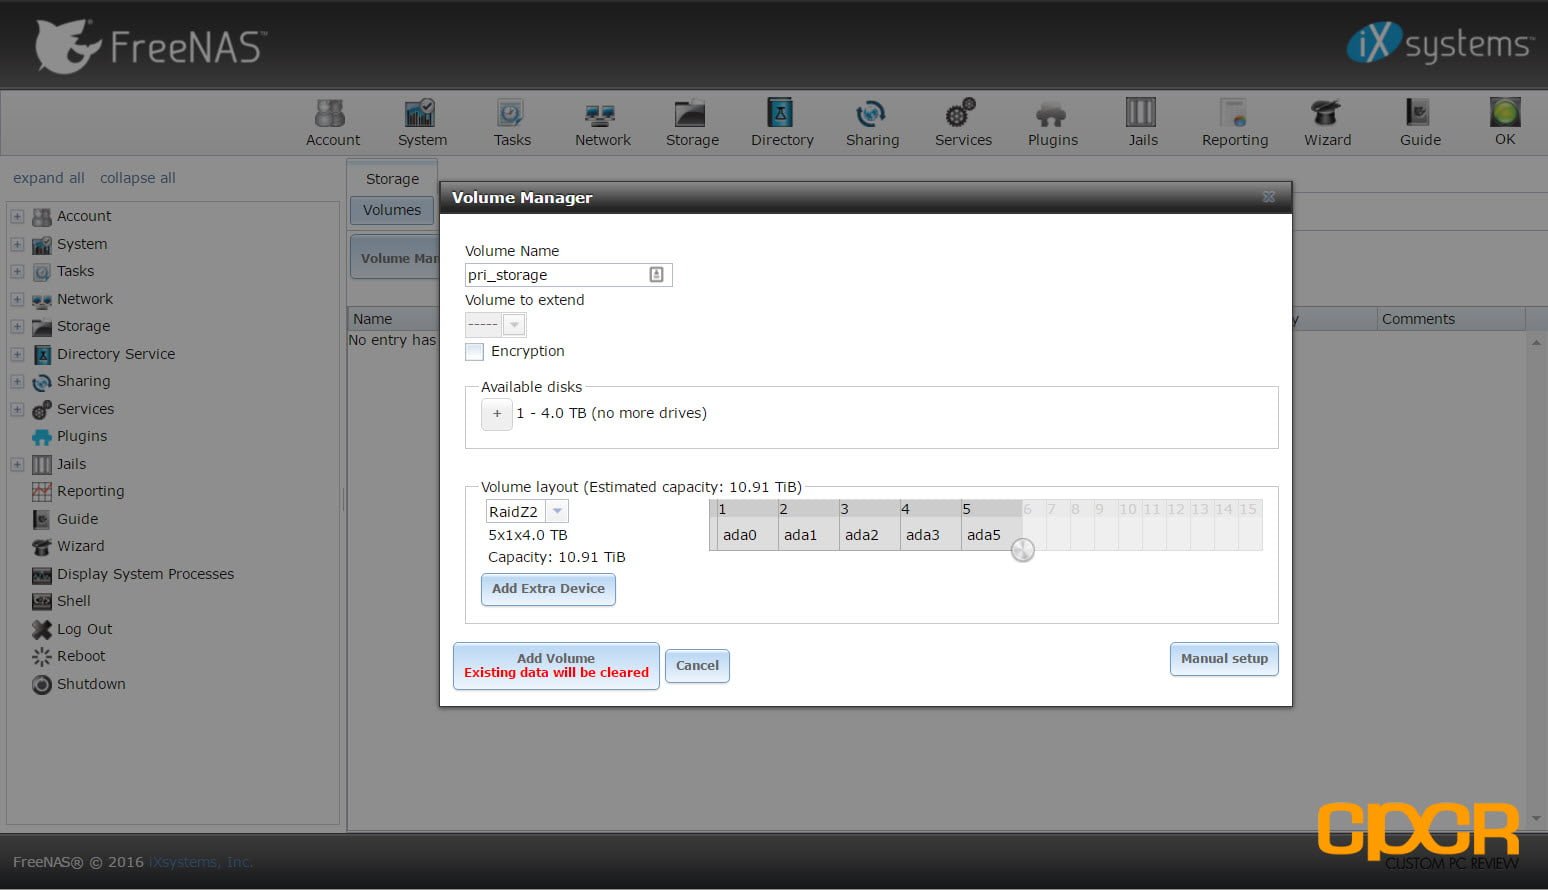
In order to setup the drives, the first thing is to head over to the Storage tab at the top which will allow configuration of the drives. For our purposes, we chose RAIDZ2 which is ZFS filesystem with two disk parity. This would allow up to two disks to fail before data would become unrecoverable and thanks to the ZFS filesystem we also get snapshots, continuous data integrity checking, automatic repair, and more. Down the road, we’re planning a guide on the different RAID and filesystem options so keep an eye out for that.
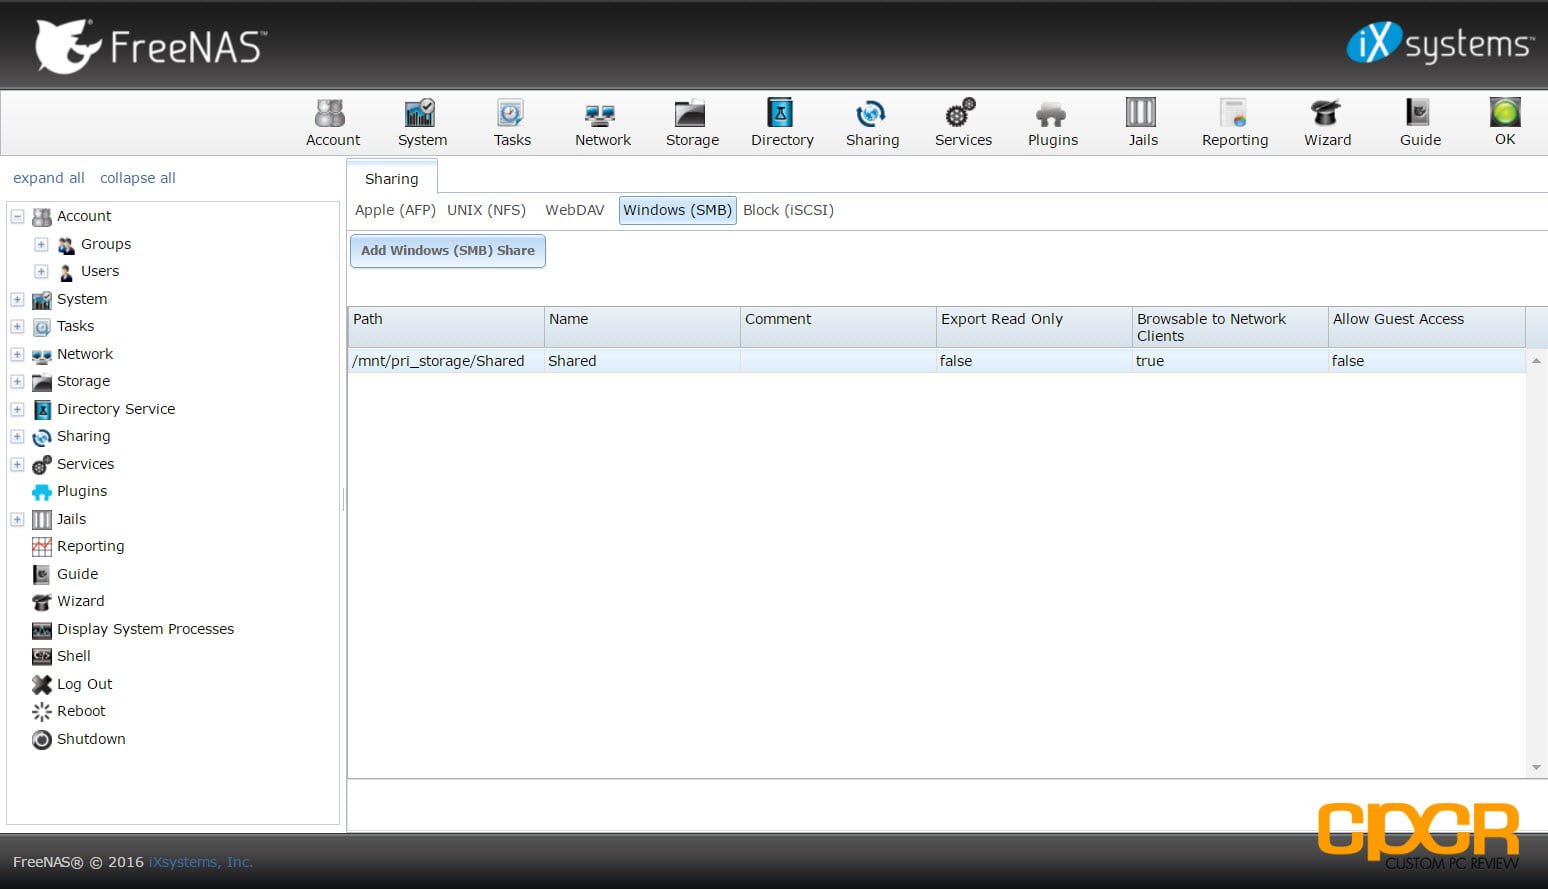
With the storage setup, simply head over to the Sharing tab to create some shared folders.
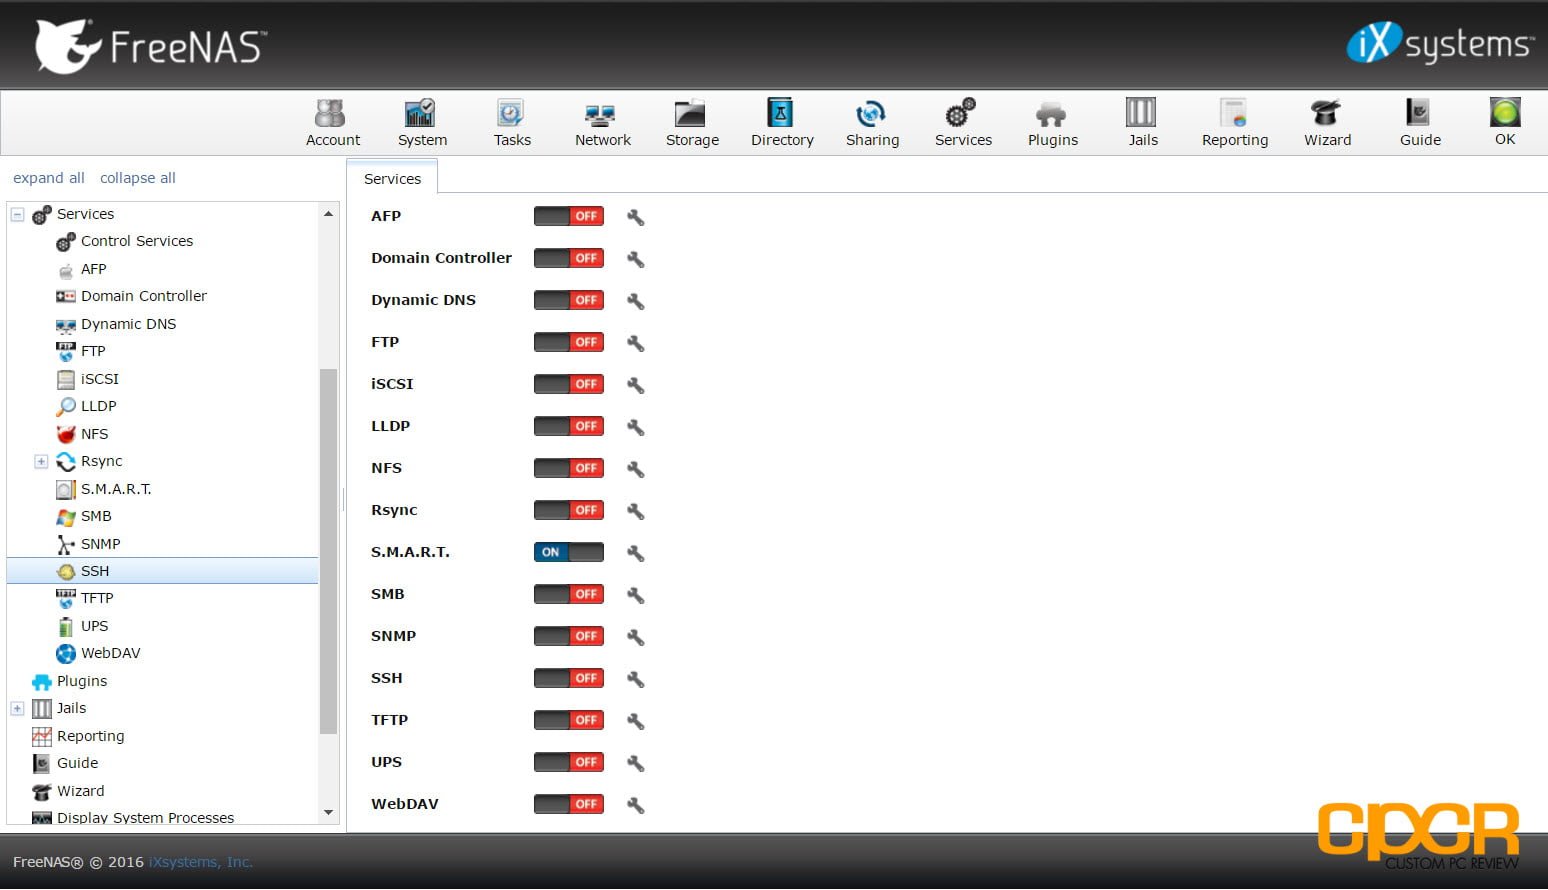
For services such as TFTP or WebDAV simply head over to services and turn on the features that are needed.
Plugins
Overall, this was a very basic introduction into getting started into FreeNAS and really scratches just the surface of the functionality of the software.
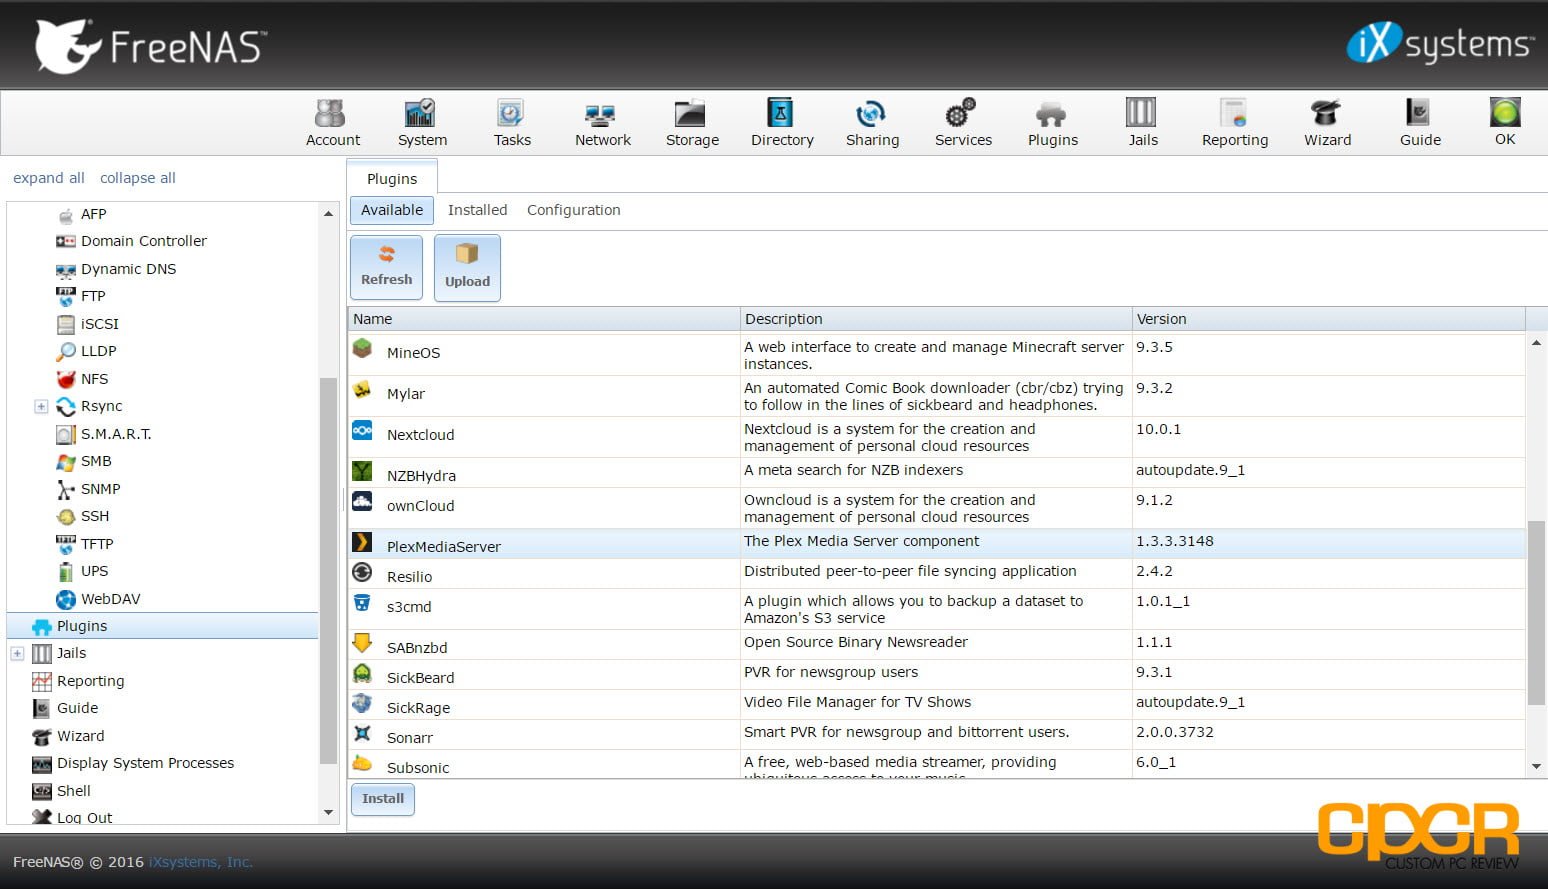
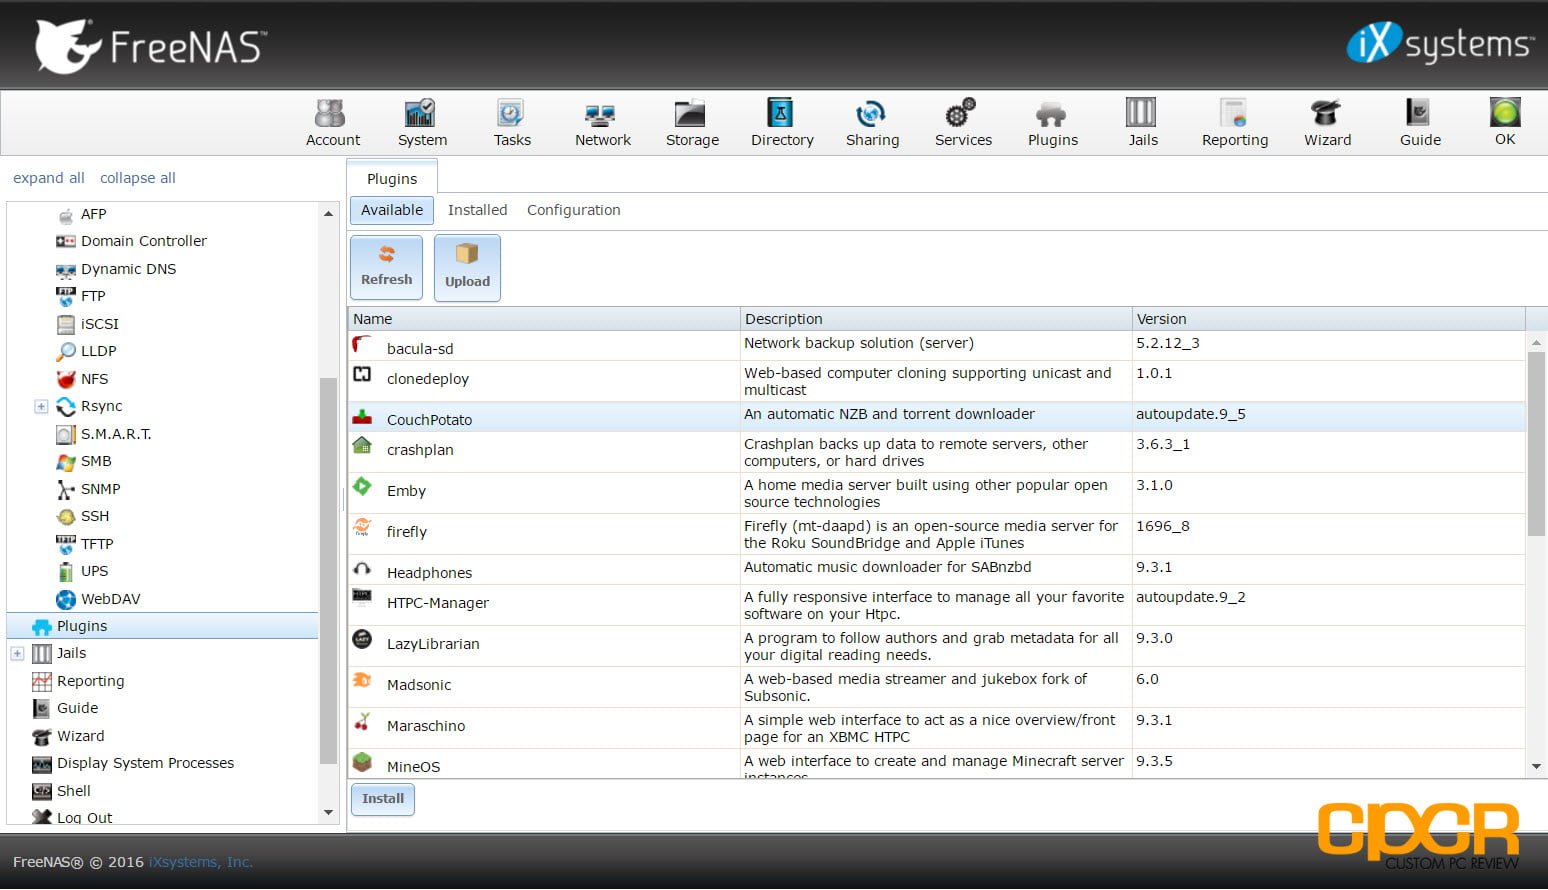
One of the main features of FreeNAS is that there’s a plugin system which allows it to serve as a media server, torrent downloaded, personal cloud server, Plex Media Server, and much more. I’ll definitely be exploring some of these additional features down the road.
[section label=”Conclusion”]
Conclusion
I’ve had the system up and running for the past few days and have copied over all the data from our previous 2-bay NAS which had just two 1TB HDDs in a JBOD configuration to the new server. It’s nice knowing there’s plenty of room for expansion down the road with an additional six drive bays still wide open.
I’m also happy with the hardware although I have two issues that I’m working on. First, the fans are a bit louder than I’d like since the system is a 1U server designed to be operated in a room full of hot servers. I’ll definitely be researching some solutions for that.
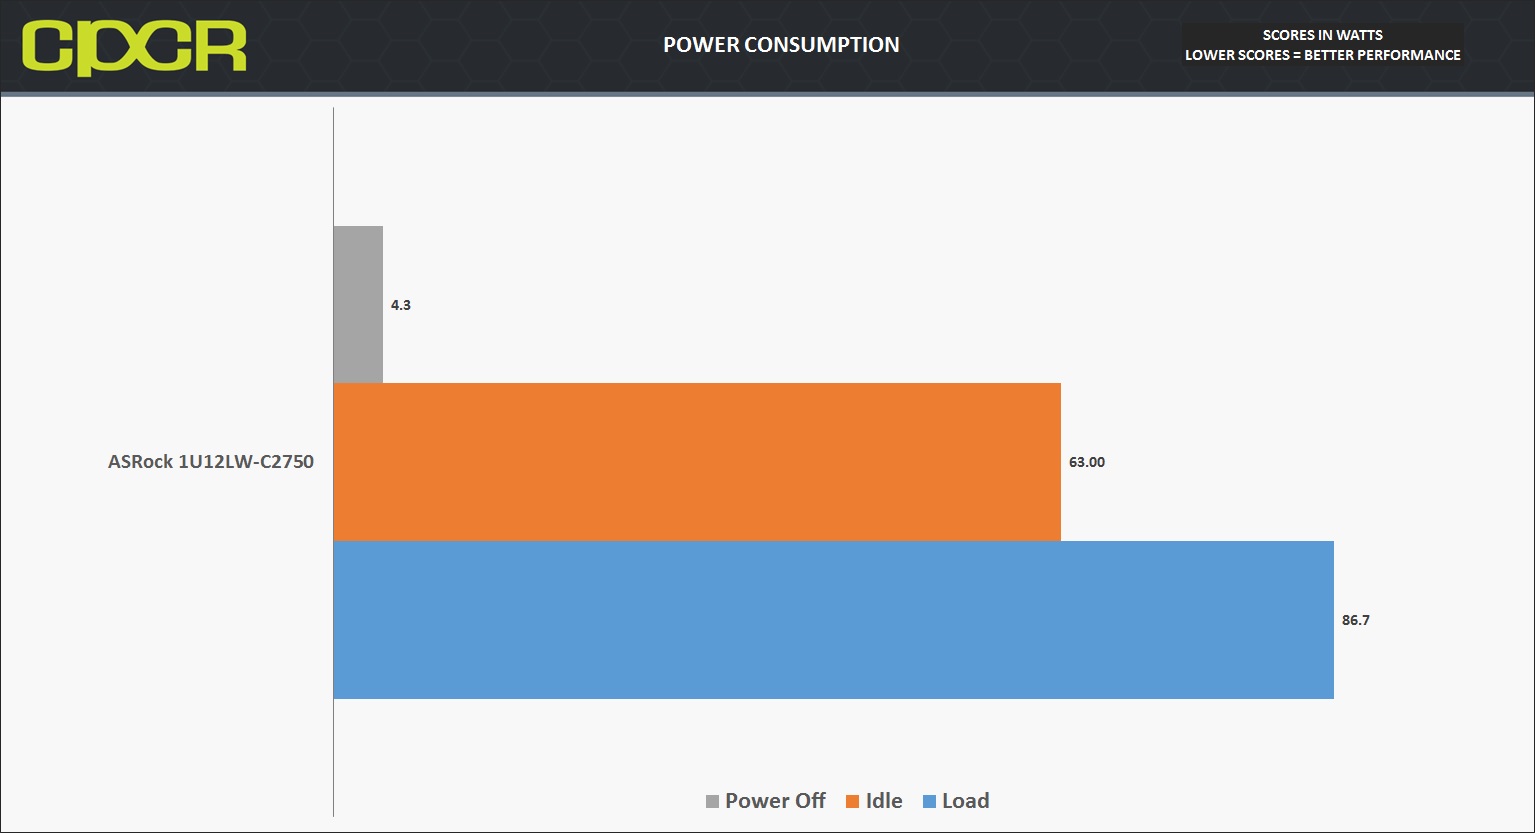
Power consumption at idle is also a bit higher than I’d like as well for something that’s going to run 24/7, but given all the drives a 63W idle might not be too bad. I’d like to reduce that if possible. If anyone has any ideas, please let me know in the comments below. (“powerd” is enabled)
Thanks for reading. If you have any questions, feel free to leave them in the comments below or visit our forums!
Er… Why waste money on any SSD for the boot drive to load FreeNAS? Just use a cheap 16GB flash drive!
From the review, “For the boot drive, I had an older Crucial MX100 256GB so I used it. A 64GB SSD would probably suffice as well. I definitely recommend getting a SSD or using a faster flash drive to boot the FreeNAS OS.”
That’s why.
No, you’re not getting what I am saying. The FreeNAS specification says clearly that a flashdrive/thumbdrive or even an SD card in a card reader costing next to nothing will suffice.
The FreeNAS OS is loaded into RAM at boot up only. After that it runs 24×7 anyway. An SSD is completely unnecessary and a waste of resources better deployed for other things (like RAM/harddisks).
Readers should know that.
Certainly, a flash drive or SD card can be used. Certainly it will suffice as well, which is why flash drives were included in the article. Yes, I know FreeNAS gets loaded into the OS once the system is booted up and yes many people use flash drives with success.
However, if ports are available, I’ll take a SSD over a flash drive any day. Why? Reliability. I’ve had too many flash drives fail in my lifetime and I’m sure you have too unless you’re just that lucky. I don’t even carry flash drives at this point. It’s a external SSD or nothing.
If I were building a new FreeNAS system today and I didn’t already have SSDs laying around, at a price of $25 for a 32GB MLC SSD, I wouldn’t even consider going with a flash drive. There’s no reason to risk the hassle of an entire system going down after something as simple as an update to save a couple bucks. Maybe I’d consider going with multiple MLC based flash drives, but then I’m not saving much at that point. Just my 2c.
https://www.amazon.com/Transcend-Solid-State-Drive-TS32GSSD370S/dp/B00VX82PJC/
Er… we don’t carry the 16GB flash drive around, it costs nothing so we just leave it permanently in the USB slot. I’ve never had a single USB drive fail either.
I am finding that my 2 mirrored drive on a gigabit network isn’t able to beat speeds more than 40Mb/s. Some people tell me that I need at least a RAID10 array. What do you think?